Serpentine Belt Replacement
Procedure To Replace Serpentine Belt
Helpful Information
A serpentine belt drives engine accessories such as the air conditioner compressor, power steering pump and alternator. Over time serpentine belts can crack and fail. If the serpentine belt breaks the operation of some accessories will stop. Steering will be difficult but not impossible to turn because the power assist will be non-operational and eventually the car battery will lose its charge. Belt routing can be confusing, make sure to take a picture or draw a routing diagram before removing the old belt. Visit - Belt diagrams
Check the belt tension, if the belt is loose it can cause a chirping noise due to the lack of pressure needed for the belt to operate properly. Visit - Serpentine belt tensioner replacement.
Tools and Supplies Needed
- Socket set and ratchet
- Serpentine Belt
- Protective eyewear and gloves.
- Flashlight
- Use a wire brush to clean the belt pulley grooves.
- Always use the right size belt to maintain the proper amount of tension.
- Do not use "belt dressing" or anti noise sprays. This is a temporary fix and will cause the replacement belt to fail prematurely because of contaminates on the pulley system.
- With the belt removed, spin all the pulleys to make sure the bearings are good. When bearings fails they can squeal before they lock up and throw the belt off.
Step by step guide on how to replace an automotive serpentine belt, this information outlines the basic procedure which translates to most vehicles.
Difficulty Scale: 4 of 10
Before work begins park the vehicle on a flat surface with the engine "OFF" in park with the parking brake "ON". Wear protective clothing, eyewear and gloves to avoid injury.
Step 1 - Remove engine covers, shrouds or plastic guards that may cover the work area. (Needed to access to the front of the engine.)

Removing Air Filter Housing
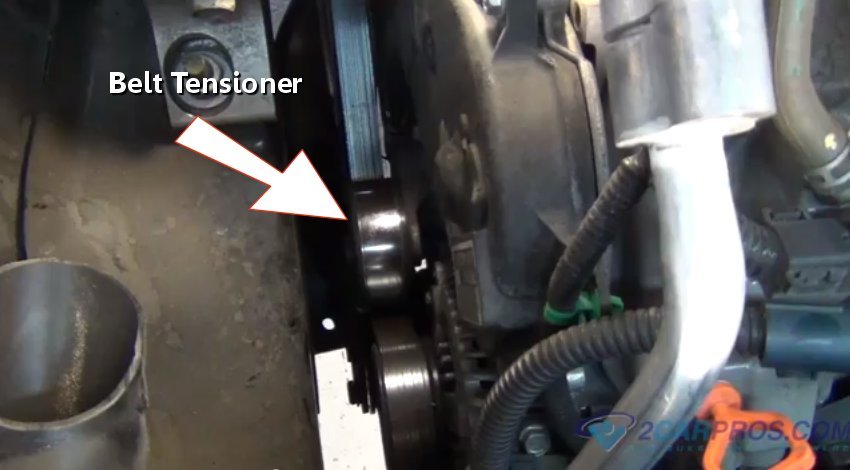
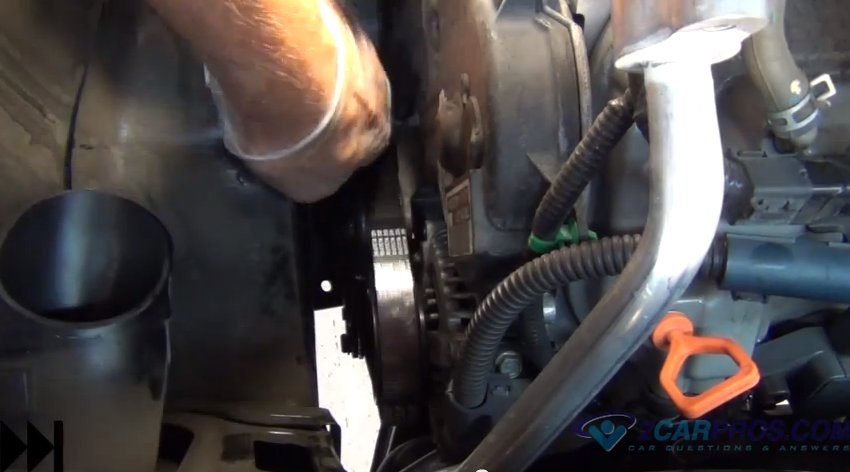
Step 2 - Locate the belt tensioner which is under spring tension to hold pressure on the belt which keeps it secure.

Locating Belt Tensioner
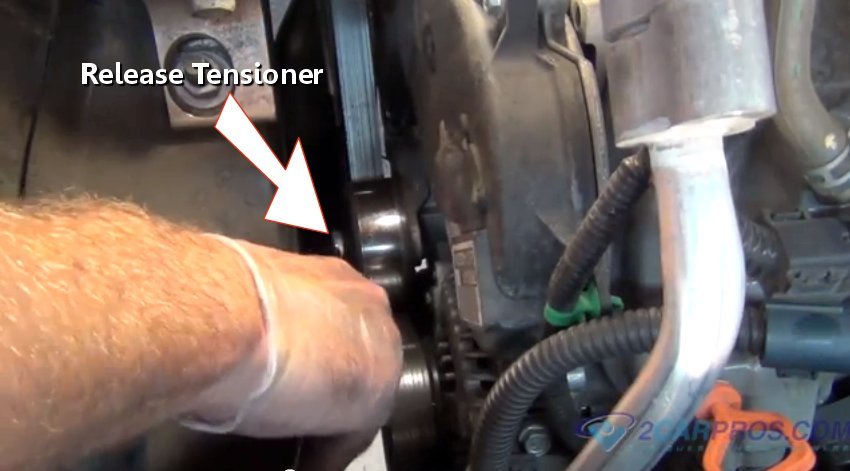
Step 3 - Using a wrench push the tensioner in the opposite direction of the spring tension to release the tensioner.

Releasing Belt Tensioner
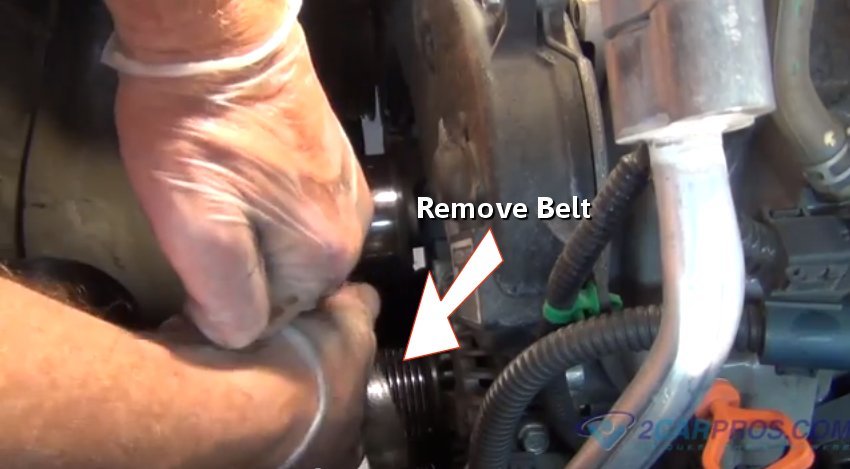
Step 4 - Once the tensioner is released move the belt off the nearest pulley.

Removing Serpentine Belt
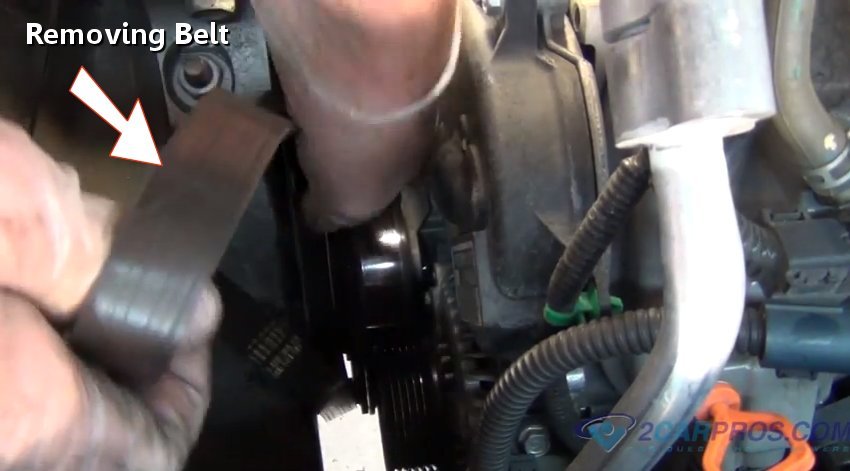
Step 5 - Belt is now ready for removal.

Belt Ready for Removal
Step 6 - Remove the belt from the bottom pulley and all idler pulleys and accessories.

Removing Serpentine Belt From Pulleys
Step 7 - Once the belt has been removed compare the old belt to the replacement belt. They should be a exact match in both length and width.

Belt Comparison
Step 8 - Once the new belt has been checked install the new serpentine belt onto the pulleys.

Installing New Serpentine Belt
Step 9 - Once the belt is on the engine pulleys activate the belt tensioner to complete the belt installation

Activate Tensioner Install Belt
Step 10 - Once the belt has been installed use a flashlight to inspect the belt location on the pulleys are aligned with the grooves of the belt.

Checking Belt Alignment
The is no adjustment is necessary to a serpentine belt, the tension is automatically maintained by spring tension.

Removing Air Filter Housing
Locating Belt Tensioner
Step 3 - Using a wrench push the tensioner in the opposite direction of the spring tension to release the tensioner.
Releasing Belt Tensioner
Removing Serpentine Belt

Belt Ready for Removal
Removing Serpentine Belt From Pulleys
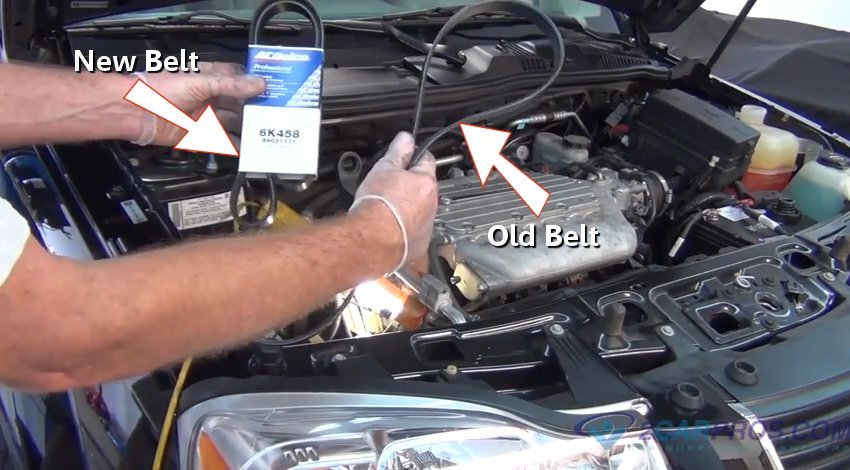
Belt Comparison
Installing New Serpentine Belt
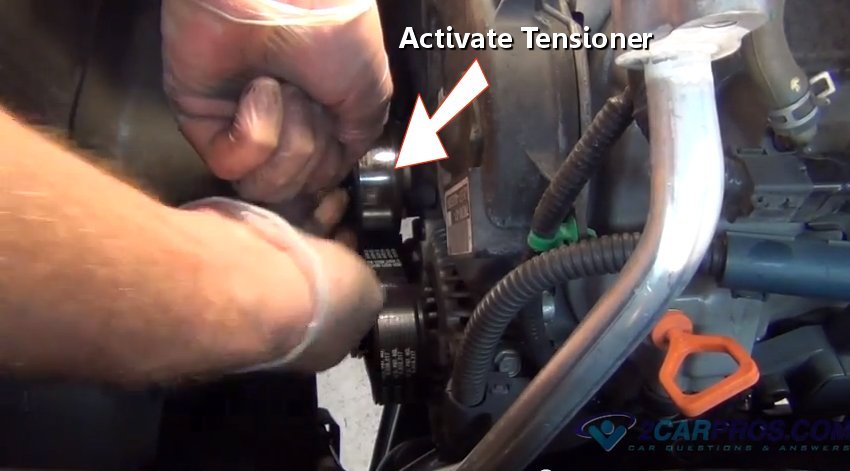
Activate Tensioner Install Belt
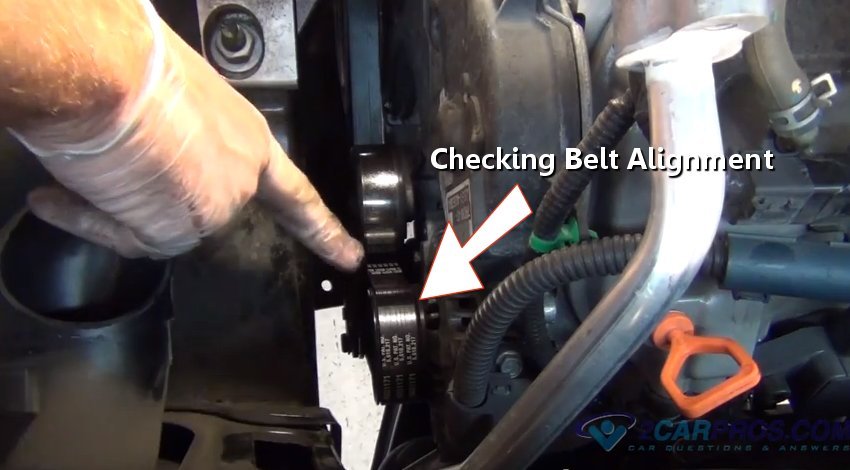
Checking Belt Alignment
No comments:
Post a Comment