How To Replace Car Air Filter?
Air Filter Replacement
Procedure To Replace Car Air Filter
Helpful Information
A vehicle's engine air filter is a replaceable cleansing unit. In most cases an air filter can be replaced in under 5 minutes. The air cleaner in your car should be changed between 3,000 and 6,000 miles depending on driving conditions. Changing your air filter is easy. Remember, always use protective eye wear and gloves when doing any car repair. First locate the air filter housing; this is where the air filter element resides. To locate the air filter housing look for the engine air intake tube. Next, remove the air filter housing retainer clips or screws and remove the air filter housing top. Replace the old air filter with a new air filter and reassemble. (Note: be sure you clean out any leaves or debris inside the air filter housing upon reassembly).
To determine if your air cleaner needs to be changed remove the air filter housing retainer clips or screws and remove the filter, gently tap the air filter, if you see dust falling from the air cleaner it is filled to capacity and replacement is needed. We recommend top quality air filters for your car. Imagine the amount of air processed through your engine in the course of driving. If you choose an inferior style air filter you are allowing dirt particles to enter your engine which cause premature wear and could lead to catastrophic engine failure. Replacing an air filter is a normal part of an engine tune up.
- Air filter plugs up due to lack of maintenance causing poor engine performance and rough idle
Step by step replacement instructions on how to replace an automotive air filter. This article pertains to most vehicles. This particular repair was performed on a 2000 to 2008 Chevy Tahoe.
Difficulty Scale: 1 of 10
Tools and Supplies Needed

Removing Air Filter Housing Fasteners
Step 2 - Once all hold down bolts or fasteners have been removed or released gently remove the lid to expose the air filter.

Removing Air Filter Housing Lid
Step 3 - Now the air filter is exposed and removal of the air filter can execute.

Removing Air Filter
- Replacement air filter
- Screwdriver Set
- Small socket set
- Shop towel
- Protective eyewear
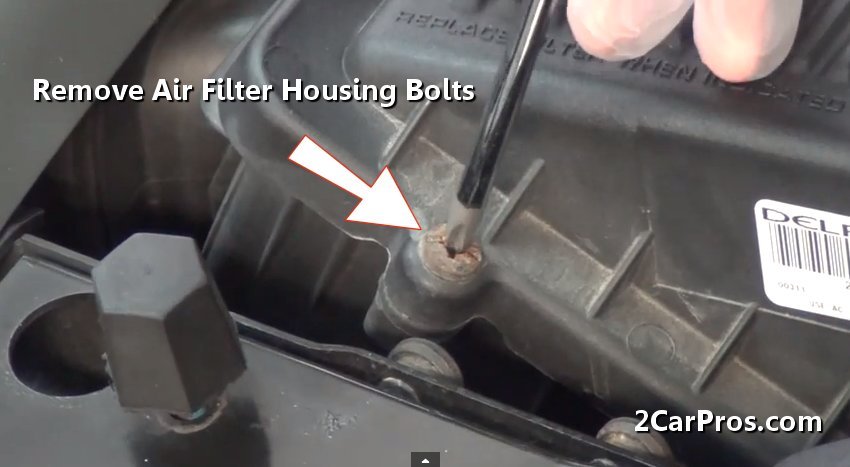
Removing Air Filter Housing Fasteners
Step 2 - Once all hold down bolts or fasteners have been removed or released gently remove the lid to expose the air filter.
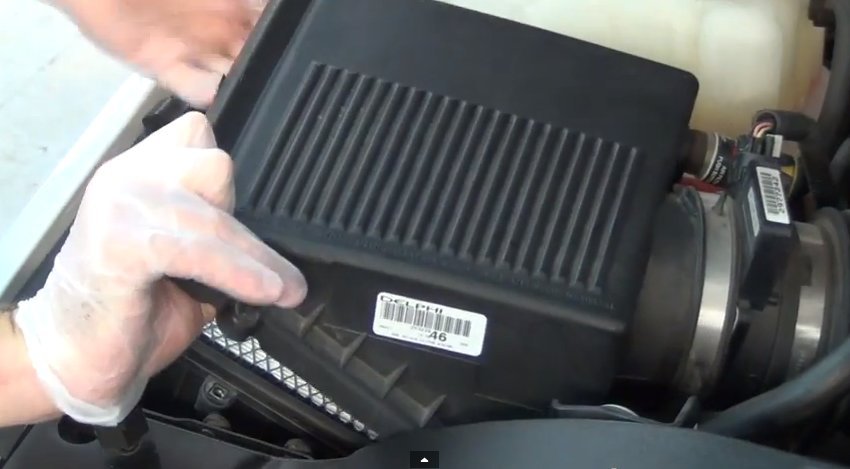
Removing Air Filter Housing Lid
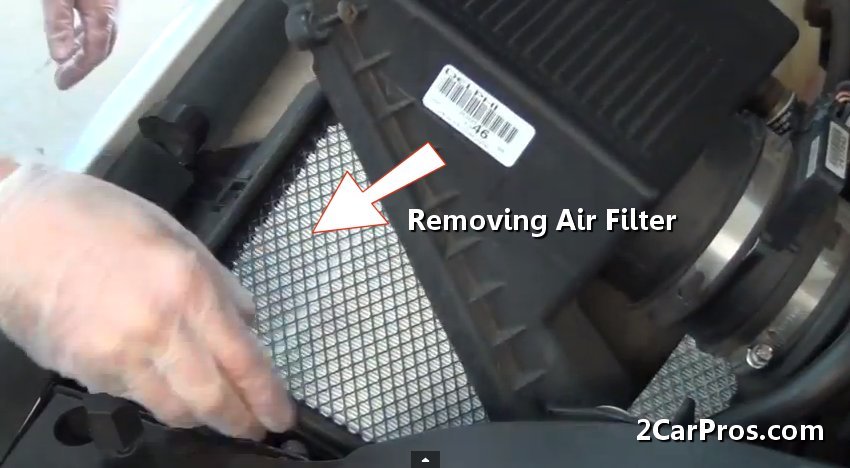
Removing Air Filter
Step 4 - Once the air filter has been removed, clean the hosing with a damp shop towel. This ensures the any debris which has been knocked into housing when the air filter was removed will be cleaned out before the new filter goes in.

Cleaning Air Filter Housing
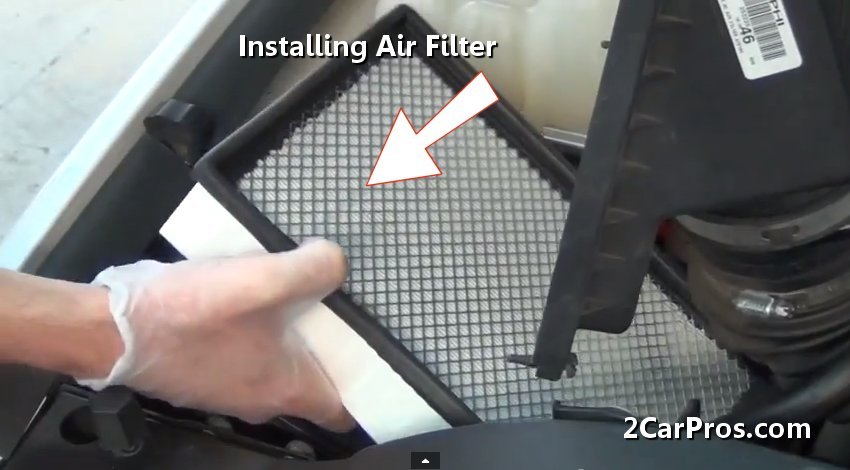
Step 5 - Installing the air filter, make sure the filter is the same size as the old air filter.

Installing New Air Filter
Step 6 - When installing the new filter confirm a positive placement by checking the seal point of the air filter to the housing. Then install the filter lid.
Installing Air Filter Lid
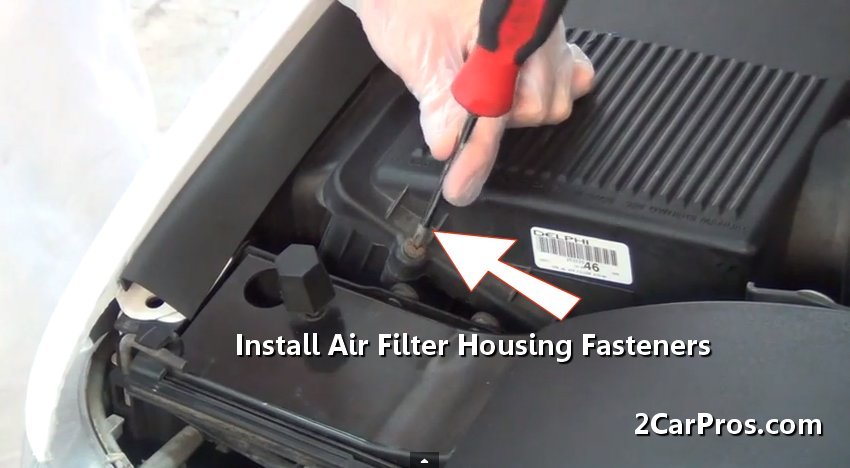
Step 7 - After the filter housing lid is reinstalled, retighten the fasteners or clips to secure the filter into place. You are all set!

Installing Air Filter Housing Fasteners
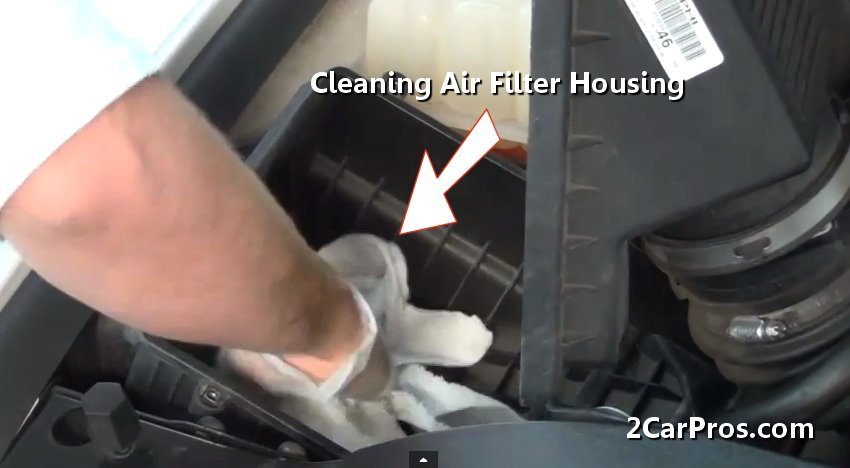
Cleaning Air Filter Housing
Installing New Air Filter
Installing Air Filter Lid
Step 7 - After the filter housing lid is reinstalled, retighten the fasteners or clips to secure the filter into place. You are all set!
Installing Air Filter Housing Fasteners


Comments
Post a Comment