How To Replace Catalytic Converter
Catalytic Converter Replacement
Procedure To Replace Catalytic Converter
Helpful Information
Catalytic converters have been standard equipment since 1976 on most cars and light trucks and is responsible for the cleaner air we enjoy today. A catalytic converter can fail in one of three ways, first the catalytic material can simply wear out loosing its effectiveness, second the material can melt due to extreme temperatures causing the converter to plug which creates a low engine power issue and lastly, the converter material can break apart and leave the converter empty with absolutely no effect on the engine exhaust flowing through it.
Best Practices
- Use new gaskets when installing a new catalytic converter.
- Spray exhaust mounting bolt with an anti rust lubricant such as WD40 to help aid the disassembly process.
Step by step repair guide on how to replace a catalytic converter. This repair was perform on a VW Turbo Beetle. This article pertains to many similar vehicles.
Difficulty Scale: 4 of 10 Tools and Supplies Needed
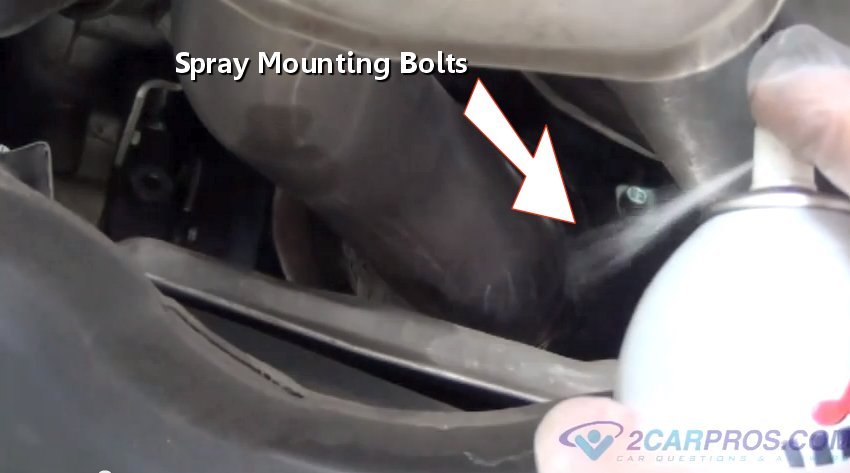
Step 1 - Exhaust systems tend to rust the mounting bolts of the system. To help dis-assembly spray the bolts on the manifold and other connections with penetrating lube to help loosen.

Applying WD40 to Rusted Exhaust System Bolts
Step 2 - While the anti-rust liquid is settling in, locate and disconnect the oxygen sensor electrical connectors that are mounted on the converter.
- Pry bar
- Socket set
- Wrench set
- Replacement catalytic converter
- Shop towels
- Protective eyewear and gloves
Applying WD40 to Rusted Exhaust System Bolts
Step 2 - While the anti-rust liquid is settling in, locate and disconnect the oxygen sensor electrical connectors that are mounted on the converter.
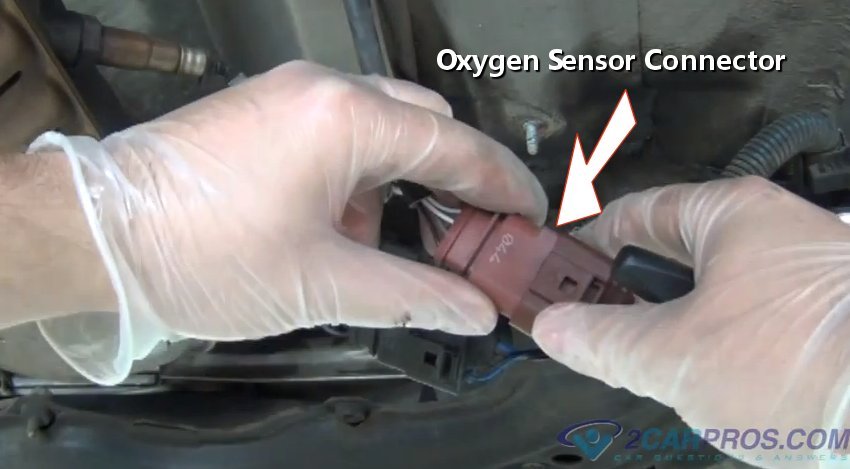
Disconnecting Oxygen Sensors

Removing Oxygen Sensor Wiring
Step 4 - Most catalytic converter's have heat shields designed to keep heat away from the vehicle. To gain access to mounting bolts some shielding may need to be removed.

Heat Shield Mounting Bolts
Step 5 - After the anti rust liquid has sat for a while, remove the main catalytic converter mounting bolts.

Removing Catalytic Converter Mounting Bolts
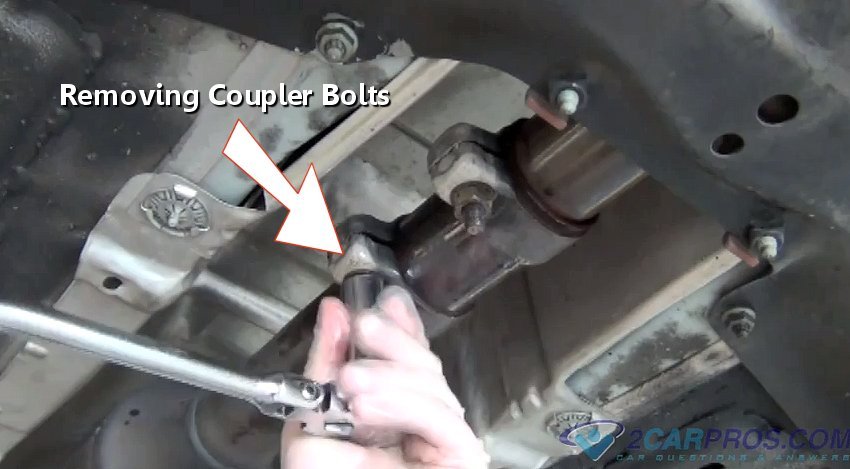
Step 6 - Continue by removing the coupler mounting bolts at the rear of the catalytic converter.

Removing Catalytic Converter Coupler Mounting Bolts
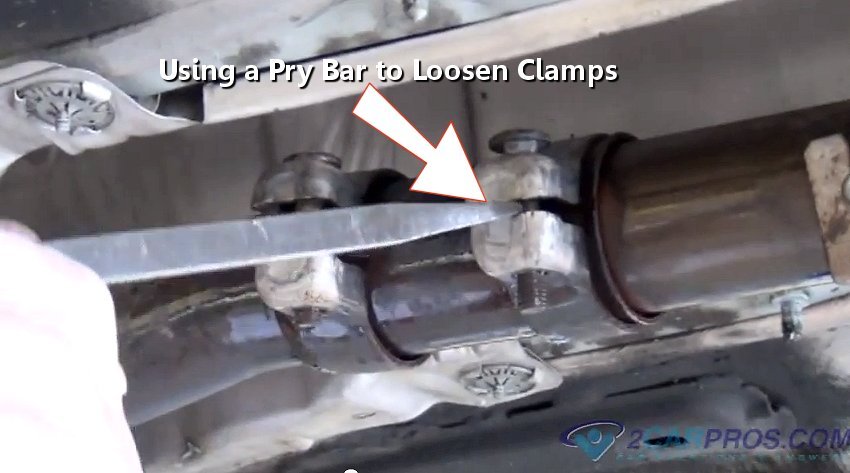
Step 7 - Once loose, use a pry bar to further loosen the clamps to aid in removal.

Loosening Clamps with Pry Bar
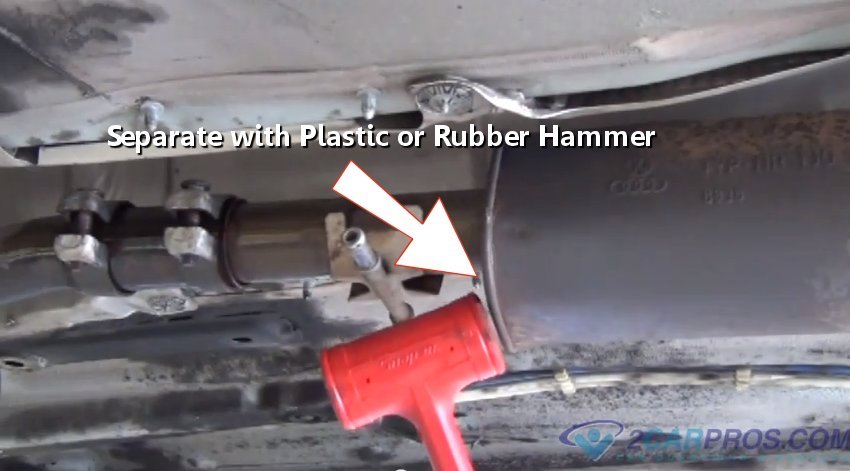
Step 8 - Once the rear exhaust mount has been removed use a plastic or rubber hammer to separate the muffler from the catalytic converter.

Separating Muffler Using Hammer
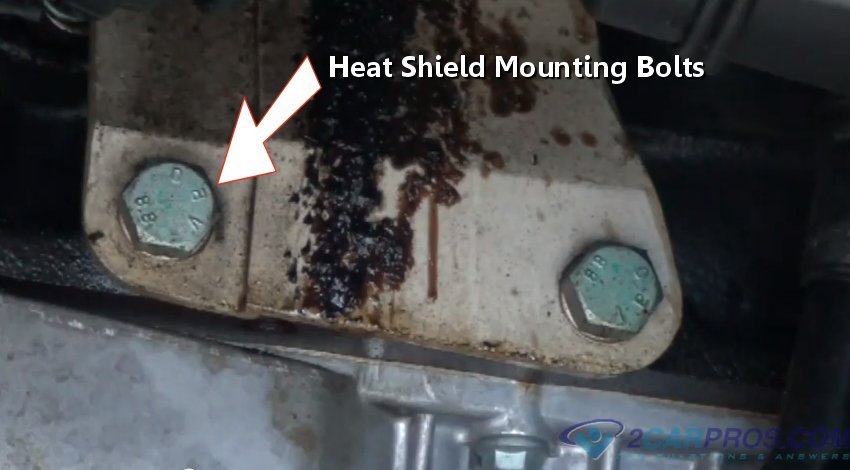
Heat Shield Mounting Bolts
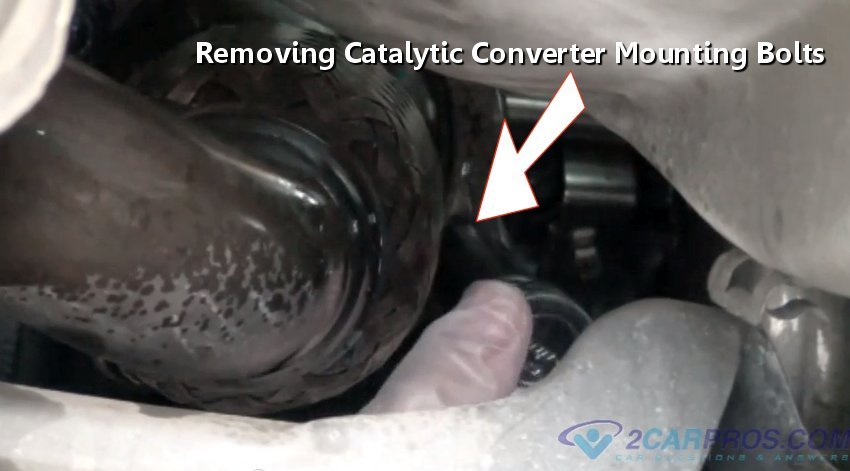
Removing Catalytic Converter Mounting Bolts
Removing Catalytic Converter Coupler Mounting Bolts
Step 7 - Once loose, use a pry bar to further loosen the clamps to aid in removal.
Loosening Clamps with Pry Bar
Separating Muffler Using Hammer
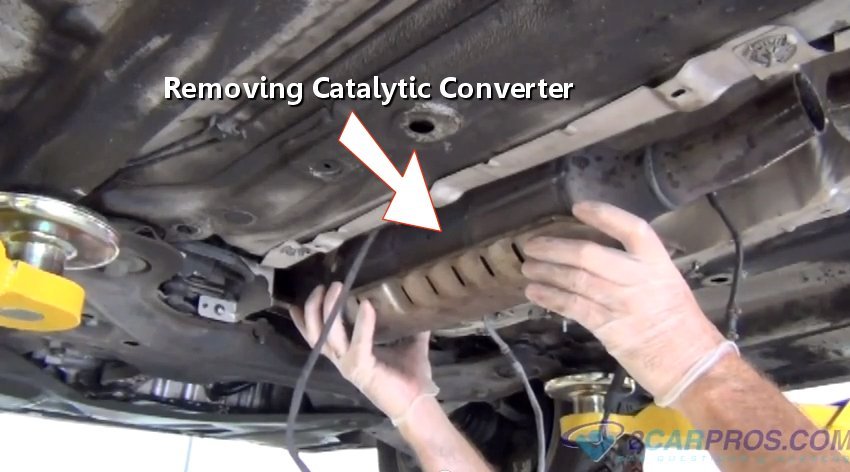
Step 9 - After the muffler has been separated, the catalytic converter is ready for removal.

Removing Catalytic Converter
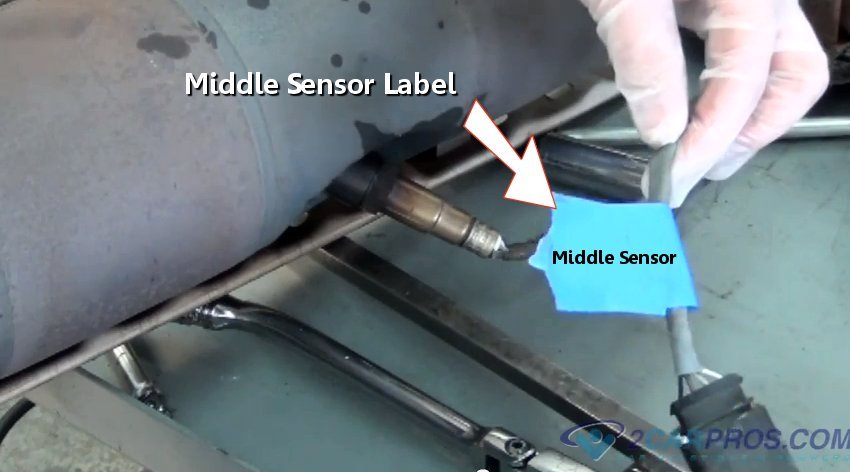
Step 10 - Most catalytic converters have multiple oxygen sensors which need to be labeled to avoid confusion when reassembling.

Installing Labels on Oxygen Sensors
Step 11 - Once successfully labeled remove all sensors from the old catalytic converter.

Removing Oxygen Sensors
Step 12 - After cleaning gasket surfaces install new sealing gaskets.

Installing New Gaskets
Step 13 - Install the labeled oxygen sensors onto the new catalytic converter.

Installing Oxygen Sensors
Removing Catalytic Converter
Installing Labels on Oxygen Sensors

Removing Oxygen Sensors
Step 12 - After cleaning gasket surfaces install new sealing gaskets.

Installing New Gaskets

Installing Oxygen Sensors
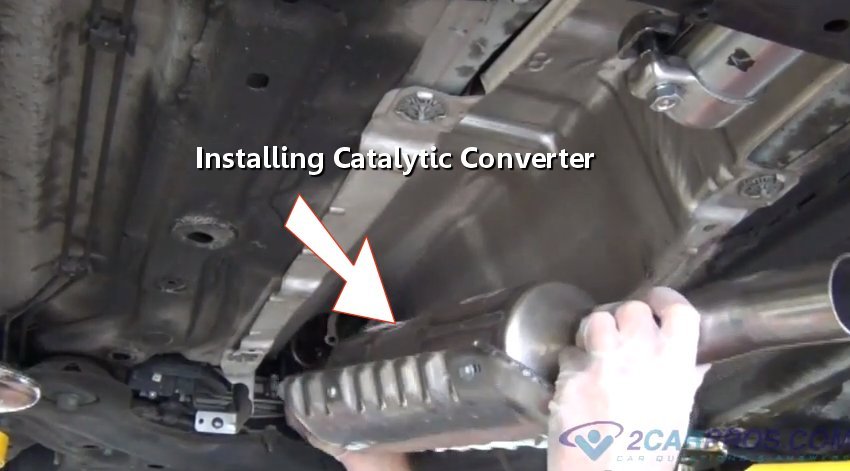
Step 14 - Once all oxygen sensors have been installed into the new catalytic converter, it is ready for installation.

Installing Catalytic Converter
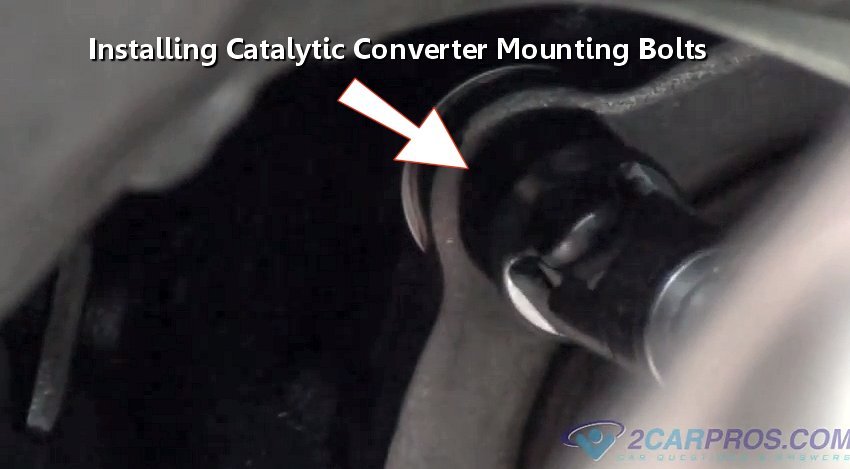
Step 15 - After the catalytic converter is in place, install all mounting bolts and tighten.

Installing Mounting Bolts
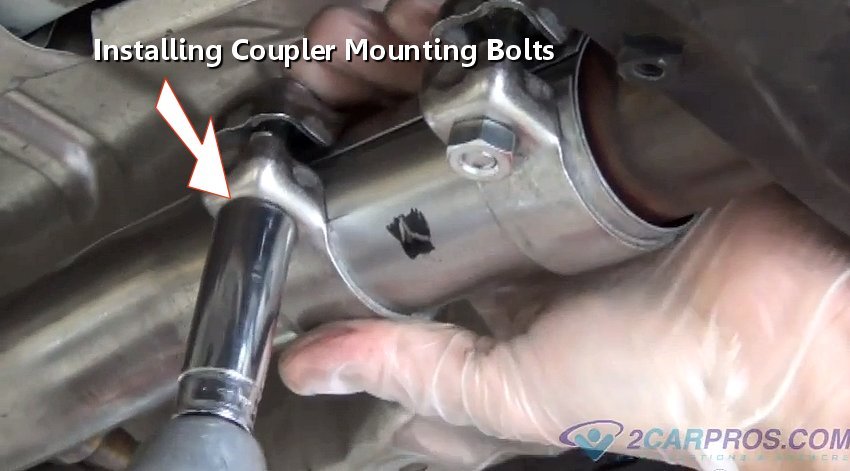
Step 16 - Once the main mounting bolts have been tightened, install and tighten the coupler mounting bolts.

Tightening Coupler Mounting Bolts
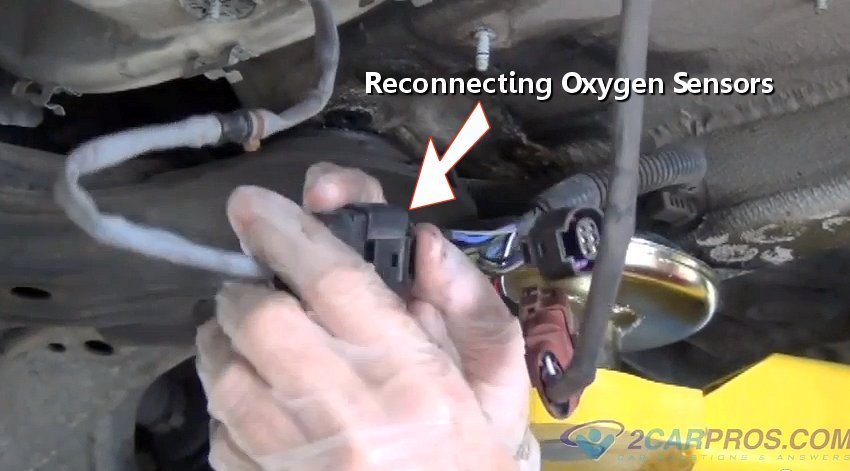
Step 17 - Next, reconnect the remaining oxygen sensors.

Reconnecting Oxygen Sensors
Once the oxygen sensors have been connected reinstall all heat shields and exhaust system mounts to complete the job.
Installing Catalytic Converter
Installing Mounting Bolts
Tightening Coupler Mounting Bolts
Reconnecting Oxygen Sensors
Once the oxygen sensors have been connected reinstall all heat shields and exhaust system mounts to complete the job.


Useful Information
ReplyDeleteUpdate us regular with new stuff
Mini Clips Manufacturers