How To Replace CV Axle
CV Axle Replacement
Helpful Information:
Once all pins are reinstalled, remount the tire and tighten lug nuts. When driving listen for any strange noises which would indicate there is a malfunction.
Most front wheel drive vehicles utilize axles with CV joints. These axles are designed with a constant velocity (CV) joint at each end. The most common cause of failure is due to the CV boot fails allowing grease to leak out causing the joint to fail. When this occurs a clicking noise is generated when turning or accelerating.
Best Practices
Once all pins are reinstalled, remount the tire and tighten lug nuts. When driving listen for any strange noises which would indicate there is a malfunction.
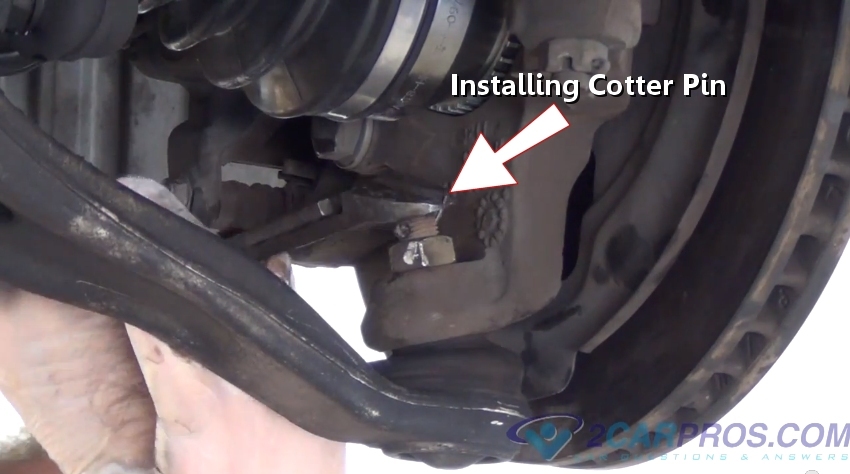
- Use new cotter pins upon reassembly
Step by step instruction on how to replace a CV joint drive axle. This article pertains to most front wheel drive cars with strut suspension.
Difficulty Scale Rating: 5 of 10
Tools and Supplies Needed
Step 1 - Remove tire lug nuts to remove the wheel. If air tools are not not used break loose the lugs when the car is on the ground.

Loosening Lug Nuts
Step 2 - After the wheel lugs have been removed the tire is ready to be removed.

Removing Tire
Step 3 - Once the tire has been removed, it will allow access to the main axle nut, remove the cotter pin and retainer clip.

Removing Cotter Pin
Step 4 - After the cotter pin has been removed, loosen and remove the main axle nut. (Note: If no air tools are used this can be done by using the brake.)

Removing the Main Axle Nut
- Hydraulic jack
- Jack stands
- Socket set with extensions
- Protective clothing and eyewear
- Replacement axle
- Hammer
- Breaker bar
- Large pry bar
- Side cutters (dikes)
- Cotter pin
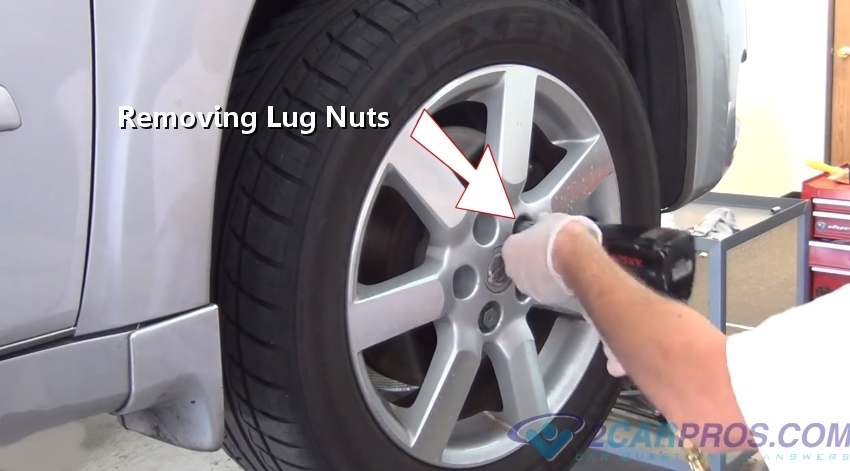
Loosening Lug Nuts

Removing Tire

Removing Cotter Pin
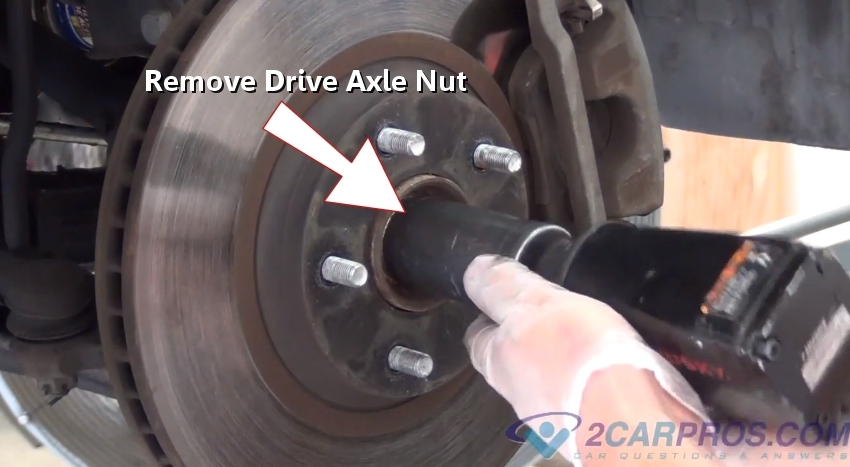
Removing the Main Axle Nut
Step 5 - Once the nut has been removed the axle will become free within the bearing hub.

Axle Nut Removed
Step 6 - Next, remove the cotter pin used in the lower ball joint.

Removing Ball Joint Cotter Pin
Step 7 - Once the cotter pin has been removed, use a wrench to loosen the lower ball joint nut.

Loosening Lower Ball Joint Nut
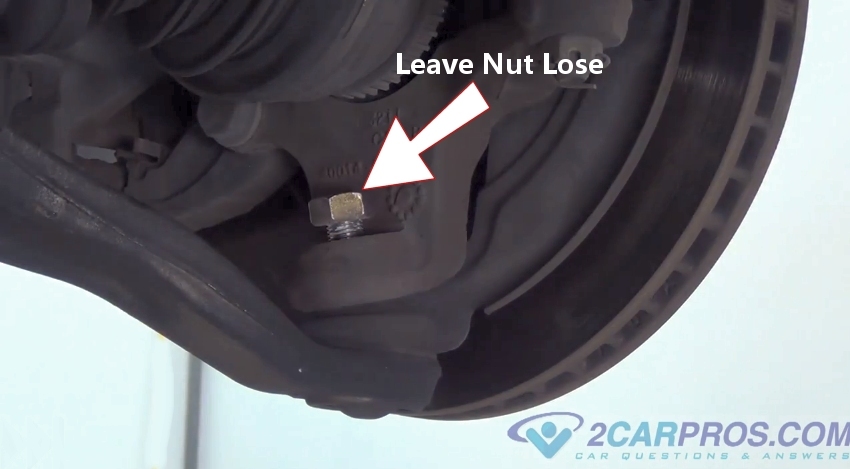
Step 8 - Leave the lower ball joint nut loose to help protect the threads which is needed in the next step.

Lose Lower Ball Joint
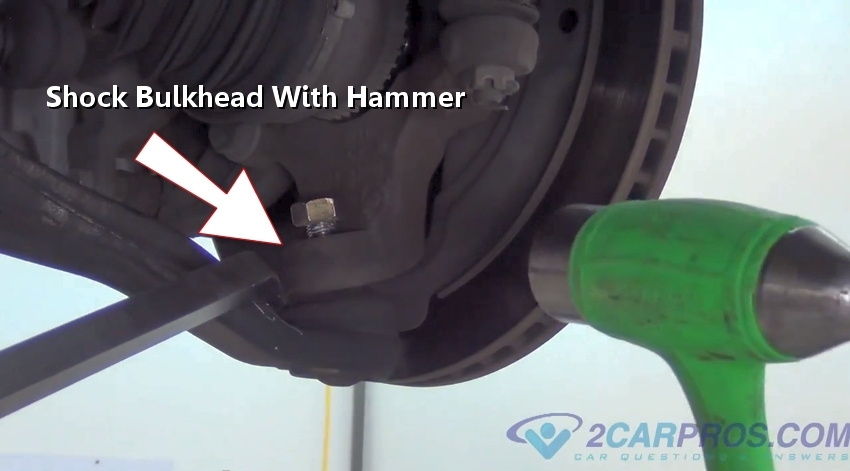
Step 9 - Using a large pry bar apply pressure downward while shocking the bulkhead with a hammer.

Shocking Bulkhead Under Pressure With Hammer
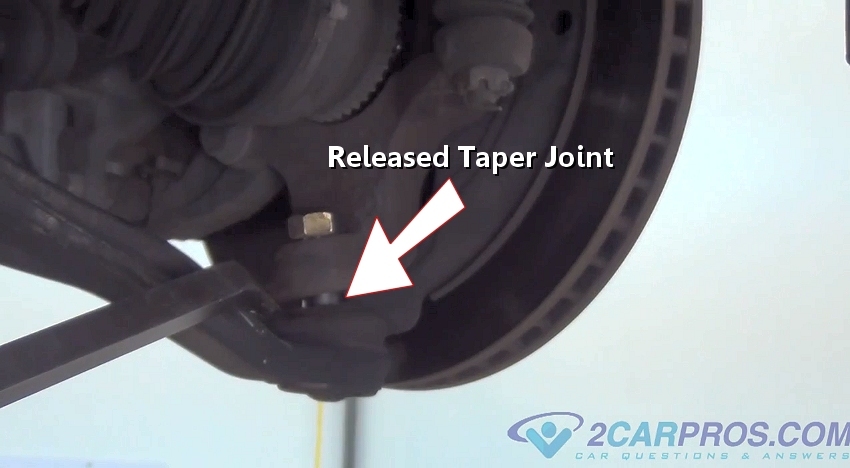
Step 10 - When the ball joint taper joint releases there will be a noticeable gap between the ball joint dust boot and the spindle.

Ball Joint Taper Joint Released.
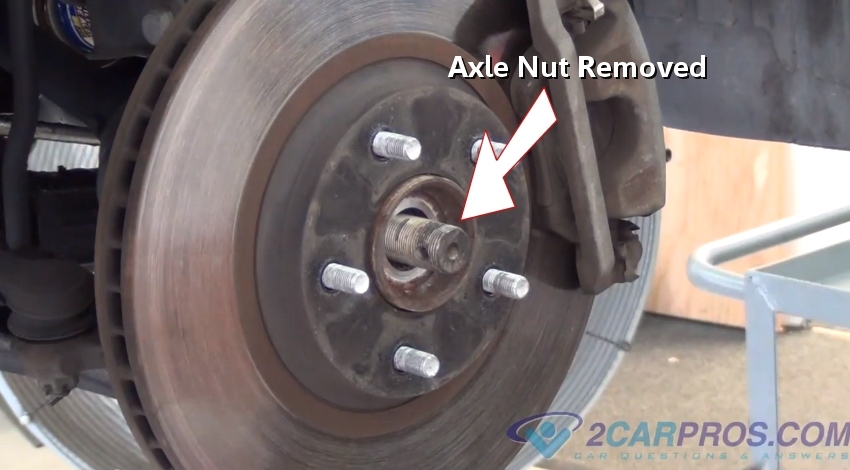
Axle Nut Removed

Removing Ball Joint Cotter Pin
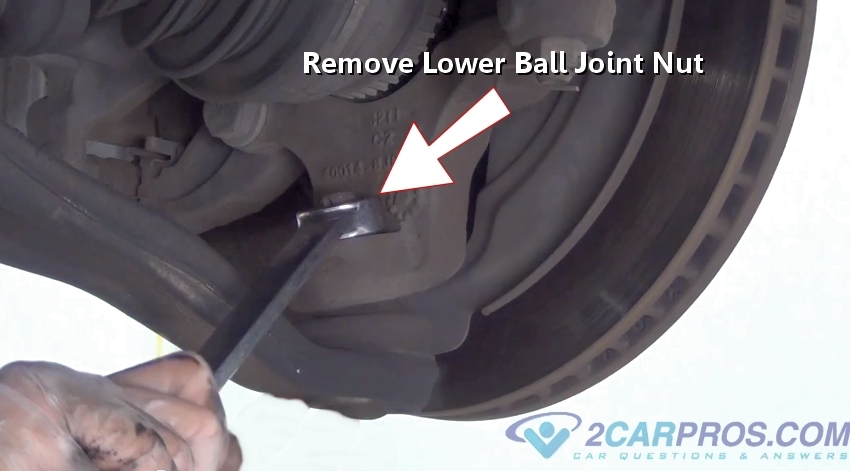
Loosening Lower Ball Joint Nut
Step 8 - Leave the lower ball joint nut loose to help protect the threads which is needed in the next step.
Lose Lower Ball Joint
Shocking Bulkhead Under Pressure With Hammer
Ball Joint Taper Joint Released.
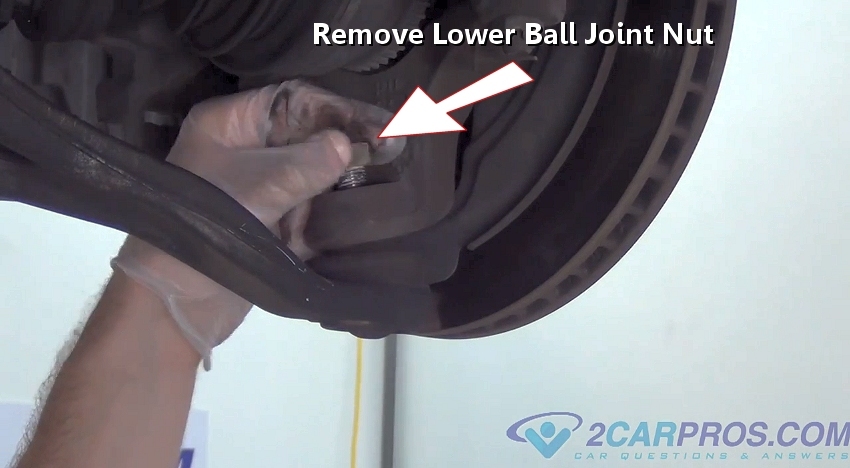
Step 11 - Once the ball joint taper fit has been released, finish removing the nut.

Removing Lower Ball Joint Nut
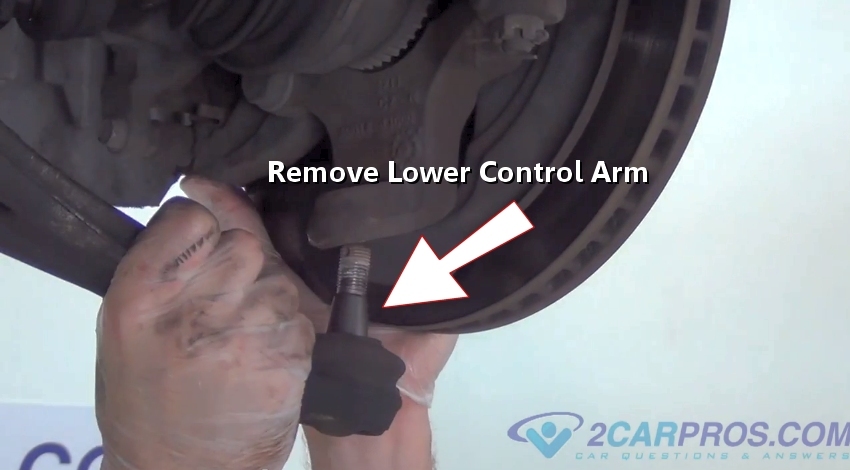
Step 12 - After the lower control arm nut has been removed, apply pressure downward to remove the lower control arm.

Removing Lower Control Arm
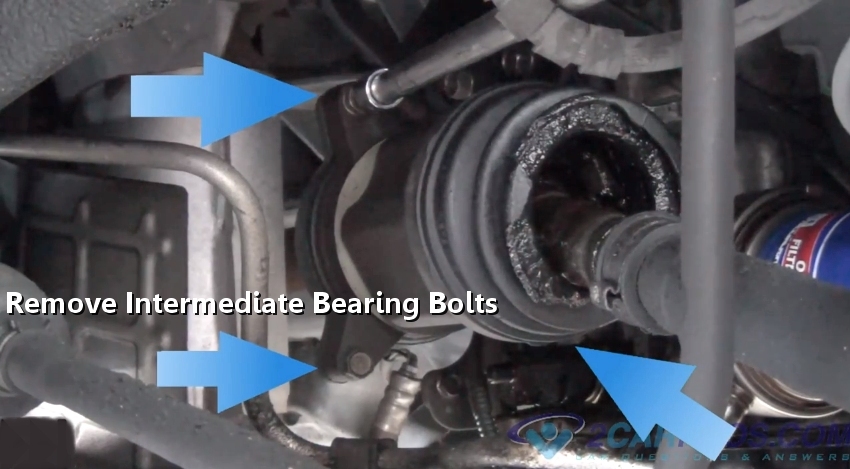
Step 13 - Next, remove the intermediate mounting bolts, some cars do not use this mount, in which case a large pry bar is used to pop the CV joint out from the transmission.

Removing Intermediate Mounting Bolts
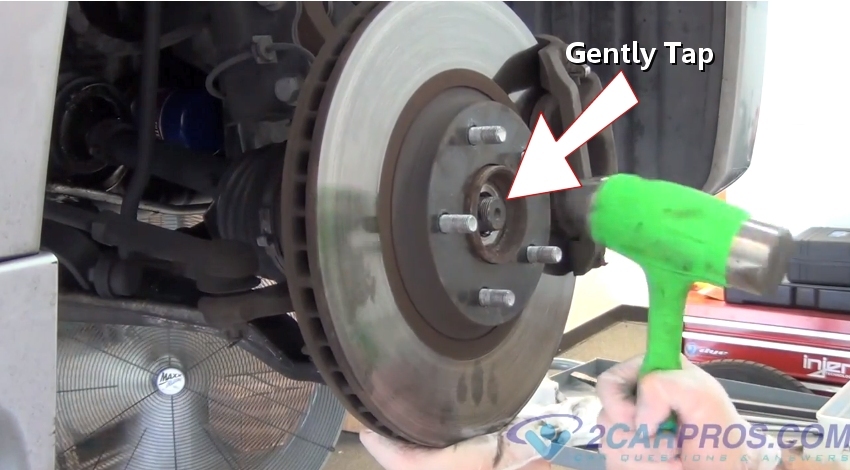
Step 14 - Then, while pulling outward on the brake rotor, tap the axle out of the bearing hub. (Note: Use caution as to not damage axle treads, the axle nut can be used to achieve this protection.)

Gently Tap Axle
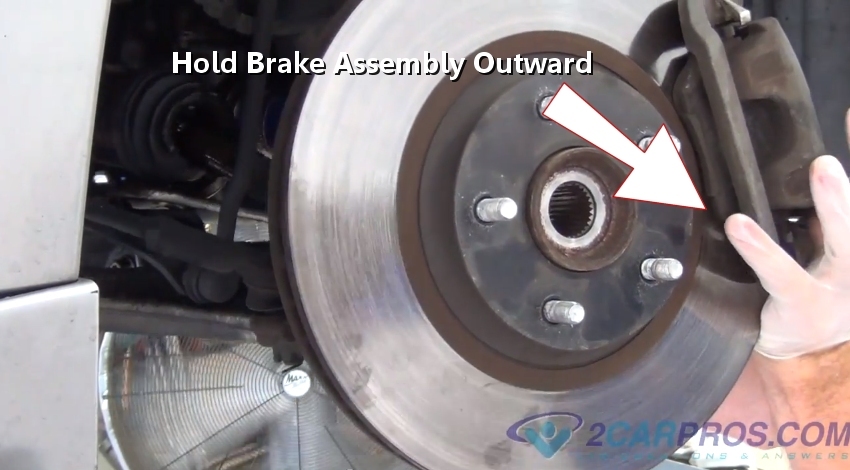
Step 15 - After the axle is loose from the bearing hub, hold the brake assembly to remove the CV axle.

Holding Brake Assembly Outward
Step 16 - After the old axle has been removed, match the replacement axle to the old axle to ensure proper installation.

Matching Replacement Axle
Removing Lower Ball Joint Nut
Removing Lower Control Arm
Removing Intermediate Mounting Bolts
Step 14 - Then, while pulling outward on the brake rotor, tap the axle out of the bearing hub. (Note: Use caution as to not damage axle treads, the axle nut can be used to achieve this protection.)
Gently Tap Axle
Holding Brake Assembly Outward
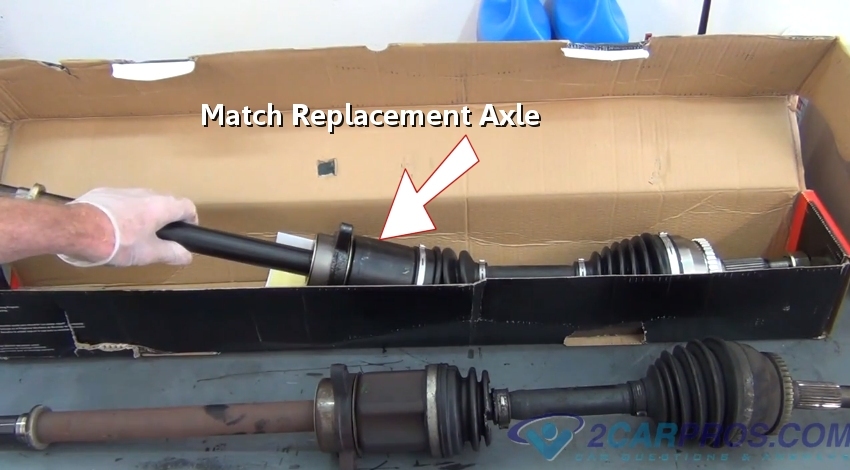
Matching Replacement Axle
Step 17 - Next, while holding the Brake assembly outward, install the new drive axle.

Installing New Drive Axle
Step 18 - Once the axle has been installed into the transmission, install the outer CV joint into the bearing hub.

Installing Outer CV Joint
Step 19 - Then, reinstall the intermediate bearing mounting bolts. If not equipped, the axle needs to be popped into the transmission with a forward thrusting motion.

Reinstalling Intermediate Bearing Bolts
Step 20 - Once the axle has been reinstalled, install and tighten the lower ball joint nut and install the cotter pin.

Reinstalling Lower Ball Joint
Step 21 - After the lower ball joint mounting bolt has been tightened, install a new cotter pin and secure

Installing New Cotter Pin
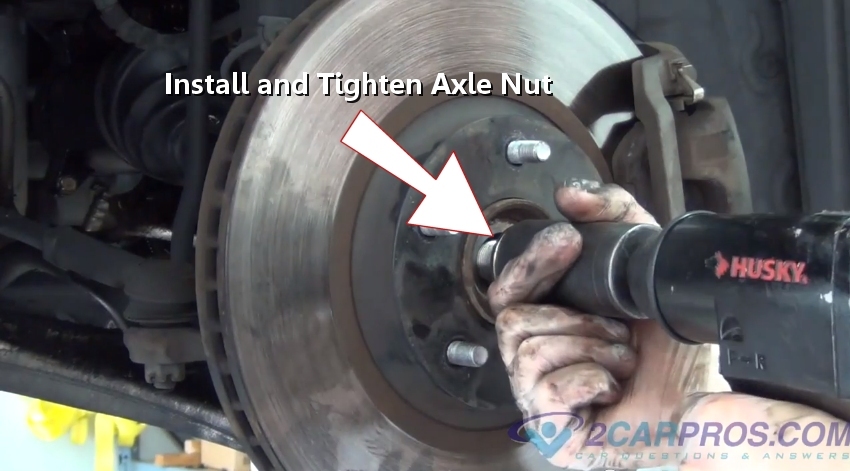
Step 22 - Then, the lower ball joint mounting nut is in place and tight reinstall the outer axle nut and tighten.

Reinstalling Axle Nut
Step 23 - Next, install a new cotter pin

Installing New Cotter Pin

Installing New Drive Axle
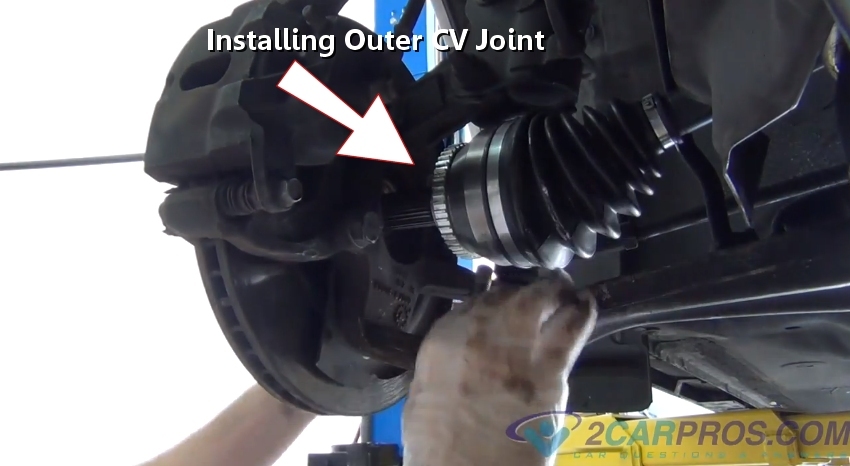
Installing Outer CV Joint
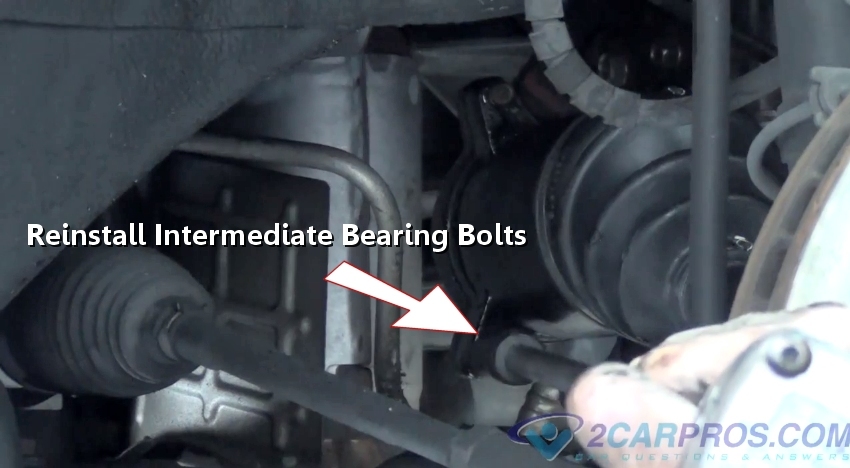
Reinstalling Intermediate Bearing Bolts
Step 20 - Once the axle has been reinstalled, install and tighten the lower ball joint nut and install the cotter pin.
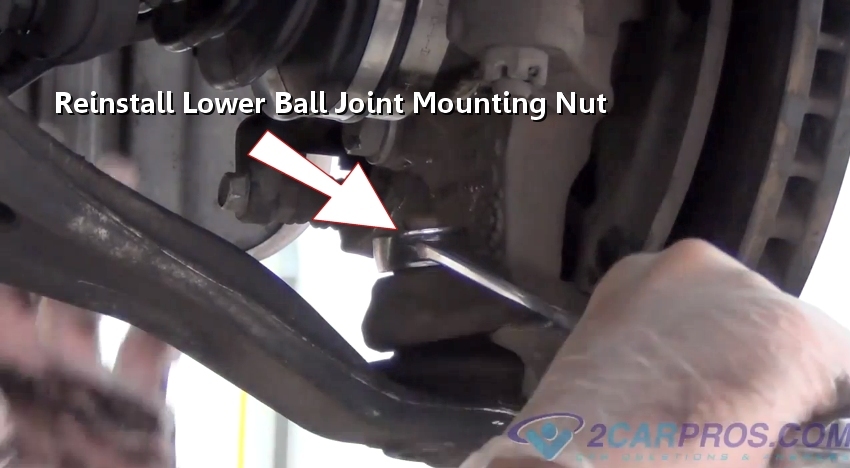
Reinstalling Lower Ball Joint
Step 21 - After the lower ball joint mounting bolt has been tightened, install a new cotter pin and secure
Installing New Cotter Pin
Reinstalling Axle Nut

Installing New Cotter Pin


Comments
Post a Comment