How To Replace Upper Control Arm
Upper Control Arm Replacement
Easy step by step guide on how to replace automotive upper control arms, this information may vary per vehicle, but the process is the same with small variations.
Difficulty Scale: 5 of 10
Helpful Information
When dealing with suspension parts rust may be present, spray anti rust such as WD40 will help facilitate the repair.
Before starting inspections and repairs, park the vehicle on level ground, lift it safely using jack stands, transmission in park and the emergency brake set.

Upper Control Arm
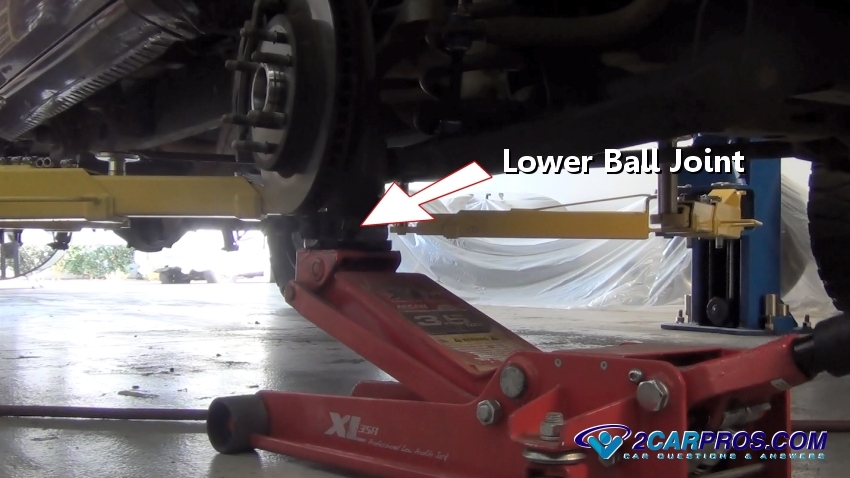
Step 1 - Position a jack under the lower ball joint or control arm to relieve downward pressure on the suspension components.

Jack Lift On Lower Ball Joint
Step 2 - After removing the cotter pin (if equipped) use a wrench to loosen the upper ball joint nut, about 3 turns.

Loosen Upper Ball Joint
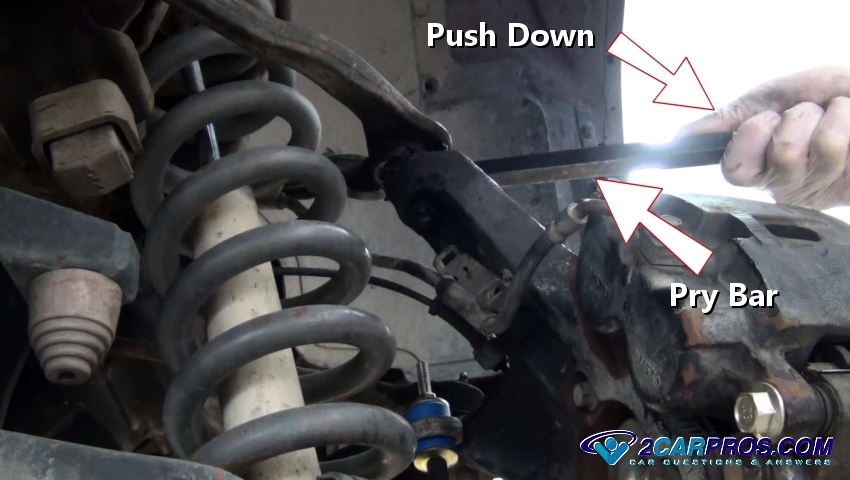
Step 3 - Insert and wedge a large pry bar between the upper control arm and spindle while pushing downward to apply pressure to the upper ball joint taper fit.

Push Down Pry bar
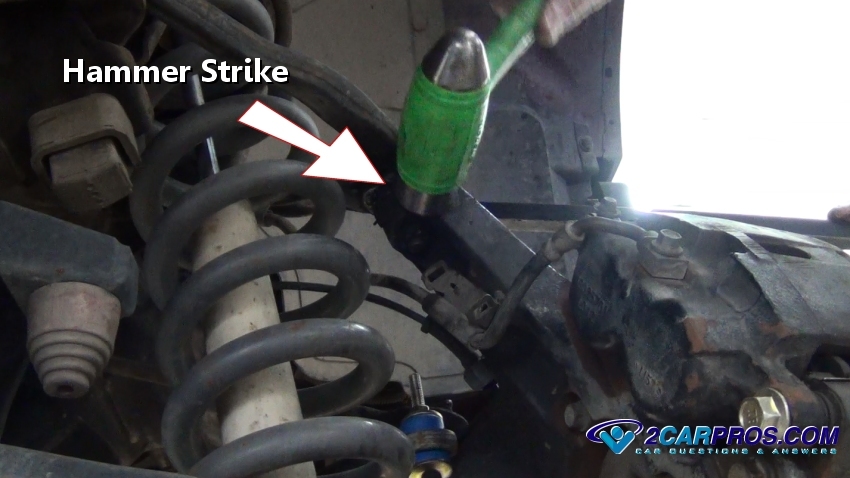
Step 4 - While holding pressure on the ball joint, strike the spindle bulkhead with a hammer, this will release the taper fit stud from the spindle.

Hammer Strike
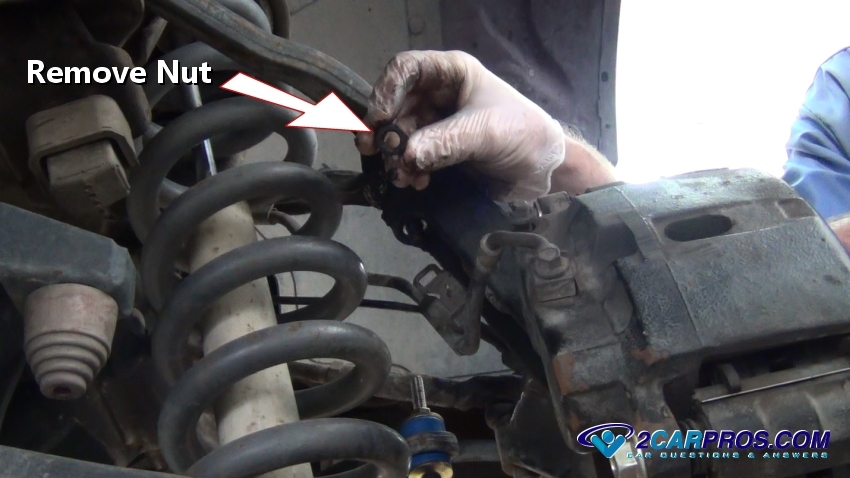
Step 5 - Once the taper fit has released, finish removing the ball joint nut.

Remove Ball Joint Nut
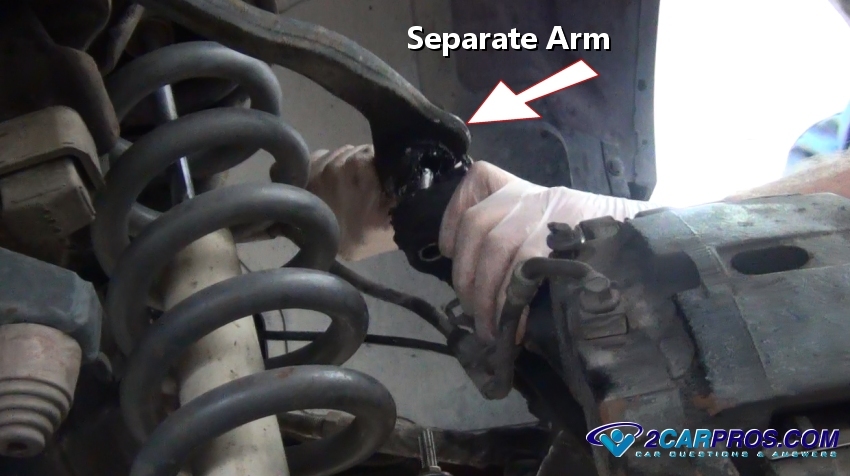
Step 6 - Lift the arm from the spindle, use caution if any rubber brake lines are involved when the spindle becomes loose.

Separate Control Arm
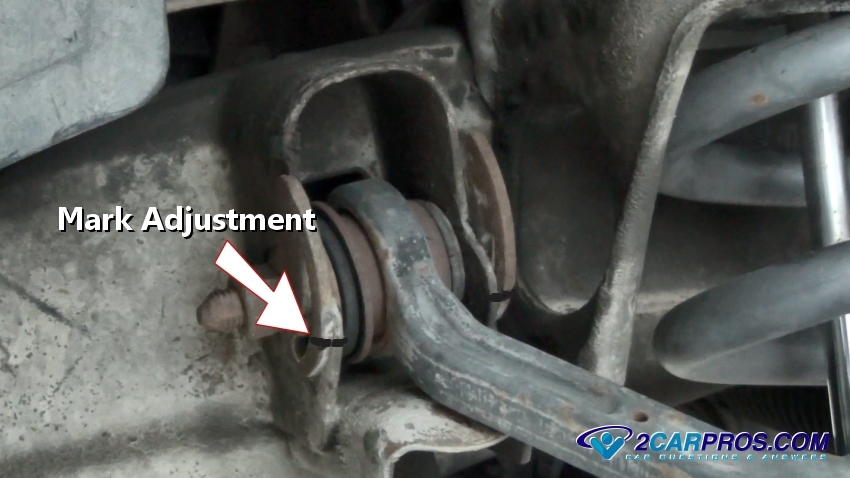
Step 7 - Mark the alignment adjusters using a felt pen to reference these marks when reassembling. Other designs use a shim or a series of shims which must be reinstalled as they were removed.

Mark Adjustments
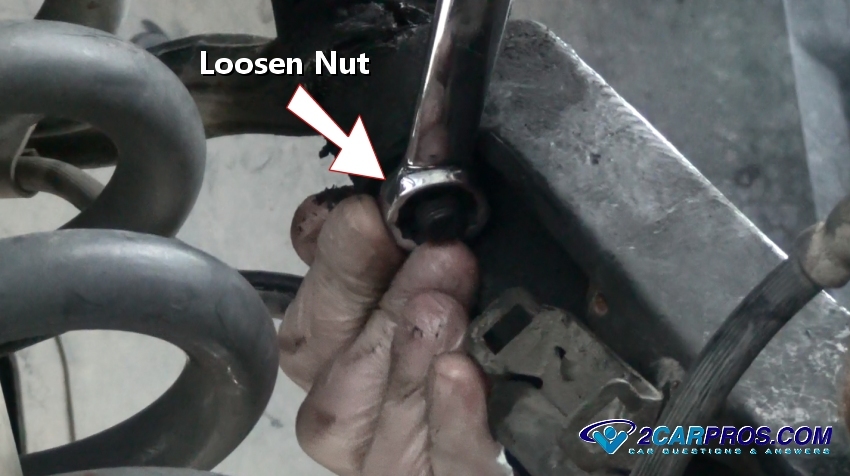
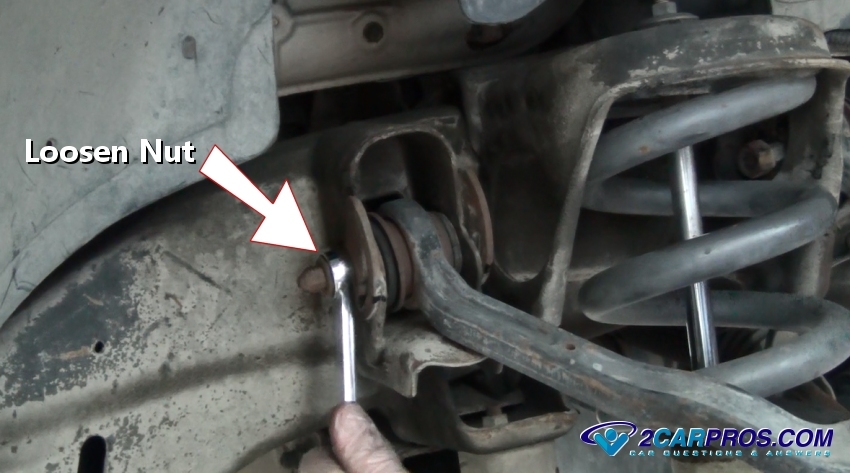
Step 8 - Use a wrench or socket loosen and remove the nut on either side of the arm.

Loosen Nut
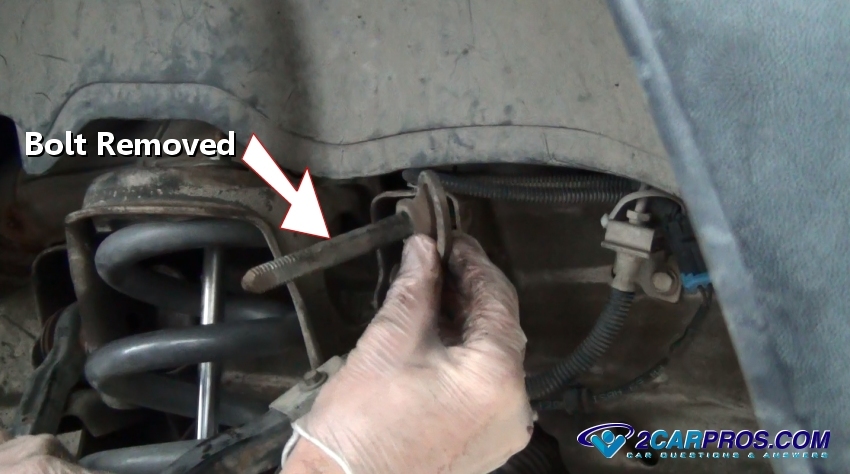
Step 9 - After both nuts have been removed, slide the bolts from the control arm mounts while keeping the adjusters in order, then remove the control arm.

Bolt Removed
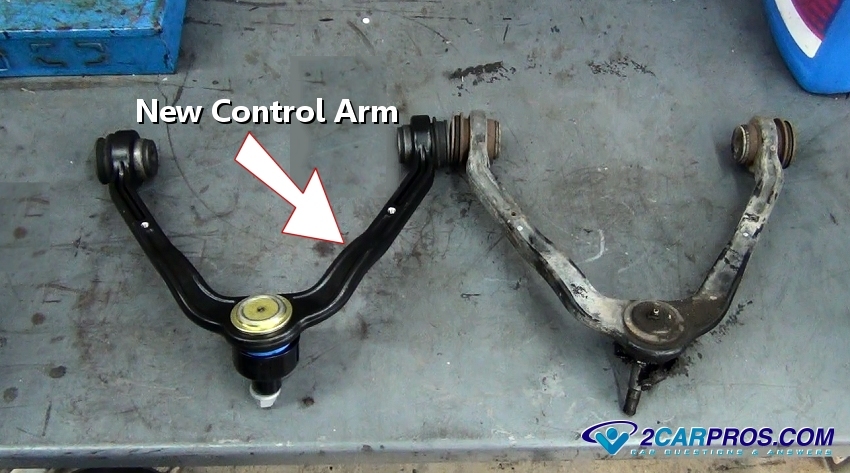
Step 10 - Once the control arm has been removed, match it against the old part to ensure a proper installation.

New Upper Control Arm
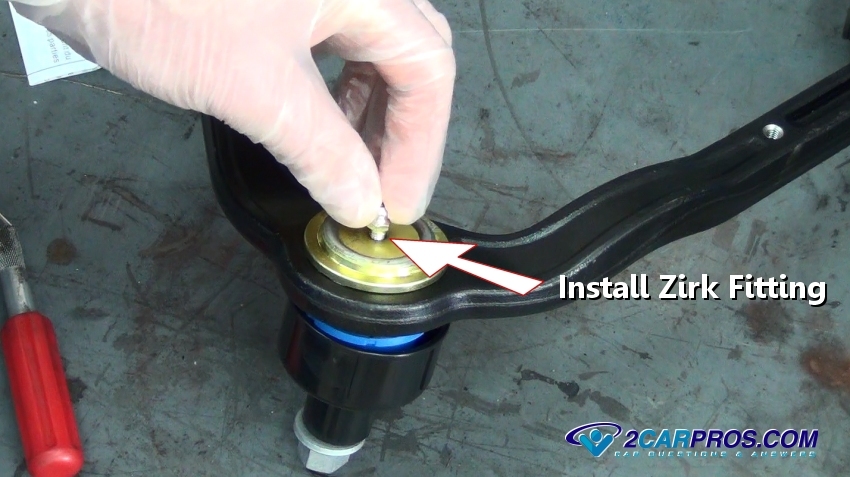
Step 11 - Some control arms are designed using zirk fittings to allow lubricant (grease) to be installed.

Install Zirk Fitting
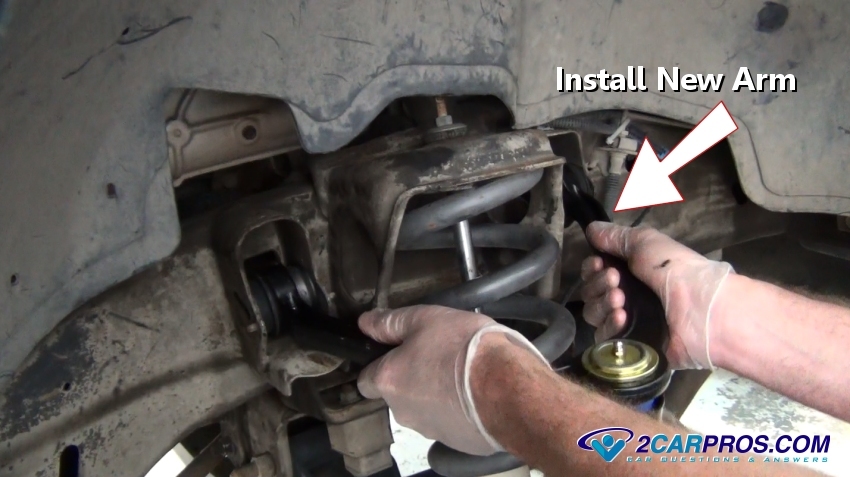
Step 12 - Install the new control arm into the frame mounts.

Install New Control Arm
Step 13 - While aligning the bolt holes install both mounting bolts.

Reinstall Bolts
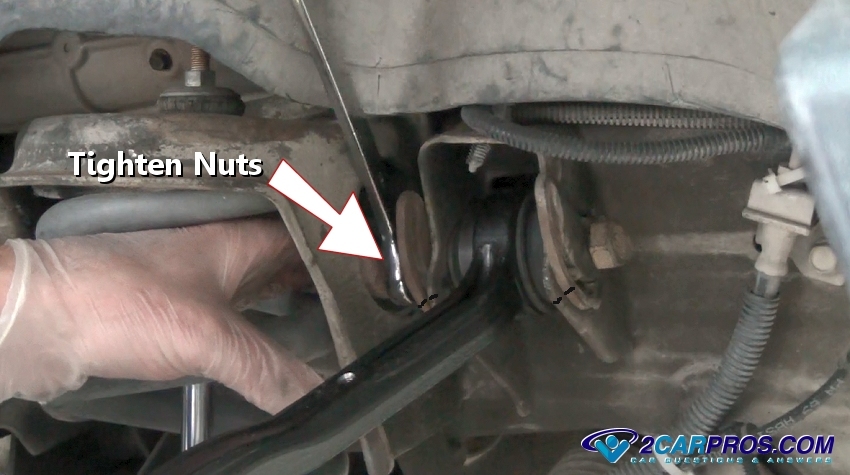
Step 14 - Using a wrench or socket to tighten the both mounting bolts while keeping the alignment adjusters or shims in place.

Tighten Nuts
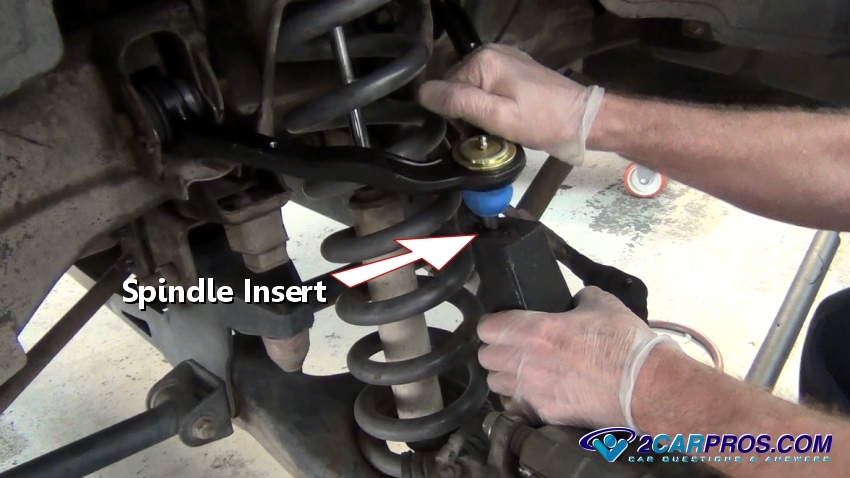
Step 15 - Insert the upper ball joint into the upper spindle bulk head, use a hammer and gently tap the tapper fit into place which will keep the stud from turning while installing the nut.

Spindle Insert Control Arm
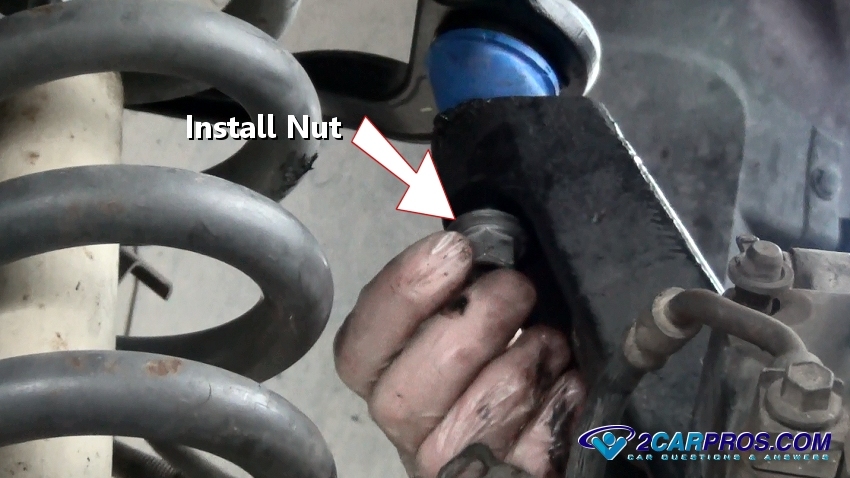
Step 16 - Install the upper ball joint nut by hand to avoid cross threading.

Install Ball Joint Nut
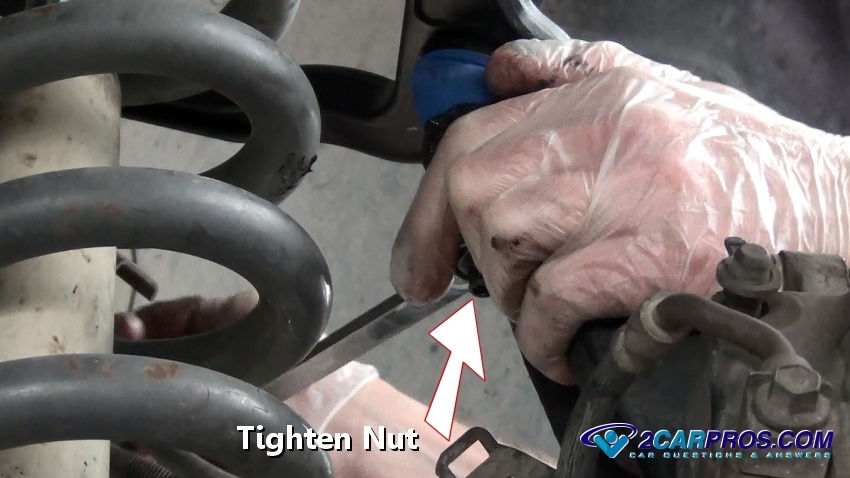
Step 17 - Use a wrench to tighten the upper ball joint mounting bolt and reinstall a new cotter pin (if needed).

Tighten Upper Ball Joint Nut
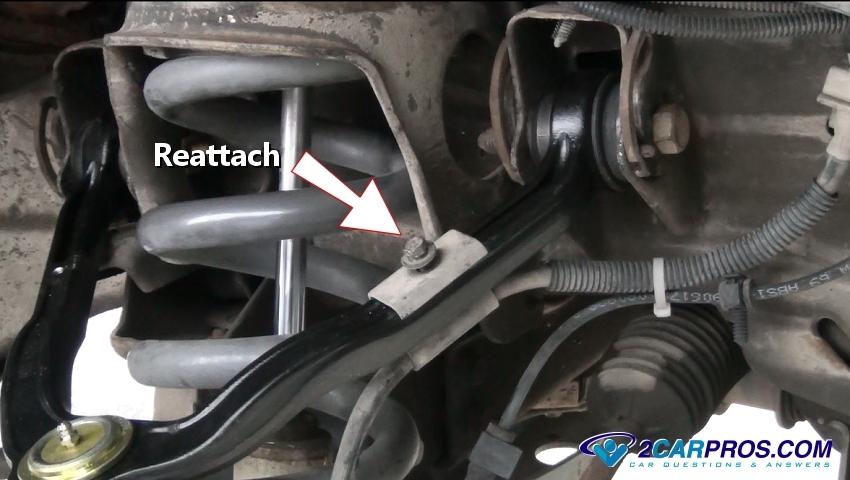
Step 18 - Reattach any holders or clips removed in the repair.

Reattach Brake Hose Mount
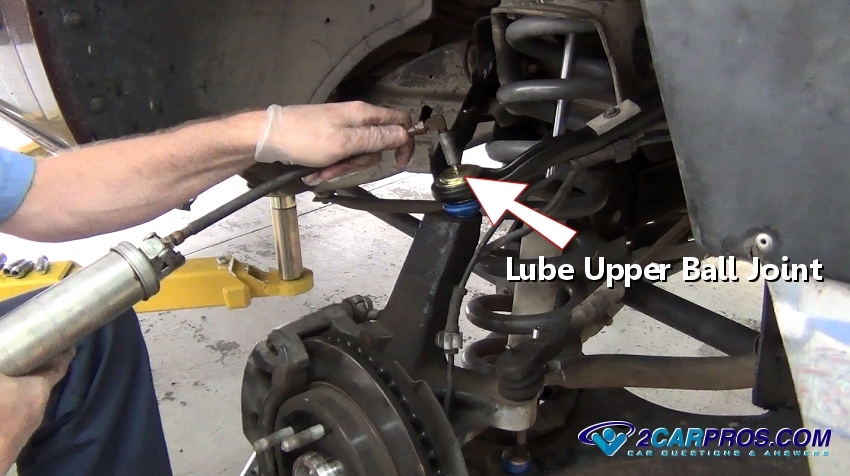
Step 19 - Once the job is complete lube the upper ball joint.

Lube Upper Ball Joints
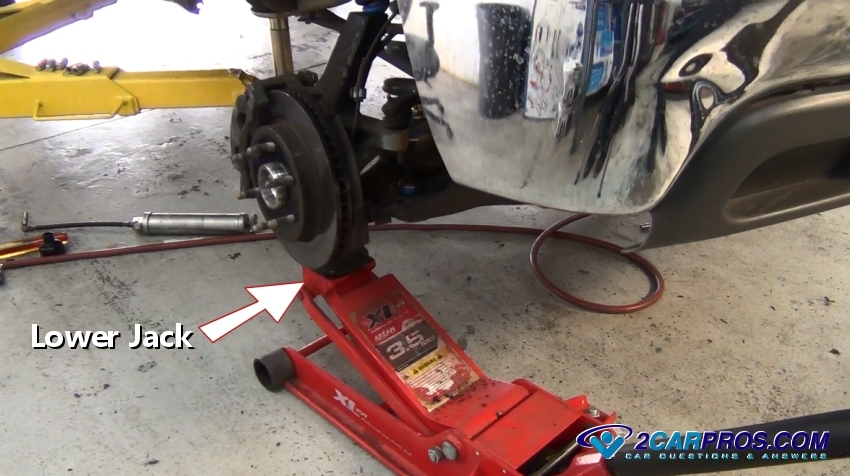
Step 20 - Lower the hydraulic jack and reinstall the wheel, torque lug nuts to factory specifications (about 75 pounds).

Lower Jack
Step 21 - After the job is complete the vehicle should be realigned and test driven.

Upper Control Arm
Jack Lift On Lower Ball Joint
Step 2 - After removing the cotter pin (if equipped) use a wrench to loosen the upper ball joint nut, about 3 turns.
Loosen Upper Ball Joint
Push Down Pry bar
Hammer Strike
Remove Ball Joint Nut
Separate Control Arm
Mark Adjustments
Loosen Nut
Bolt Removed
New Upper Control Arm
Install Zirk Fitting
Install New Control Arm

Reinstall Bolts
Tighten Nuts
Spindle Insert Control Arm
Install Ball Joint Nut
Tighten Upper Ball Joint Nut
Reattach Brake Hose Mount
Lube Upper Ball Joints
Lower Jack


Comments
Post a Comment