How To Service Automatic Transmission
Automatic Transmission Service
Step by step service guide on how to service an automatic transmission, this article pertains to most vehicles but was performed on a 2002-2007 Saturn Vue.
Difficulty Scale: 3 of 10
Tools and Supplies Needed
Helpful Information
Changing the fluid in the automatic transmission in your vehicle promotes proper operation and helps the transmission last longer without failure. All car manufacturers have different service intervals for their particular transmission. In a typical transmission service, the fluid is completely flushed (including the torque converter), a filter is changed, the transmission pan is cleaned and a new pan gasket installed.
Common Problems
Step 1 - Locate transmission drain plug or fluid pan.

Locating Transmission Drain Plug
 Step 2 - Once located loosen the drain plug and get ready for the fluid to drain out by having a catch basin ready for the old fluid.
Loosen Drain Plug
Step 3 - After the drain plug has been removed the used fluid will pour out. Have a catch basin ready.

Old Transmission Fluid Draining Out
Step 4 - While the Fluid is draining, inspect and clean the magnet used to trap metal floating around in the transmission.
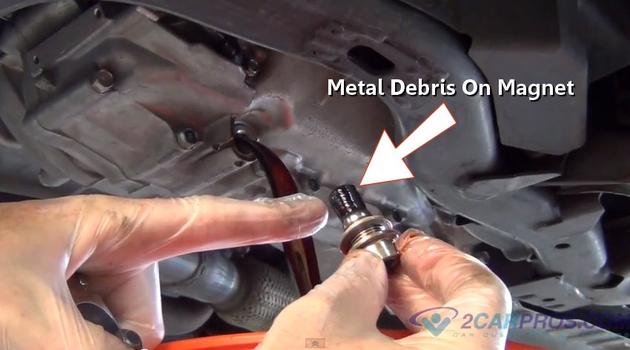 Removing Metal Debris From drain Plug Magnet
Step 5 - Once the fluid has finished draining and the particle magnet is clean, reinstall the drain plug and tighten.
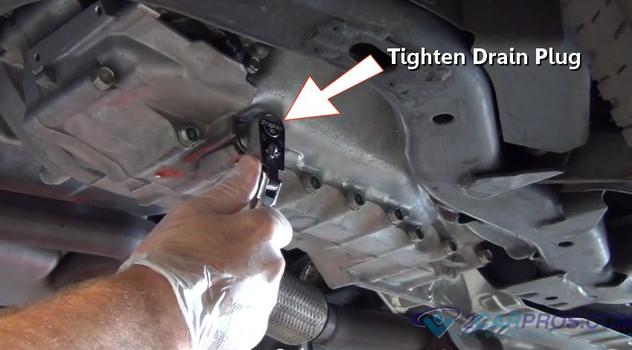
Tightening Drain Plug
Step 6 - After the drain plug has been tightened, locate the transmission fluid fill tube which also houses the fluid dip stick.
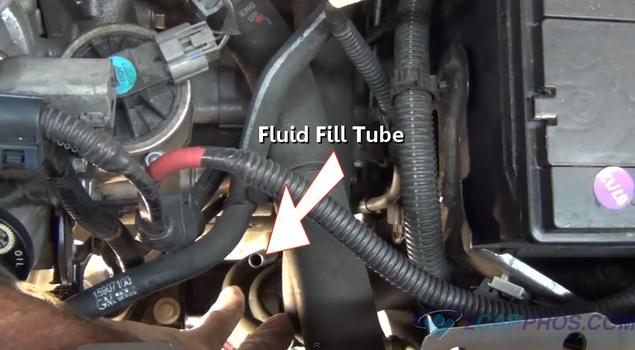
Fluid Fill Tube
Step 7 - Using a funnel to refill the transmission with fluid.
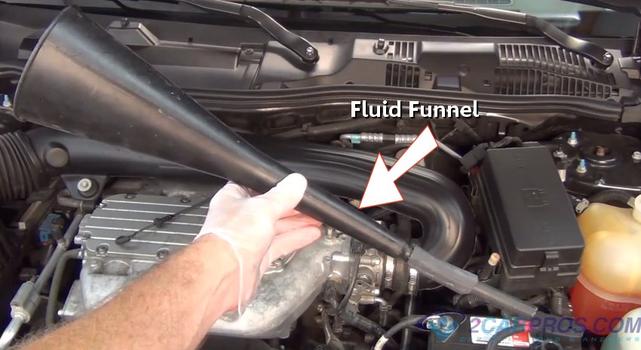
Transmission Fluid Funnel
Step 8 - After the funnel is in place new fluid can be installed

New Automatic Transmission Fluid
Step 9 - Install new transmission fluid to its proper level by using the dip stick. Start with 4 quarts and then recheck the system.

Installing New Transmission Fluid
Transmission Service with Pan and Filter Replacement
Some automatic transmissions have a service pan that houses the transmission filter. This transmission has a heat shield to keep heat from the exhaust away from the transmission. Some transmission pans have a fluid drain plug used to drain the fluid. Insert drain plug removal tool and turn counter clockwise. Loosen the drain plug until easily removed by hand. Some transmissions do not have a drain plug. In this case the fluid will exit when the transmission pan is removed.

Automatic Transmission Pan
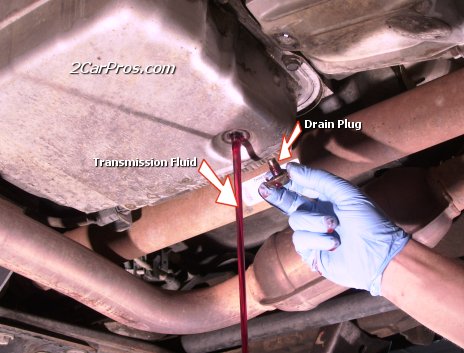
Remove Drain Plug
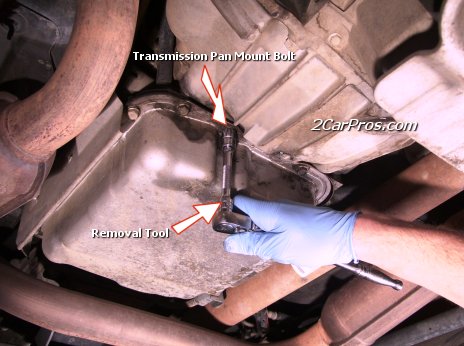
Remove Pan Bolts
When the fluid is finished draining, remove transmission pan mounting bolts. Remove all but two bolts to hold pan in place.
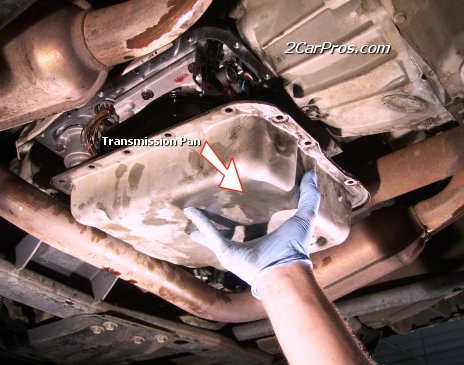
Lowering Transmission Pan
When all but two bolts remain, place your hand under the transmission pan and remove the remaining bolts. Gently lower the pan from the car. You may have to move a heat shield or gear selector cable mount to remove the pan.
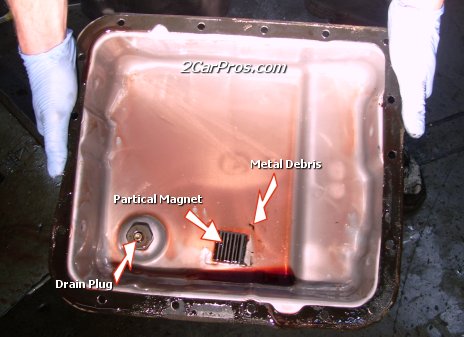
Inspecting Transmission Pan for Metal Chips and Clutch Material
When the fluid pan is removed, inspect the pan for metal debris. All transmissions have some metal in the pan but excessive metal can mean more serious problems. The transmission in this example was maintained properly and has little metal in the pan. A particle magnet traps metal keeping it away from moving internal parts.
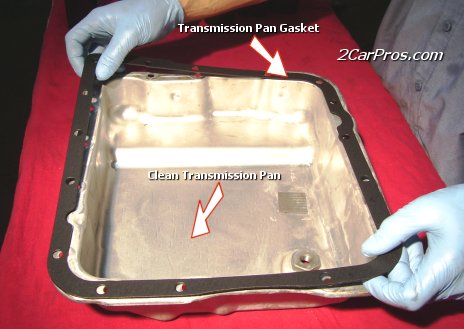
Installing Transmission Pan Gasket
Before fitting your new gasket to the transmission pan, clean the pan magnet completely. Some gaskets are manufactured with gasket sealer built right in like the one in the diagram above. If a gasket is made of cork or some other style of gasket, you will need a gasket fastening cement before installation
.
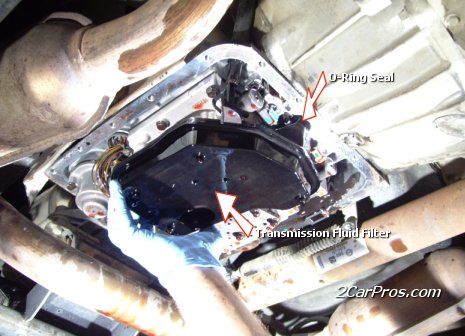
Removing Used Transmission Filter
Some filters are secured to the transmission with bolts or clips. The transmission filter in this photo is held in by an o-ring seal at the front of the filter. Grasp the transmission filter firmly and twist to remove, fluid will be present in the filter.

Cleaning Gasket Surface
Before re-installing transmission pan; clean the gasket sealing surface with a gaskets scraper and shop towel. This enables a secure seal to the new gasket when the pan is reinstalled. While the transmission pan is removed inspect the electrical connection to the shift control solenoids. The control solenoids determine what gear the transmission is operating in and are housed in the valve body. All electrical connectors inside the transmission should be secure for proper operation.
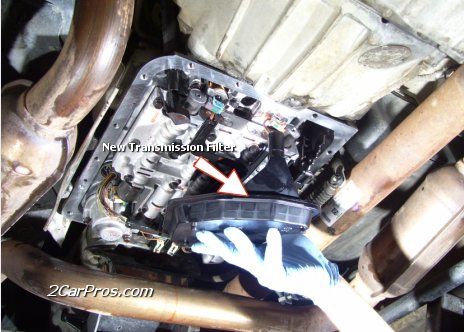
Installing New Transmission Fluid Filter
Always replace the seal for the transmission filter. As with most seals, its important that this seal does not leak. If the transmission filter seal leaks it can cause the transmission to ingest air causing low transmission hydraulic pressure. This causes the clutch disc's to slip and can cause premature failure. Reinstall filter in its proper location, re-bolt or re-clip as needed.
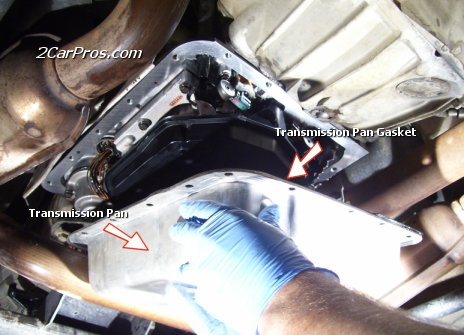
Re-Installing Automatic Transmission Pan
Carefully reinstall the transmission pan, do not damage the gasket on reassembly or transmission fluid might leak. Reinstall bolts and tighten them in sequence one away from the other and continue until all pan bolts are snug. (Note: do not over tighten gasket.)

Locate and Remove Automatic Transmission Level Dip Stick

Adding Transmission Fluid Using a Funnel
Insert fluid funnel and add transmission fluid until the proper amount of fluid level is reached.
- Transmission fluid
- Transmission filter service kit (if equipped)
- Socket set
- Fluid funnel
- Protective eyewear and gloves
- Premature transmission failure due to lack of maintenance, low fluid, dirty filter.
- Manual transmission: premature clutch failure due to abusive driving habits.
- Allow the engine to warm and recheck the fluid level.
- Do not overfill the transmission, it could cause the fluid to foam which can cause premature transmission failure.
- Recheck transmission for leaks and recheck fluid level in a couple of days.
- When refilling, use manufacturer specified fluids.
Step 1 - Locate transmission drain plug or fluid pan.

Locating Transmission Drain Plug
 Step 2 - Once located loosen the drain plug and get ready for the fluid to drain out by having a catch basin ready for the old fluid.
Old Transmission Fluid Draining Out
Step 4 - While the Fluid is draining, inspect and clean the magnet used to trap metal floating around in the transmission.
 Removing Metal Debris From drain Plug Magnet
Tightening Drain Plug

Fluid Fill Tube

Transmission Fluid Funnel
Step 8 - After the funnel is in place new fluid can be installed

New Automatic Transmission Fluid

Installing New Transmission Fluid

Automatic Transmission Pan

Remove Drain Plug

Remove Pan Bolts

Lowering Transmission Pan

Inspecting Transmission Pan for Metal Chips and Clutch Material

Installing Transmission Pan Gasket
.

Removing Used Transmission Filter

Cleaning Gasket Surface

Installing New Transmission Fluid Filter

Re-Installing Automatic Transmission Pan
Carefully reinstall the transmission pan, do not damage the gasket on reassembly or transmission fluid might leak. Reinstall bolts and tighten them in sequence one away from the other and continue until all pan bolts are snug. (Note: do not over tighten gasket.)

Locate and Remove Automatic Transmission Level Dip Stick

Adding Transmission Fluid Using a Funnel
Thanks for your informative article about how to perform automatic transmission service. I love how you have photographs for each step. You make a great point about how after draining the old transmission fluid you don't want to overfill the transmission. As you said, this can cause foaming and lead to ultimate transmission failure. Making sure that you do regular maintenance on your automatic transmission can help reduce repairs and keep your car running smoothly. Thanks for the great post. http://www.albertatransmission.ca/en/automatic_transmission_repair.html
ReplyDelete