How To Tue-up A Car Engine?
Car Engine Tune up
Helpful Information
Vehicles are equipped with many different styles of ignition systems, but all follow the same principle. A tune up is needed between 35,000 to 75,000 miles depending on driving conditions and car manufacturers recommendations. Before starting, determine the individual tune up parts. When performing a tune up avoid contact with undesirable components such as exhaust manifolds, serpentine belts etc.)
Most spark plug gaps are pre-set and ready to install. Replace spark plug wires individually to avoid confusion, mark the wires clearly while confirming proper length of each wire, twist the wire boot to help break the seal which will assist in the wire removal. Inspect coil output terminals for corrosion as this will hinder performance.
The spark plug gap is important because it determines the amount of resistance used to "time" the ignition system. An incorrect spark plug gap can cause low powerand poor mileage.
The condition called "coking" can cause stalling as well as variable idle ranges.
Tools and Supplies Needed
- Spark plug socket
- Ratchet
- Extensions
- Carburetor cleaner
- Shop towels
- Fuel filter release tool (some models)
- Spark plugs
- Fuel filter
- Air filter
- Plug wire set (some models)
- Screwdriver set
- Protective gloves and eyewear
- Remove debris from the spark plug well using compressed air.
- Inspect the new spark plug porcelain and isolator before installing.
- Use OEM (original equipment manufacturer) parts to ensure proper performance.
Easy step by step guide on how to tune up an automotive internal combustion engine, though each engine configuration is different, the process is the same.
Difficulty Scale: 5 of 10
Begin with the car on level ground, in park with the emergency brake set.
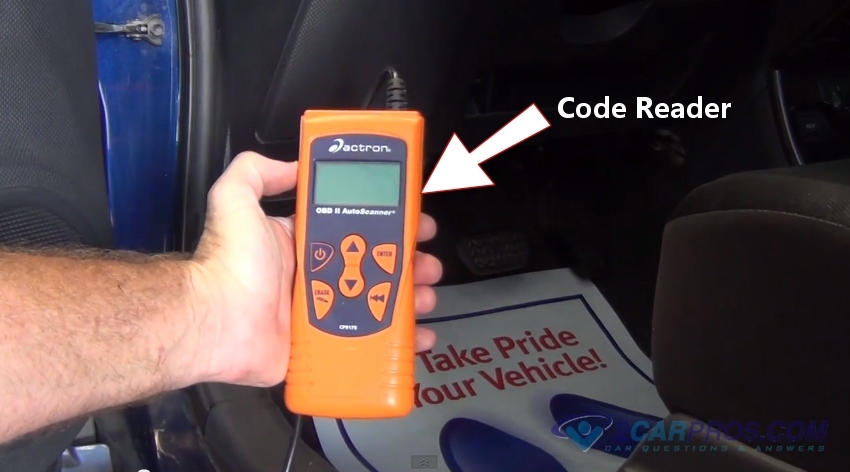
Step 1 - Many times an engine tune up can be accompanied by a check engine or service engine soon light. If this is the case, connect a trouble code reader to retrieve diagnostic trouble codes to isolate the misfiring cylinder or malfunctioning system.

Code Reader
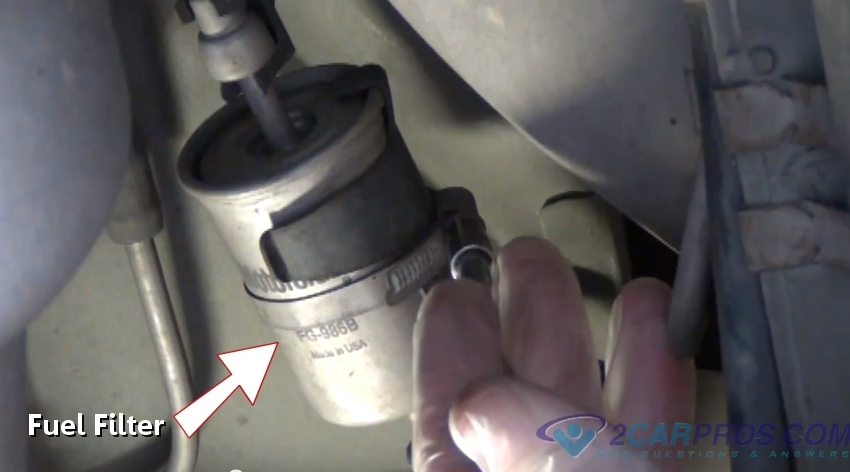
Step 2 - A fuel filter is used to clean fuel before it enters the fuel injection system. This filter should be replaced within an engine tune up. (Note: Some vehicles are not equipped with the an external filter, these vehicles filter is located inside the fuel tank and are good for the life of the car in most cases.)

Fuel Filter
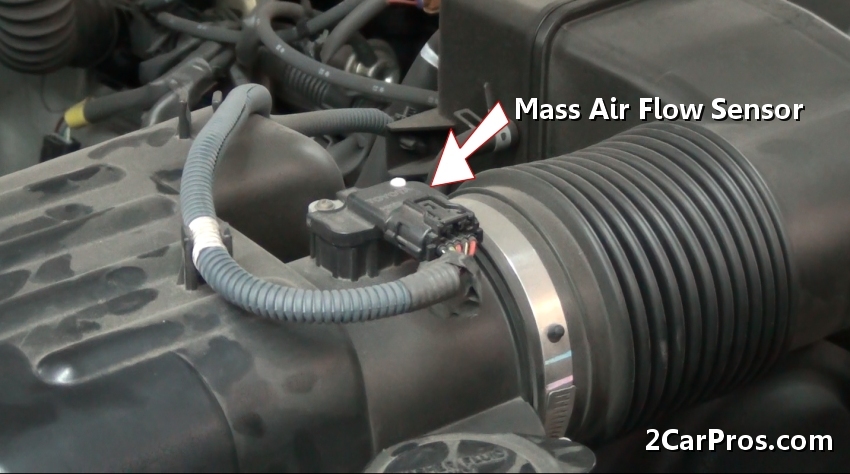
Step 3 - A mass air flow sensor measures engine air intake volume while generating data for the computer. This sensor processes large amounts of air and after many miles of usage, the sensor element becomes contaminated and must becleaned using a sensor safe carb spray.

Mass Air Flow Sensor
Step 4 - An engine air filter is designed to remove dirt and other contaminants from the air intake system, inspect and replace the air filter.

Engine Air Filter
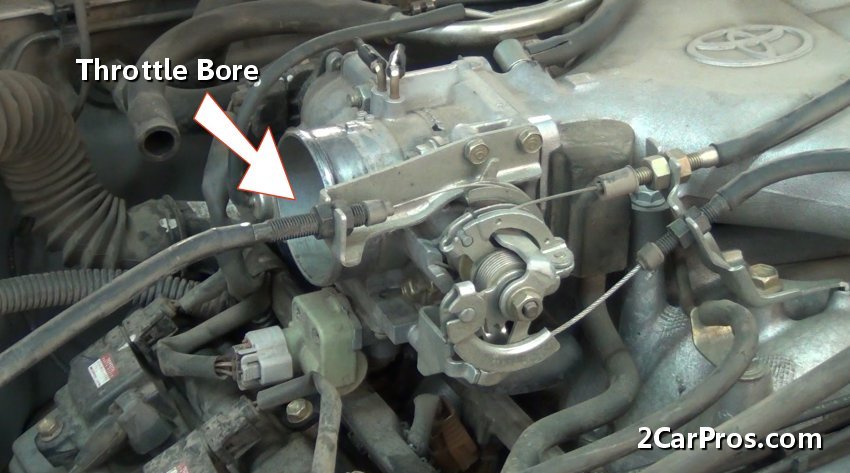
Step 5 - A throttle bore actuator is used to control air flow into the engine's intake manifold, and onto each cylinder. Manually controlled units (throttle cable) use an idle air control valve (IAC) to adjust engine idle speed. These devices process large amounts of air much like the mass airflow sensor. After many miles of operation a condition called coking occurs which hinders performance characteristics. These items must be serviced (cleaned) to operate correctly.

Engine Throttle Bore w/Idle Air Controller
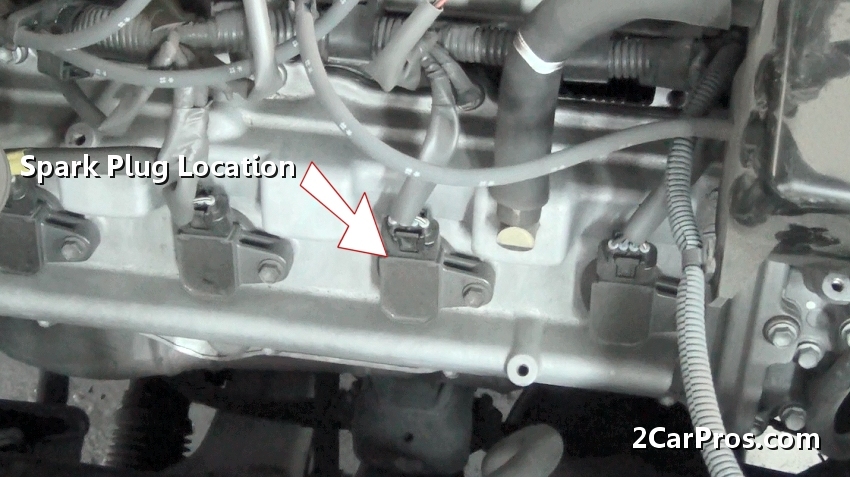
Step 6 - A spark plug is used to ignite the fuel air mixture inside the engine's combustion chamber via the ignition coil. Begin by locating the spark plug and spark plug wire or coil, (COP, coil over plug.)

Spark Plug Location - Coil Over Plug (COP)
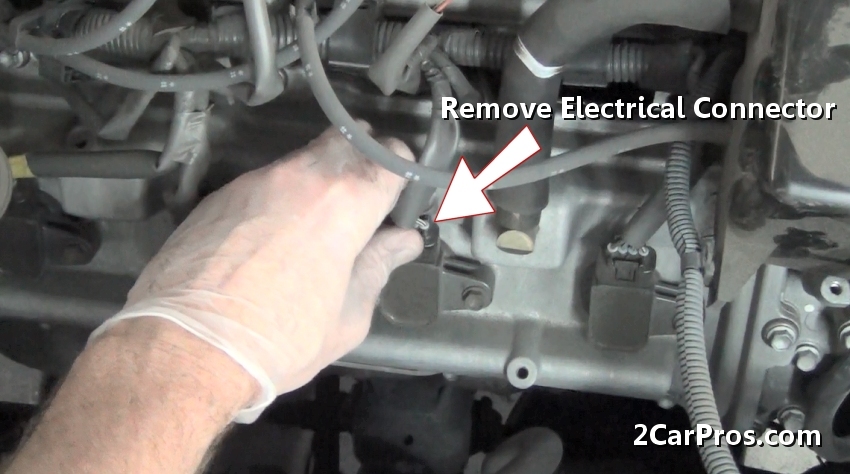
Step 7 - After the spark plugs have been located, remove the ignition coil electrical connector.

Remove Coil Connector
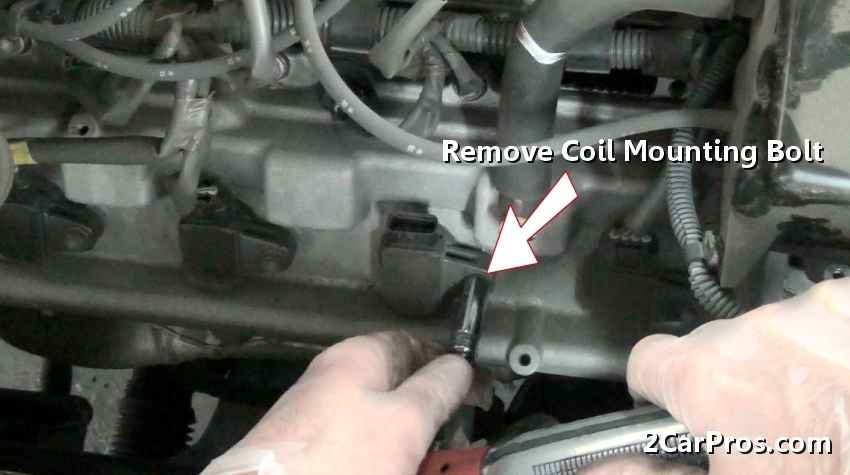
Step 8 - Once the electrical connector has been removed, located and remove the coil mounting bolt.

Removing Coil Mounting Bolt
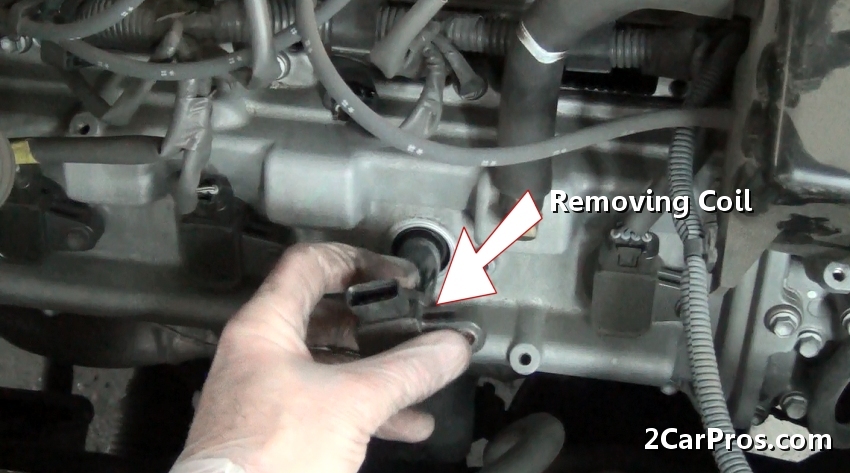
Step 9 - Then, gently remove the ignition oil from the spark plug well, while talking note of any coil damage or motor oil. (Note: If motor oil is present the valve cover gaskets has failed.)

Removing Ignition Coil
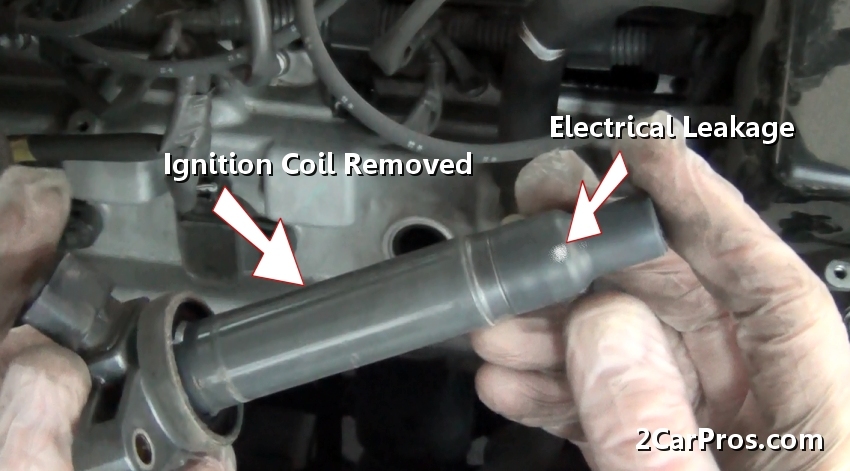
Step 10 - After the coil has been removed, inspect the coil for dark or light markings which indicates electrical leakage failure and must be replaced.

Ignition Coil Removed
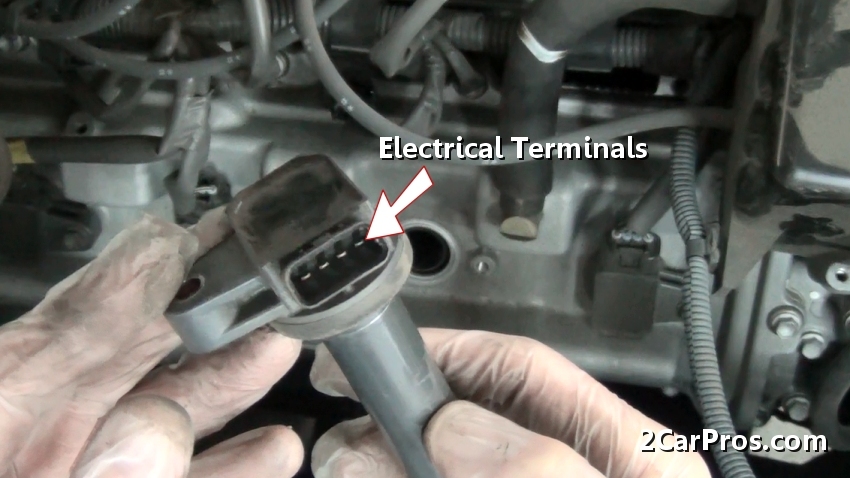
Step 11 - Inspect coil electrical terminals for corrosion or signs of heat which indicates failure.

Coil Electrical Terminals
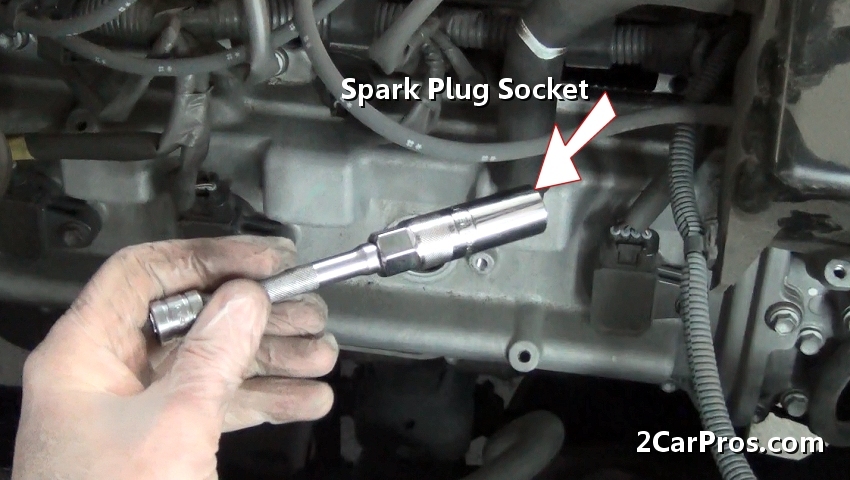
Step 12 - Once the coil has been removed, use a spark plug socket and extension to remove the spark plug. (Note: A spark plug socket is rubber lined as to not damage the plug.)

Spark Plug Socket
Step 13 - Using a socket wrench, turn the plug counterclockwise to remove it from the well.

Removing Spark Plug
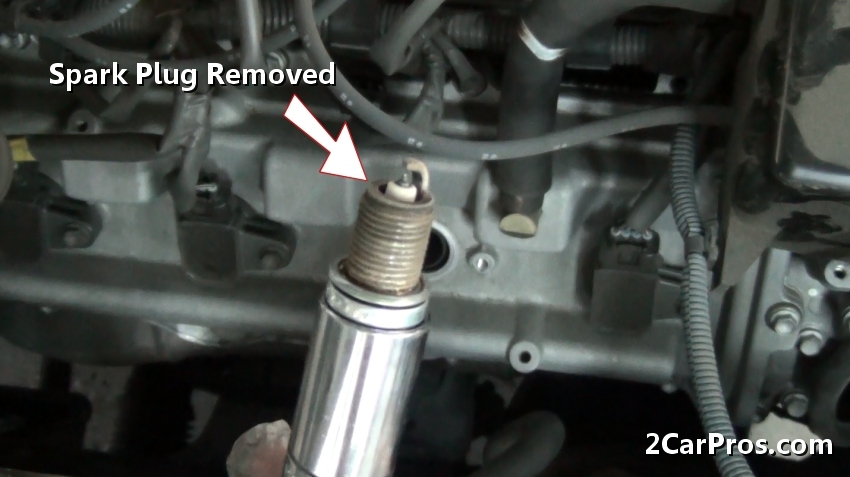
Step 14 - After loosening the plug, carefully remove it to inspect. This inspection can give information on how that particular cylinder is running. If the plug is white, or slightly yellow with little flecks of gray or black the cylinder is running pretty well. If the plug is wet with fuel, the cylinder is not firing, this could be low compression or a faulty ignition coil. If the plug is covered in black soot, the mixture is extremely rich indicating a vacuum leak or a misfire on opposing cylinders.

Spark Plug Removed
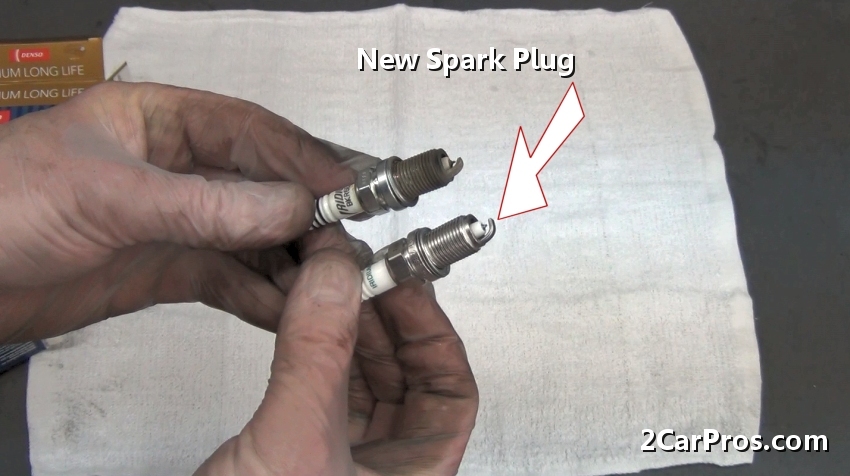
Step 15 - Once removed, match the new replacement spark plug to the old plug. Its important to install the correct plug or the engines performance will be hindered. Also check the plug "gap" which should be consistent and to the manufacturer recommendations.

New Spark Plug
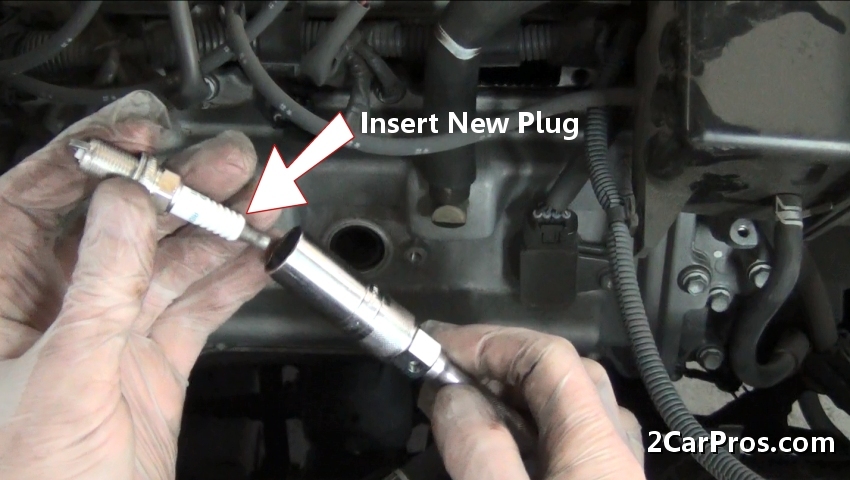
Step 16 - After the right plug has been identified, with the correct gap measurement, gently insert the plug into the socket.

Insert New Spark Plug
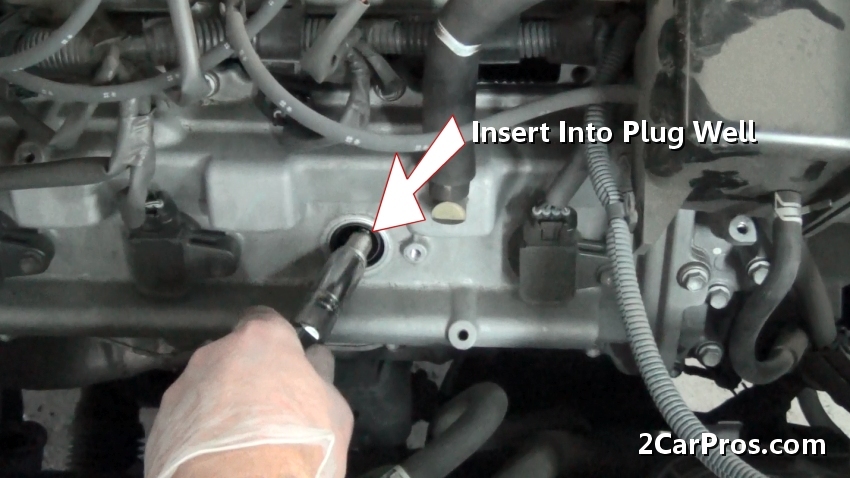
Step 17 - Next, gently lower the spark plug down in to the plug well. This is an important step because if the plug is bounced, or dropped, it can close the plug gap or damage the plug causing a misfire or poor performance.

Insert Spark Plug Into Plug Well
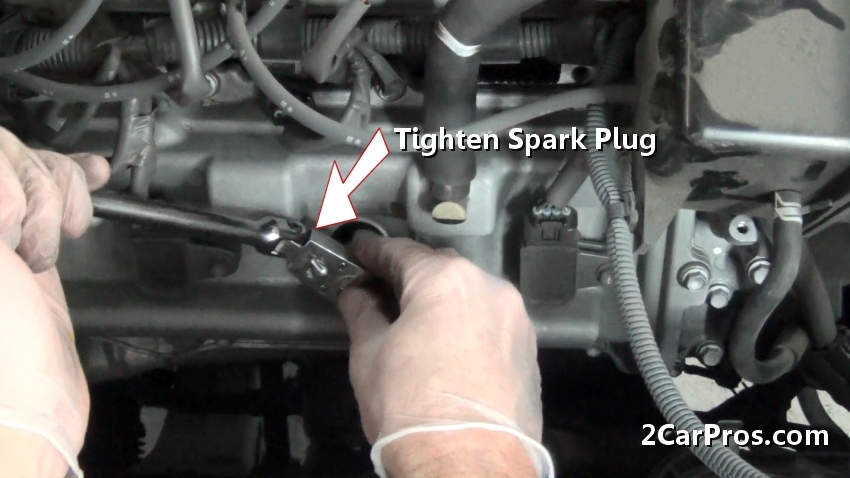
Step 18 - Once successfully lowered into the plug well and rolled in by hand, attach a ratchet and tighten the plug. The tighten specification can vary, but a general rule of thumb is to crush the sealing ring about half way.

Tighten Spark Plug
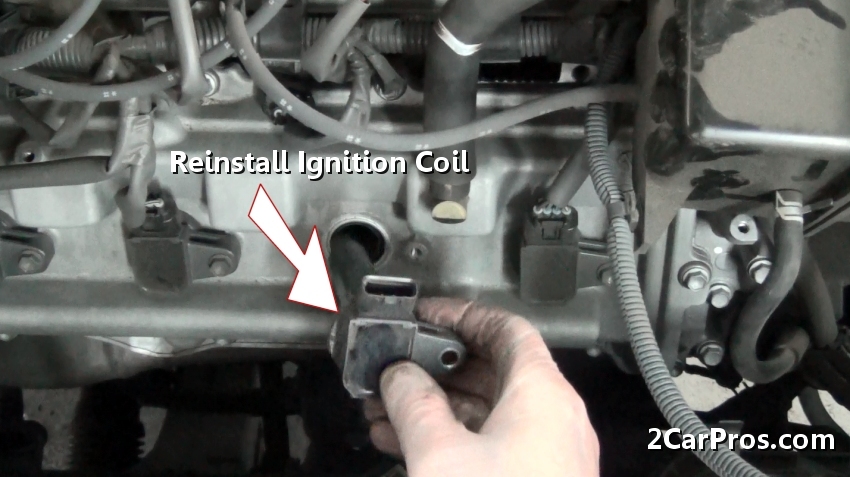
Step 19 - After the spark plug is tight, reinstall the coil into the plug well, making sure the end of the coil is over the spark plug.

Reinstall Ignition Coil
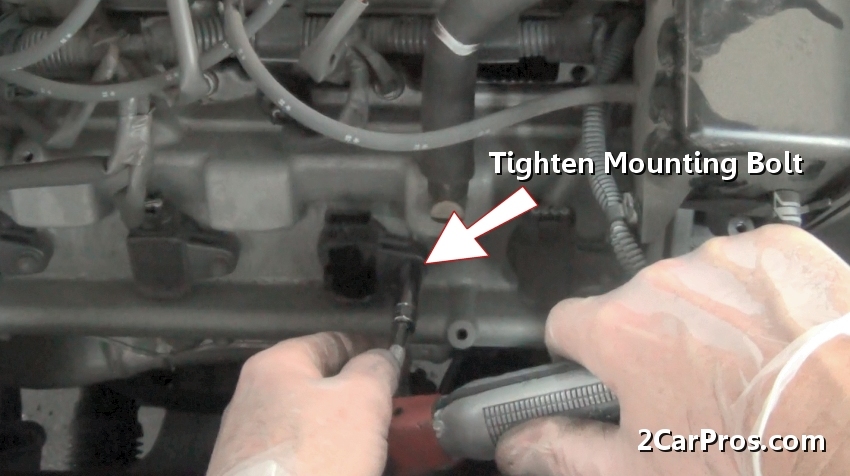
Step 20 - Then, install the coil mounting bolt and tighten.

Tighten Coil Mounting Bolt
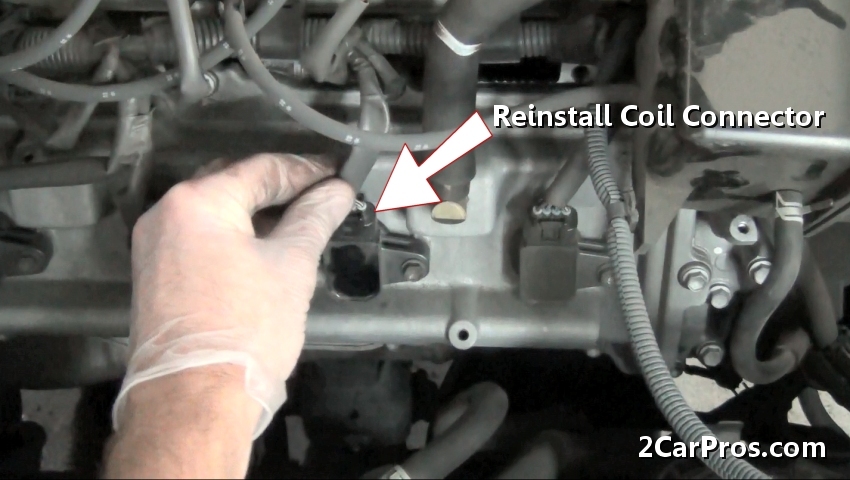
Step 21 - After the coil mounting bolt is tight, reinstall the coil electrical connector and repeat this process throughout the remaining engine cylinders.

Reinstalling Coil Electrical Connector
Once completed, start the engine and observe the performance, if obvious problems exist retrace the previous steps to discover a damaged spark plug, ignition coil, or plug wire not correctly installed.
Code Reader
Fuel Filter
Mass Air Flow Sensor

Engine Air Filter
Engine Throttle Bore w/Idle Air Controller
Spark Plug Location - Coil Over Plug (COP)
Remove Coil Connector
Removing Coil Mounting Bolt
Removing Ignition Coil
Ignition Coil Removed
Coil Electrical Terminals
Spark Plug Socket

Removing Spark Plug
Spark Plug Removed
New Spark Plug
Insert New Spark Plug
Insert Spark Plug Into Plug Well
Tighten Spark Plug
Reinstall Ignition Coil
Tighten Coil Mounting Bolt
Reinstalling Coil Electrical Connector


Comments
Post a Comment