How To Use An Engine Vacuum Gauge?
Vacuum Leak Test
Troubleshooting Engine vacuum Leak Issues
Helpful Information
Most internal combustion engine's hold between 15 and 18 inches of vacuum when idling. This condition varies as the engine is loaded, the amount of vacuum is measured by a combination of sensors such as mass air flow (MAF) and throttle position (TPS) or directly using a manifold absolute pressure (MAP) sensor. Engine vacuum is a large factor in the equation of fuel management which is determined by the computer. To aid in the discovery of a vacuum leak an audible hiss or whistle sound might be heard which will help pinpoint the problem.
Engine vacuum is used to operate several accessories such as the power brake, climate control, (heater, air conditioner) and cruise control systems. Engine pistons create vacuum on their downward stroke which allows the air/fuel mixture to be delivered into the combustion chamber. (Air only in direct injection engines.) Symptoms of an engine vacuum leak include: check engine light, low idle, high idle, poor acceleration, cylinder misfire and stalling at idle.
Easy step by step guide on how to detect and fix an automotive engine vacuum leak, this information pertains to most vehicles.
Difficulty Scale: 2 of 10
Begin with the engine cool on level ground with the emergency brake set, also wear protective eye wear, gloves and clothing. Carburetor cleaner is flammable so use caution when testing, have a fire extinguisher ready. (Note: Never spray exhaust manifolds.)
Step 1 - Inspect vacuum hoses for dilapidation or cracks, this will cause the engine to stall, idle poorly and hurt gas mileage.

Vacuum Leak
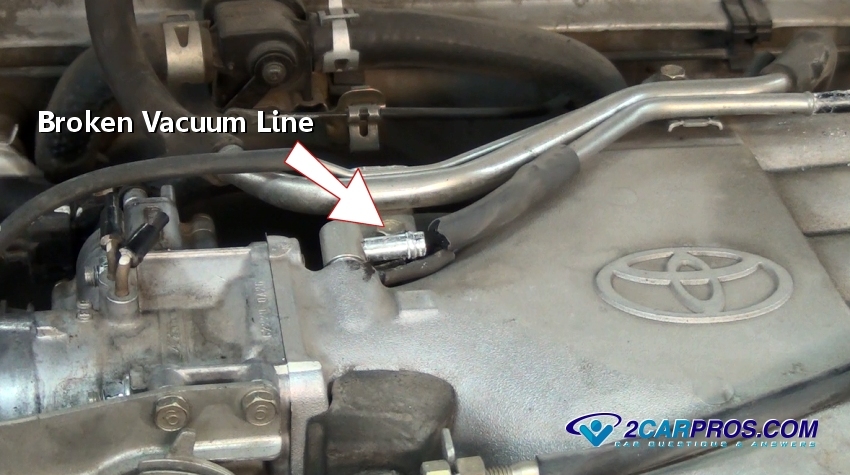
Step 2 - Vacuum lines can become hard due to under hood temperatures which produce an unwanted vacuum leak.

Broken Vacuum Line
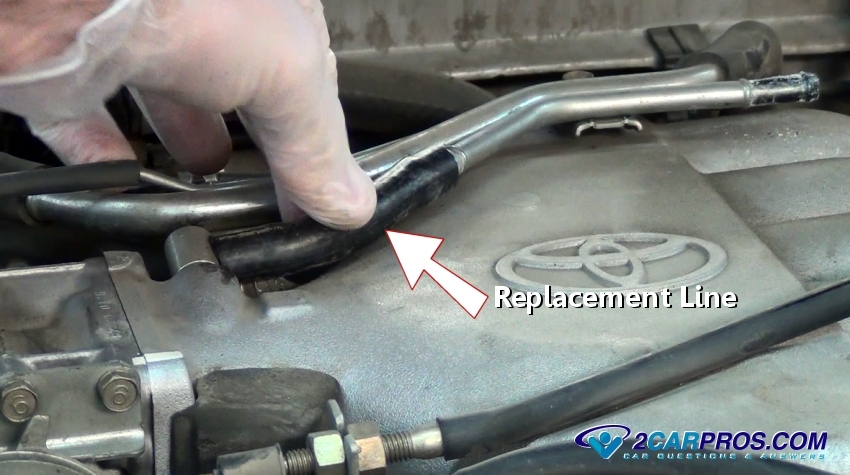
Step 3 - After removing the old vacuum line and check for blockage, install a new replacement hose, this can be done by using vacuum or fuel hose.

Replacement Vacuum Line
Step 4 - If after inspection, no broken vacuum lines are found carburetor cleaner can be used to further inspect for leaks.

Carburetor Cleaner
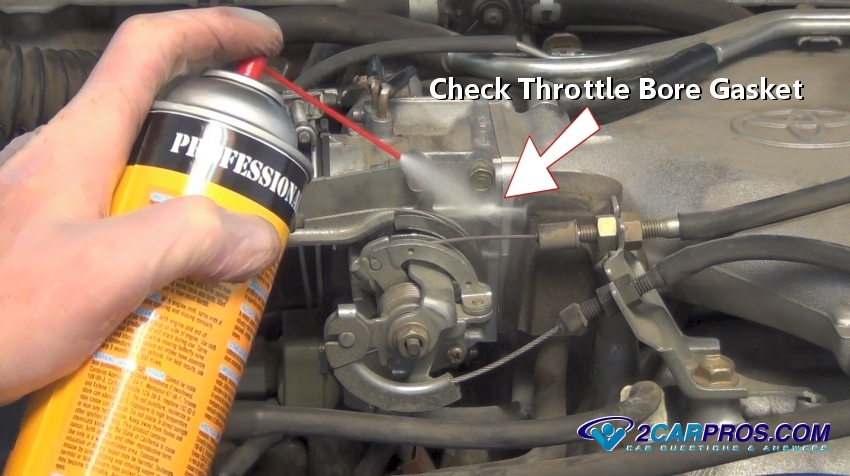
Step 5 - After starting the engine and allowing it to idle, spray the cleaner near and around the throttle bore gasket, if the gasket has failed the engine will react to the spray by increasing the engine idle speed as the cleaner is burned. If the engine is idling rough it will temporarily smooth out as the cleaner is consumed.

Checking Throttle Bore Gasket
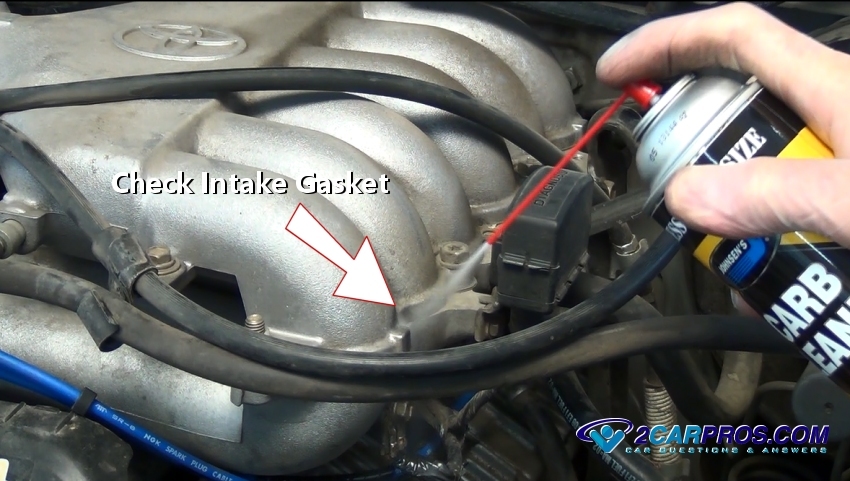
Step 6 - Continue testing by spraying around the intake manifold plenum and base gaskets while observing engine speed, if the gasket has failed the engine speed will increase.

Checking Intake Manifold Gasket
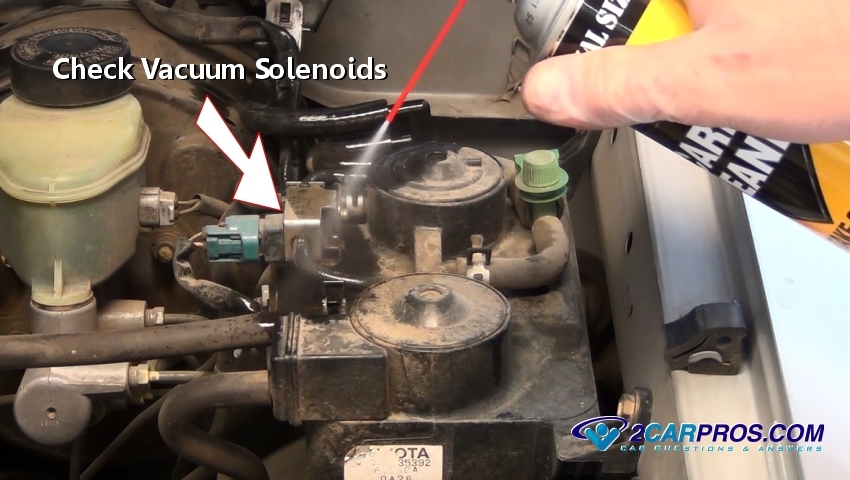
Step 7 - Moving on to external components such as EVAP control solenoids, valves and connections while still observing engine speed.

Checking Vacuum Solenoids
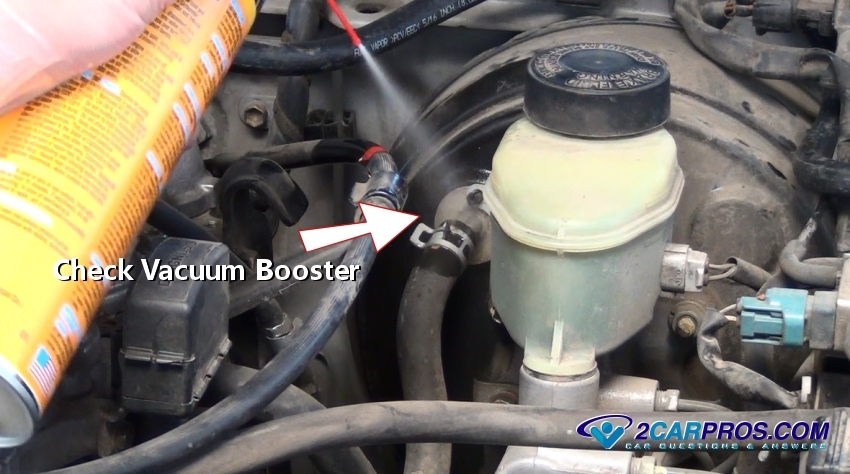
Step 8 - A large amount of vacuum is used to work the brake booster and can allow major leaks, spray around the booster while observing engine speed. Also, an audible hissing noise can sometimes be heard coming from around the brake pedal when the brakes are applied which also indicates the booster has failed. An alternative method of a vacuum leak inspection is to pinch a supply line to the accessory and observe engine speed, an increase indicates a leak.

Check Vacuum Brake Booster
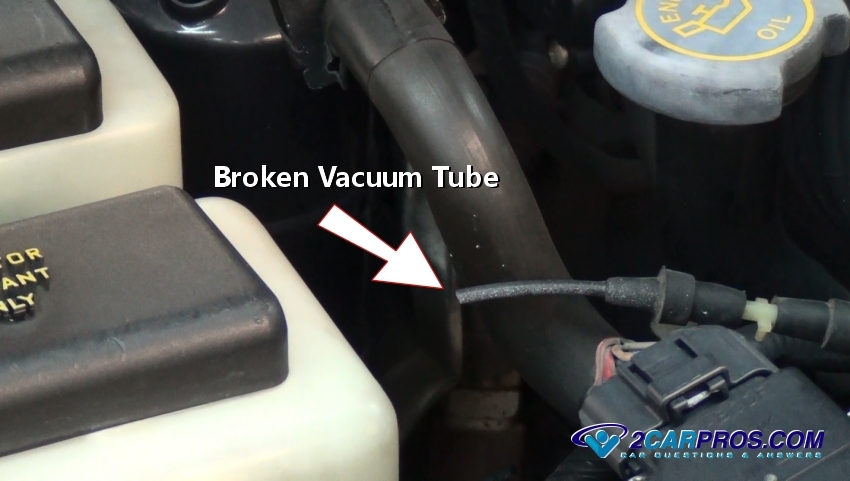
Step 9 - Check small vacuum tubes for cracks and broken pieces, these tubes provide vacuum to many accessories such as the heater/air conditioner, leaks under the dashboard near the heater plenum can also occur.

Broken Vacuum Tube
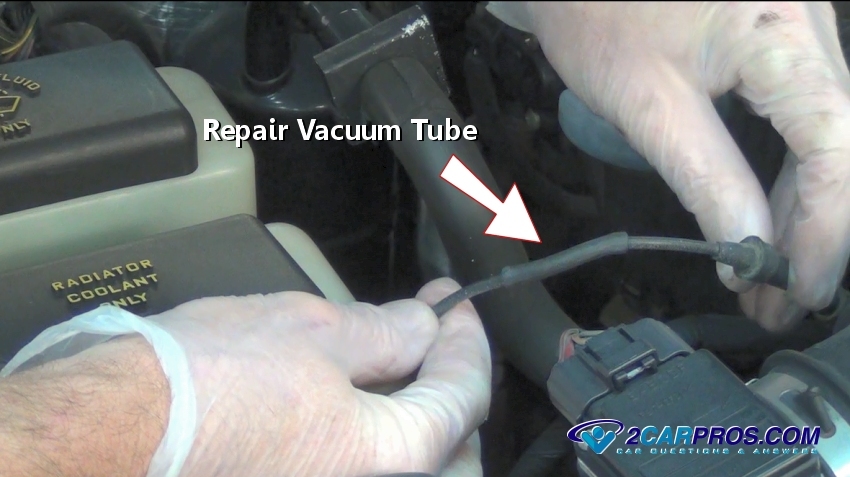
Step 10 - Use a small piece of vacuum line to act as a connector which will repair the issue and return the heater/defroster/air conditioner to it proper operation.

Repair Vacuum Tube
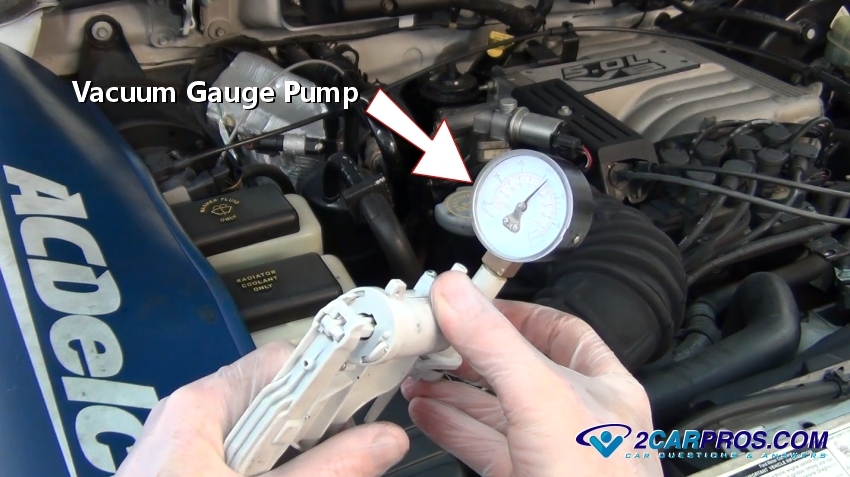
Step 11 - A vacuum gauge or tester can be used to check an external system for additional leakage. This is done by disconnecting the vacuum tube from the vacuum source (engine) and attaching it to the tester. Pump the tester and observe the vacuum, it should hold vacuum if the system is working properly. (Note: A small amount of seepage is normal.)

Vacuum Gauge Tester

Vacuum Leak
Broken Vacuum Line
Step 3 - After removing the old vacuum line and check for blockage, install a new replacement hose, this can be done by using vacuum or fuel hose.
Replacement Vacuum Line

Carburetor Cleaner
Checking Throttle Bore Gasket
Checking Intake Manifold Gasket
Checking Vacuum Solenoids
Check Vacuum Brake Booster
Broken Vacuum Tube
Repair Vacuum Tube
Vacuum Gauge Tester


Comments
Post a Comment