How To Replace Vehicle Heater Core
Helpful Information
The heater core is similar to the radiator located in the vehicle’s cooling system
. The blower motor forces air through the core and into the air duct system allowing temperature controls which enable defrost floor and front vent modes. The most common cause of heater core problems is neglect, cooling systems need to be serviced on a regular basis, coolant can become corrosive and will cause deterioration of the core.Use caution when installing the heater core, these units are made of thin metal and plastic and are easily broken. Use a digital camera/phone to take pictures during the disassembly process, this will aid in reassembly if things get complicated. The glove box will need to be removed in most cases to allow access. Some plenums have a small door, others will have to be disassembled to gain access to the heater core.
Best Practices
- Always use a quality replacement heater core.
- Check the condition of the heater hoses.
- After disconnecting the battery, allow a minimum of 10 minutes before working around the air bag system.
- Ensure the roundness of the heater core hose fittings to help provide a proper seal.
Step by step guide on how to replace an automotive heater core, though each car is different in complexity, these steps outline the basic procedure.
Difficulty Scale: 6 of 10
Tools and Supplies Needed
- Replacement heater core
- Coolant
- Hose clamps
- Fluid catch basin
- Socket set
- Wrench Set
- Screw driver set
- Protective eyewear and clothing
Begin with the vehicle on level ground, engine cold, with the emergency brake on.
Step 1 - Locate and remove the negative battery cable, move the cable end far enough away to avoid an accidental connection.
 Negative Battery Cable Removal
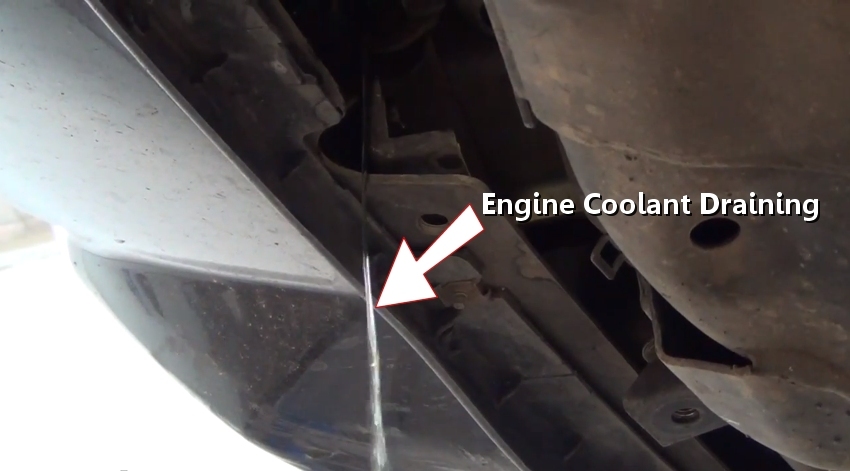
 Step 2 - Release the radiator cap (engine cold), and loosen the radiator drain valve, have a fluid basin ready.
Draining Engine Coolant
Step 3 - Some vehicles utilize a common plenum for both heater core and A/C evaporator core, these types will require the refrigerant be evacuated
from the system, once evacuated, disconnect heater hoses and necessary A/C equipment.
 Evacuating Refrigerant
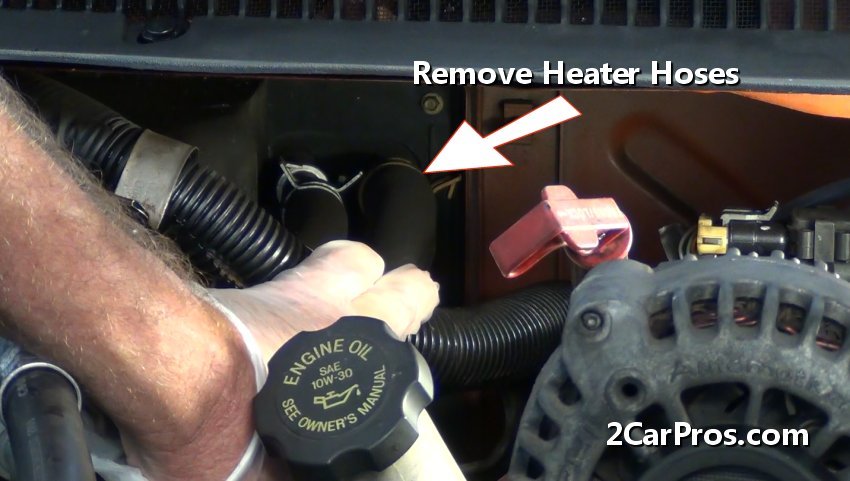
Step 4 - Using the hose clamp removal tool, loosen and remove the heater hoses from the heater core inlet and outlet fittings.
 Remove Heater Hoses
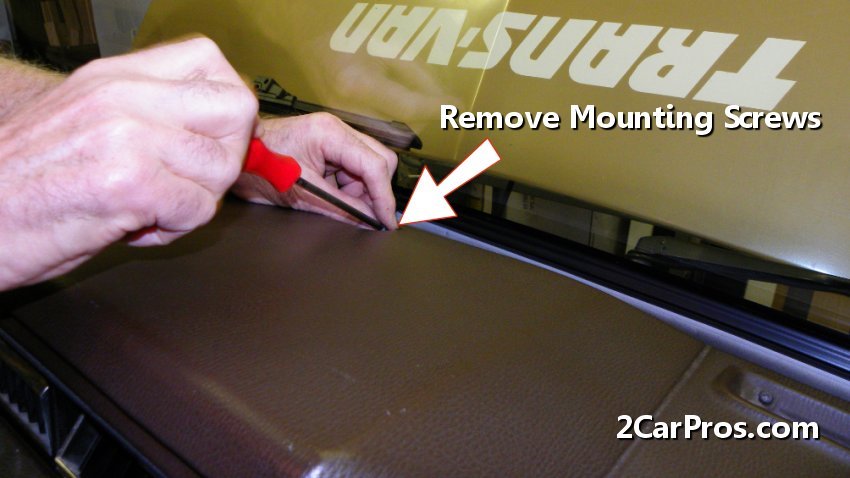
Step 5 - After the heater hoses have been removed, locate and remove upper dash mounting screws. Remove any mounting hardware across the top of the dash assembly, which is usually covered by pop-in trim pieces along the base of the windshield.
 Removing Dash Mounting Screws.
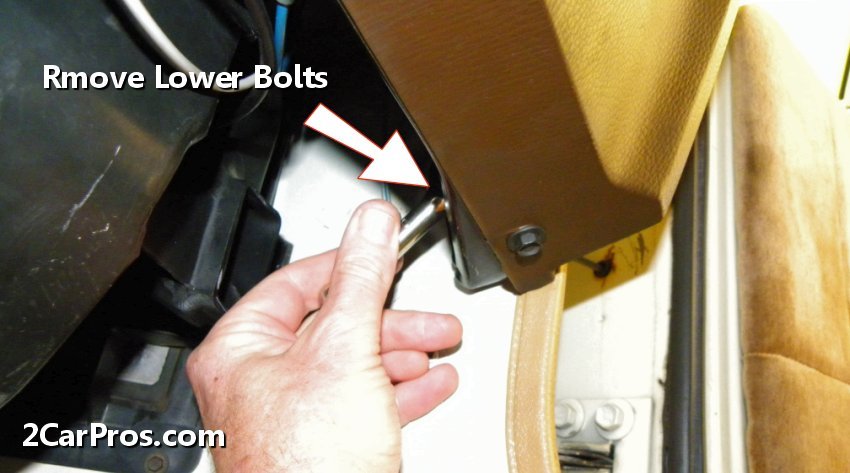
Step 6 - Once the upper dashboard mounting screws have been removed, locate and remove the lower mounting bolts. (Note: Some vehicles require the center console to be removed to access middle mounting bolts.)
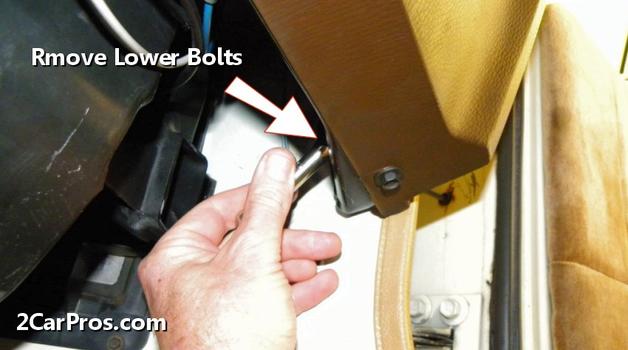 Removing Lower Mounting Bolts
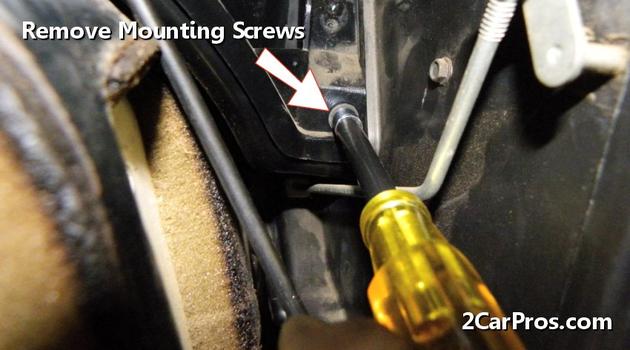
Step 7 - Using a small socket or screw driver, remove mounting screws to gain access to the lower steering column mounting bolts.
 Removing Lower Panel Cover
Step 8 - On the drivers side of the vehicle you will need to lower the steering column to allow for the dash to rotate for clearance. This is done by removing the shift indicator cable (if applicable), then removing the nuts/bolts that hold the column to the dash assembly. This will allow the column to become loose from dashboard. In most instances allowing the column to rest on the drivers seat will supply sufficient room. Locate the dash mounting hardware on the left side of dash and remove them.
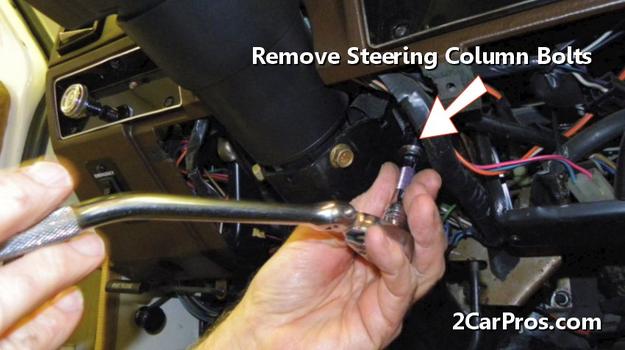 Remove Steering Column Bolts
 Step 9 - Once the heater hoses have been removed, locate and remove the dashboard mounting bolts, knee bolsters and foot shields on the bottom of the dash assembly, and center console if so equipped to gain access to the heater plenum. (Note: Some vehicles are designed with access panels that allow the core to be replaced with minimal disassembly.)
Dashboard Removal
Step 10 - Slowly pull away from firewall while keeping an eye out for any wiring or vacuum lines, once back far enough, support dash assembly in a position that will allow for enough room to remove the heater plenum.
 Dashboard Supported.
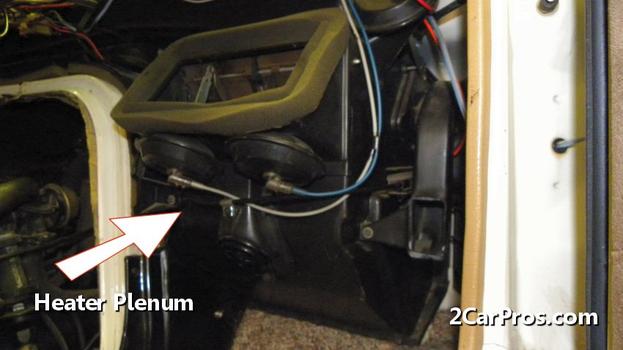
Step 11 - Once the necessary obstructions have been removed, the heater box will be exposed.
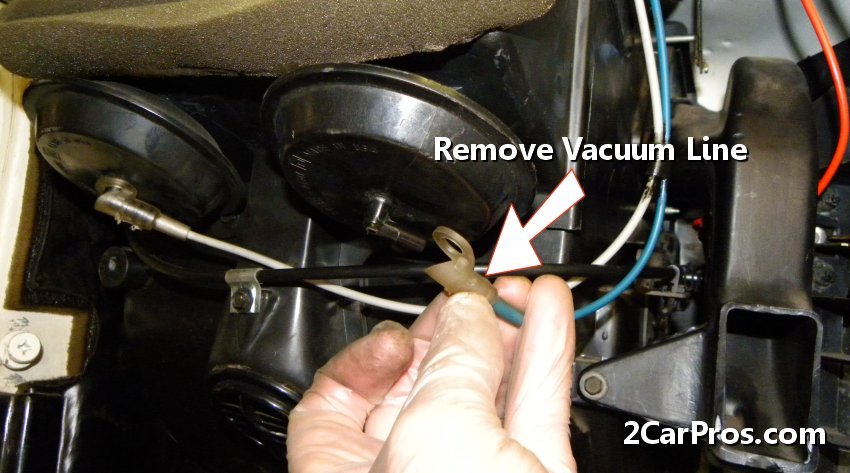
Step 12 - Next, remove and vacuum lines and control cables from the plenum. Take note on the location of these lines and cables to reassemble them in their proper locations. (Note: Some models you may need to disconnect the blower motor wiring and remove the screws from the heater core box to remove the blower motor.)
 Remove Vacuum Lines
Step 13 - Locate inner heater plenum mounting bolts and screw and remove them.
 Remove Inner Mounting Screws
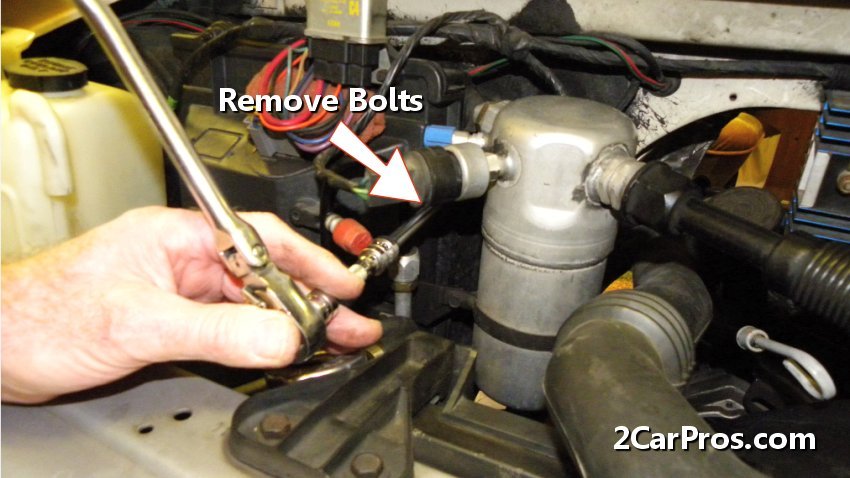
 Step 14 - Inside the engine bay, locate the heater plenum mounting bolts and remove. Remove all mounting hardware holding the plenum assembly to the firewall, Remove all duct work including windshield duct and air distribution ducting. This will allow the heater box plenum to become free of the vehicle which will allow removal of the unit.
Removing Outer Heater Plenum Mounting Bolts
Step 15 - Once removed, pull back gently on the plenum assembly while keeping an eye out for anything that was missed such as ductwork, once its released, remove it from the vehicle. Pay close attention while removing parts so they can be reinstalled correctly. (Note: There will be coolant leaking from the heater core, use an old towel to help control spillage.)
 Removing Heater Plenum
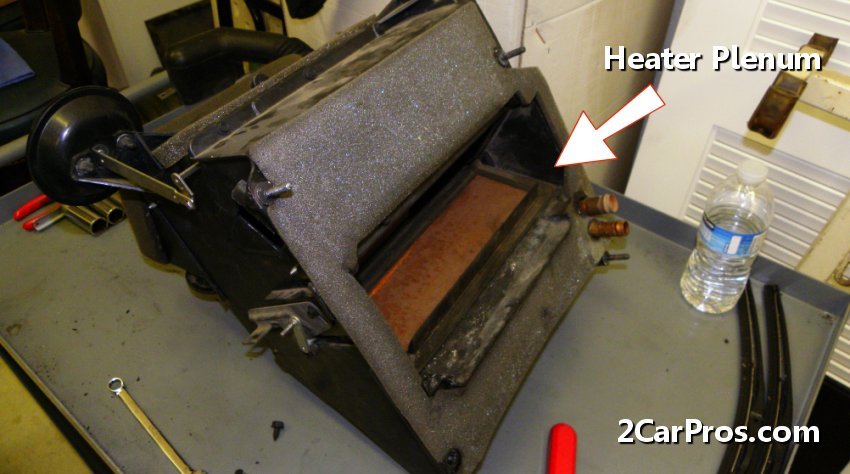
Step 16 - After the heater plenum has been removed, place plenum assembly on suitable work area for disassembly.
Removing Heater Plenum
Step 16 - After the heater plenum has been removed, place plenum assembly on suitable work area for disassembly.
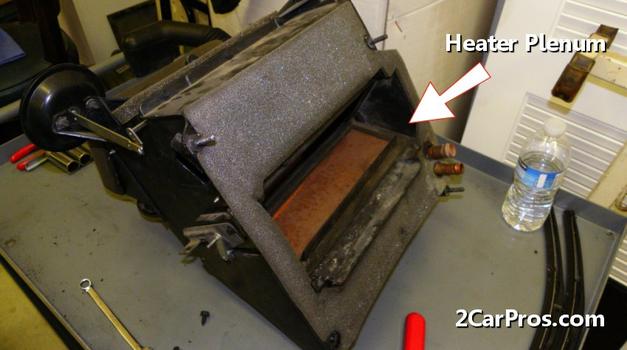 Heater Plenum Removed
Step 17 - The heater core plenum is designed to fit each vehicle individually so configuration will vary.
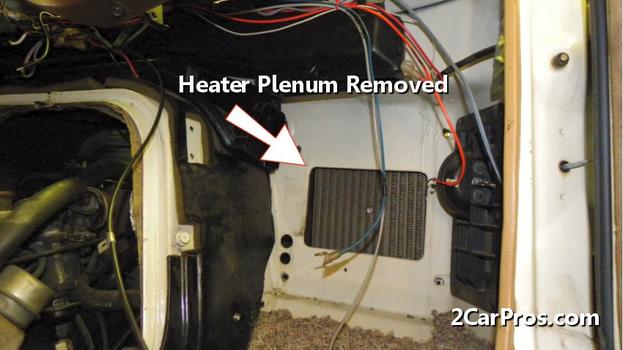 Heater Plenum Mounting Area
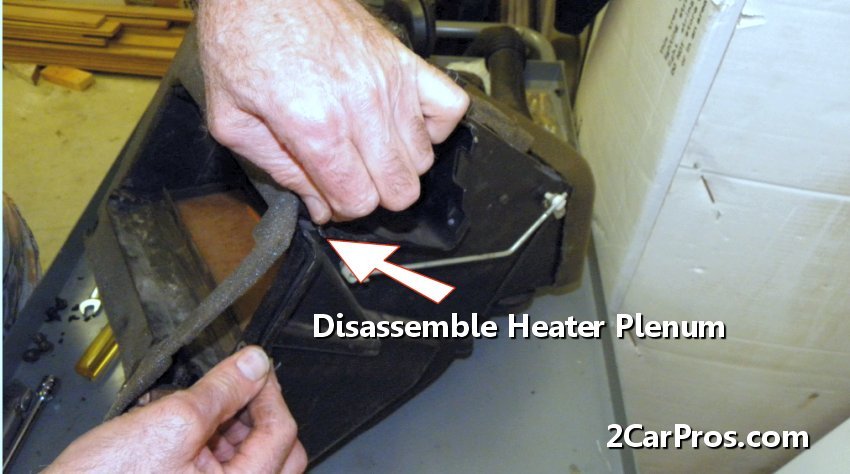
Step 18 - After the heater plenum has been removed, locate and remove plenum screws to dissemble to gain access to the heater core.
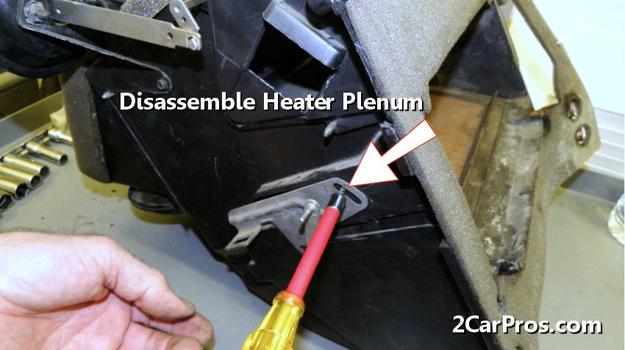 Disassemble Heater Plenum
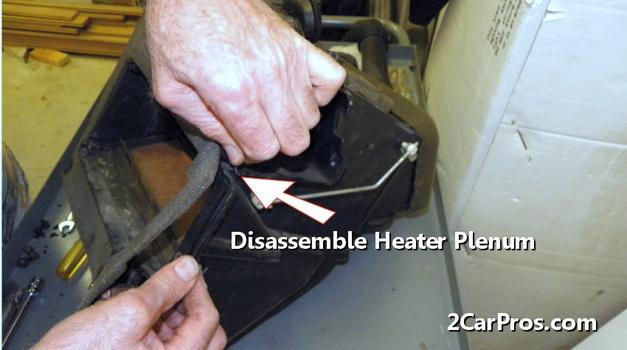 Step 19 - Once all mounting screws have been removed, gently pull the plenum open to expose the heater core.
Disassemble Heater Plenum Box
Step 20 - After the heater plenum has been separated, remove the mounting screws holding the core to the housing.
 Removing Heater Core Mounting Screws
Step 21 - Then, gently lift the core from the housing mounts.
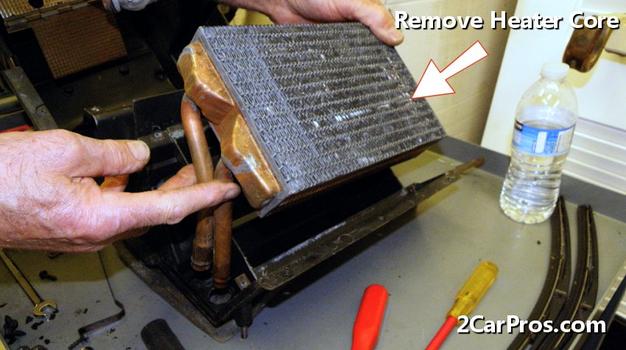 Removing Heater Core
Step 22 - Once the worn core has been removed, match the new core to ensure a proper installation, reverse these steps to reassemble. Install new core in the plenum assembly carefully to avoid damage, reassemble the plenum accordingly. Clean and inspect the heater box to make sure seals and gaskets are in good condition and reusable.
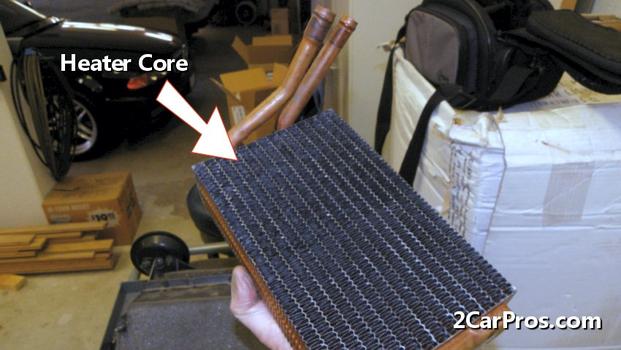 New Heater Core
Install the new heater core back into the heater box plenum and clamp the new heater core into place. Reassemble heater plenum and reinstall into vehicle, reinstall blower motor wiring, screws, vacuum lines and control cables. Carefully, install the dashboard back into position and re-attach tie bars and mounts. Reinstall any under dash covers that were removed during disassembly. Once the dash is replaced, attach the heater core hoses under the hood. (Note: Replace heater hoses and clamps if needed.) Reattach the negative battery terminal, start the engine and adjust the heater on its highest setting, refill coolant level. Allow the engine to reach operating temperature and check for leaks. (Note: It isn’t uncommon for air to be trapped in the system that will cause problems such as no heat and engine overheating. If this is the case, many vehicles have a bleeder valve to allow trapped air to escape from the system which is usually located near or on the thermostat housing. (Caution: Coolant can be extremely hot.)
After completing the job, recharge the air conditioner
(if needed.) Recheck the system for leaks while testing the blend door operation, verify all dash functions operate properly.

 Step 2 - Release the radiator cap (engine cold), and loosen the radiator drain valve, have a fluid basin ready.
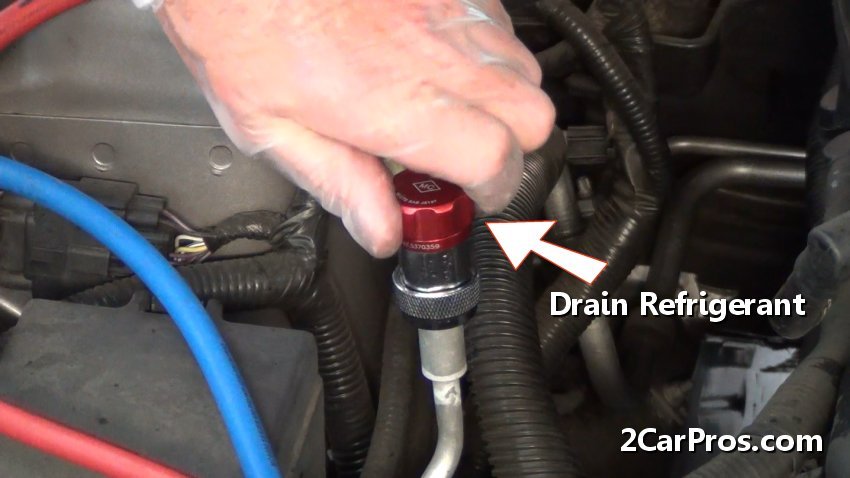


 Step 9 - Once the heater hoses have been removed, locate and remove the dashboard mounting bolts, knee bolsters and foot shields on the bottom of the dash assembly, and center console if so equipped to gain access to the heater plenum. (Note: Some vehicles are designed with access panels that allow the core to be replaced with minimal disassembly.)
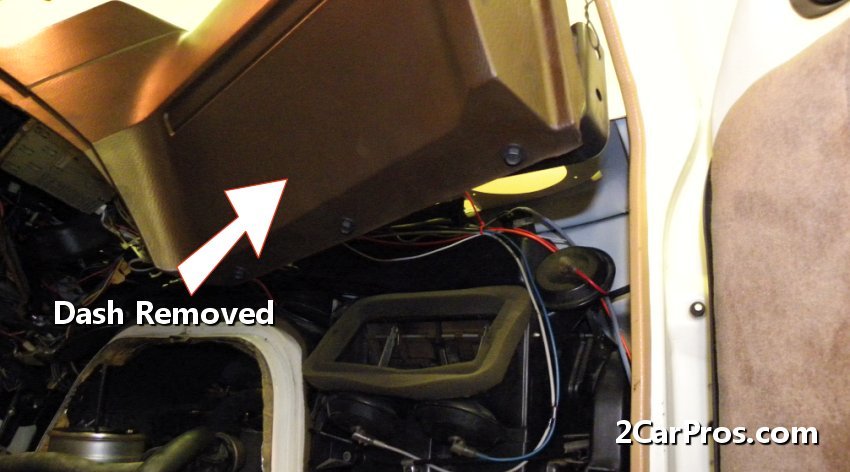


 Step 14 - Inside the engine bay, locate the heater plenum mounting bolts and remove. Remove all mounting hardware holding the plenum assembly to the firewall, Remove all duct work including windshield duct and air distribution ducting. This will allow the heater box plenum to become free of the vehicle which will allow removal of the unit.
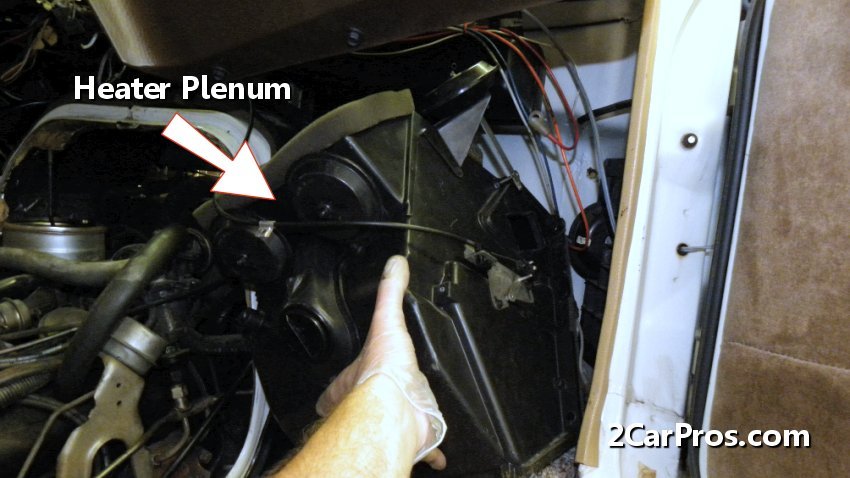


 Step 19 - Once all mounting screws have been removed, gently pull the plenum open to expose the heater core.
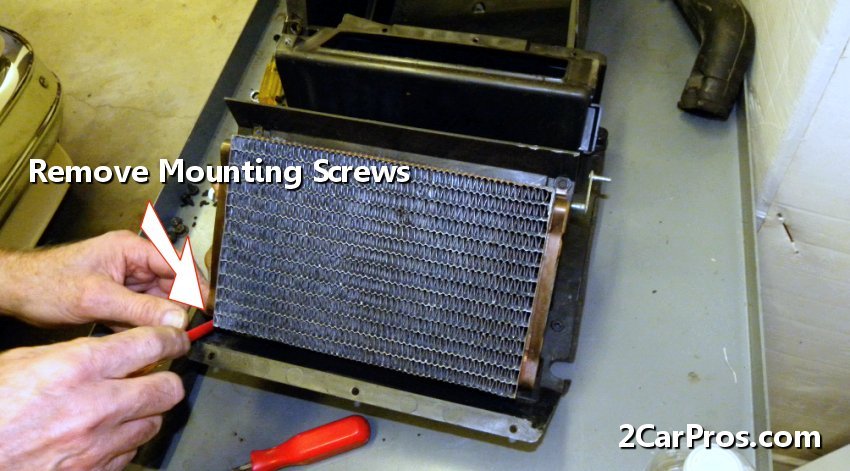


Comments
Post a Comment