How To Replace Front Brake Pads And Rotors FWD
Brake Pad and Rotor Replacement - Front FWD
How To Replace Brake Pad And Rotor
Helpful Information
Front brake pads provide up to 70% of a vehicles stopping power. In general, front brake pads wear out twice as fast as rear brake pads, roughly a 2 to 1 ratio on a standard disc-drum brake combination, this will be slightly different on a disc-disc arrangement due to the efficiency of a rear disc brake versus drums. Disc brakes have a definite braking power advantage over drum style brakes and performance is not compromised as much when wet or hot. Some disc brakes utilize cooling fins in-between the braking surfaces of the rotor to maximize cooling efficiency.
Replacing brake rotors can vary depending on the make and model of car, two or four wheel drive, front or rear wheel drive. Always replace brake rotors with top quality or OEM (original equipment manufacturer) brake rotors, some less expensive brake rotors can squeak and may not dissipate heat or perform as well because of their inferior metal quality. The same applies to the brake pads; they should be high quality (OEM) to ensure proper performance. When a grinding brake rotor is neglected, it will cause the brake system to fail due to the separation of the rotor hat (center) from the outer web (braking surface). Additional problems the can occur include the brake pad to fall out completely or the brake caliper to blow out a piston, either of these conditions will cause brake operation failure.
A vehicles brake pads wear out at different rates depending on design, driving habits, brake pad quality, stop and go traffic and freeway conditions, etc. Hydraulic pressure is supplied to the brake caliper forcing the pads against the brake rotor causing friction to slow the vehicle. Most brake pads have some kind the sensing device that will warn if the brake pads are getting low, either a brake warning light, or a noise sensor the will create a high pitched squeal when the pads have worn down beyond manufactures recommendations. After a brake service has been performed and the car is safety on level ground, recheck the brake pedal operation, this should be done with the car running and in park to aid the power brake system. Press the brake pedal up and allow to return and check proper brake pedal operation, if proper brake pedal operation not present further inspection is required (do not drive). As the car is first driven , start slow and test the brakes, listen for any sounds that are abnormal. Observe the brake operation if any irregularities occur inspect the brake system immediately.
Best Practices
- Clean and inspect wheel studs, replace if any are damaged.
- Inspect the ABS sensor wheel for cracks or damage and replace as needed.
- Bleed the brake system after replacing brake components are replaced.
- Brake service usual occurs between 15,000 and 30,000 miles depending on driver habits, road conditions, brake pad and rotor materials used.
- Use high quality pads and rotors when replacing brake components.
- Lubricate caliper sliders if needed
- Clean surface between the rotor and axle flange to ensure proper operation. (If debris is left between the rotor and hub bearing, it can cause the rotor to wobble on the axle causing the steering wheel to shake when the brakes are applied.)
Step by step guide on how to replace front brake pads on a front wheel drive car. This repair was performed on a 2000-2007 Saturn Vue and pertains to most front wheel drive vehicles.
Difficulty Scale: 4 of 10
Tools and Supplies Needed
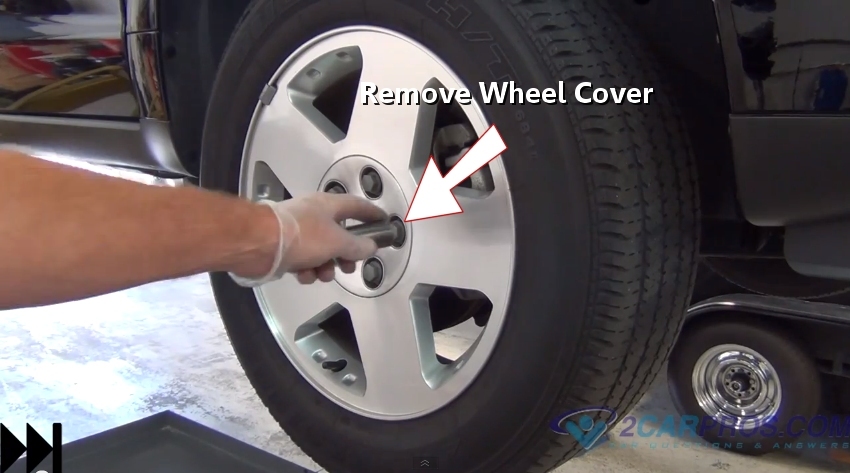
Step 1 - After the car has been lifted, remove the wheel cover plastic nuts or hub cap.

Removing Lug Nut Cover or Hubcap
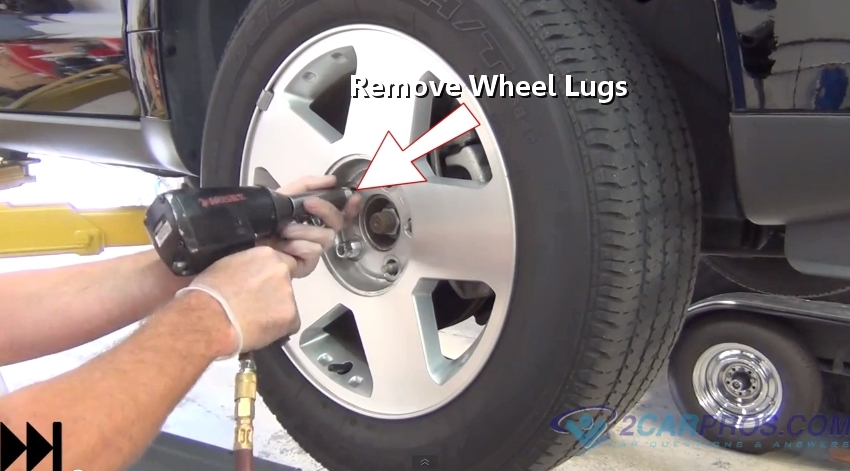
Step 2 - Remove lug nut with lug wrench or breaker bar. Shown with air tool. (Note: Loosen lugs on ground if no air toll are used.)

Removing Lug Buts
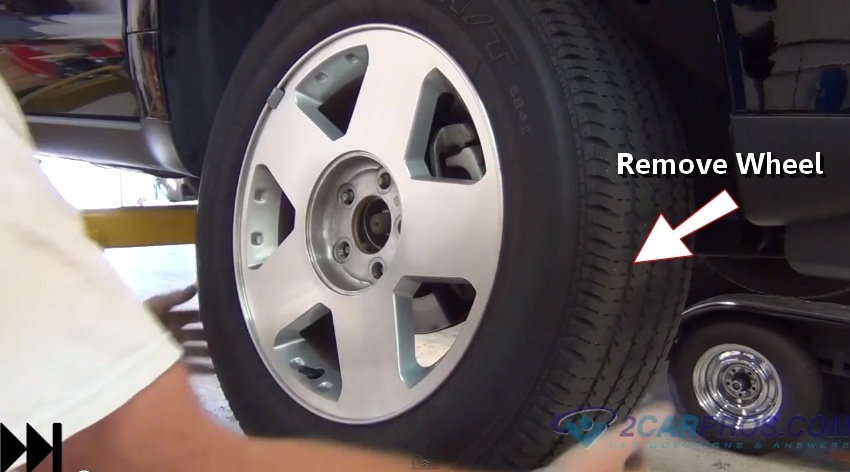
Step 3 - After all lug nuts have been removed, grasp the tire with both hands and lift off.

Lifting Wheel from Axle Studs
- Socket set
- Wrench set
- Shop towels
- Screw driver set
- Large "C" clamp or channel locks
- Brake fluid
- Jack stands
- Hydraulic floor jack
- Breaker bar or lug wrench
Removing Lug Nut Cover or Hubcap
Step 2 - Remove lug nut with lug wrench or breaker bar. Shown with air tool. (Note: Loosen lugs on ground if no air toll are used.)
Removing Lug Buts
Lifting Wheel from Axle Studs
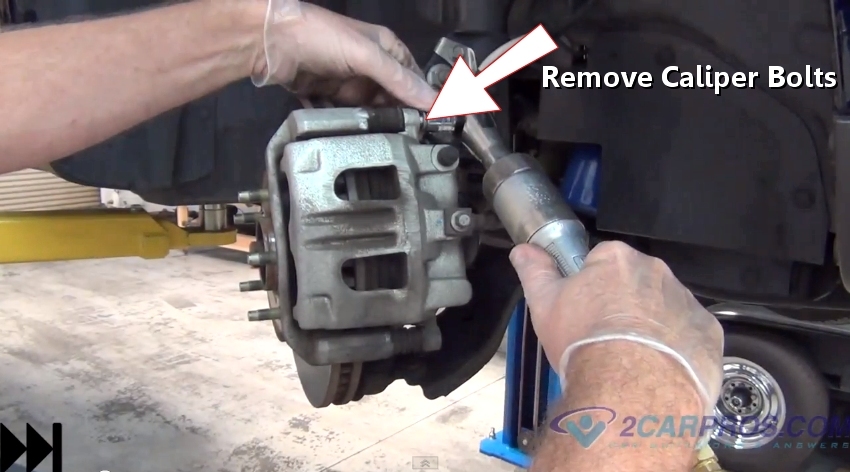
Step 4 - Once the wheel has been removed, loosen the caliper bolts and remove. Make sure the bolt threads are in good shape and replace if necessary.

Removing Both Caliper Mounting Bolts
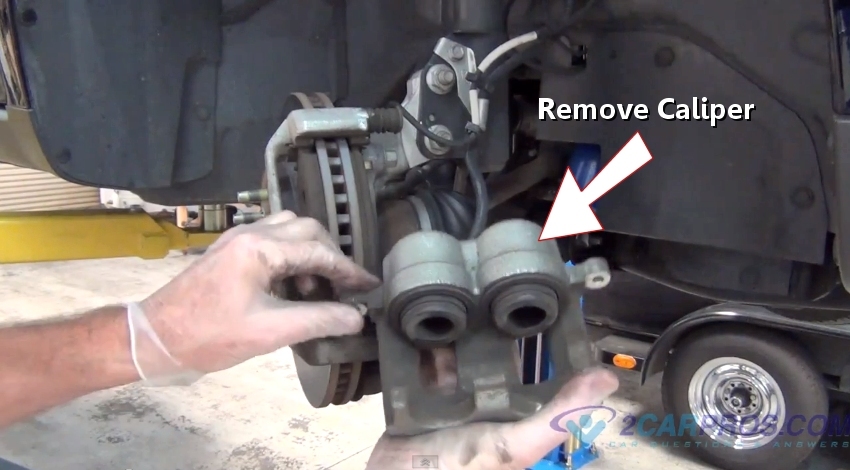
Step 5 - Now, lift the brake caliper off the rotor and brake pads. Tie or secure the caliper, being careful not to bend or kink the brake caliper flex hose. Thoroughly inspect brake caliper and brake hoses for leakage, cracks or chaffing and replace as needed.

Removing Brake Caliper
Step 6 - Next, remove both brake pads.

Removing Brake Pads
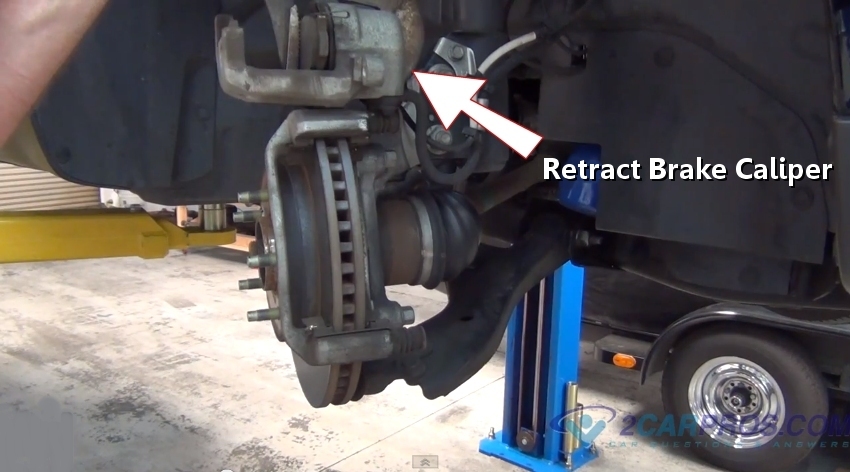
Step 7 - Once the brake caliper has been removed, retract the caliper using a large "C" clamp or channel locks until fully depressed, use old brake pad to protect the caliper piston. Remove the master cylinder cap or open the brake caliper bleeder screw to allow excess brake fluid to be released if necessary.

Retracting Brake Caliper
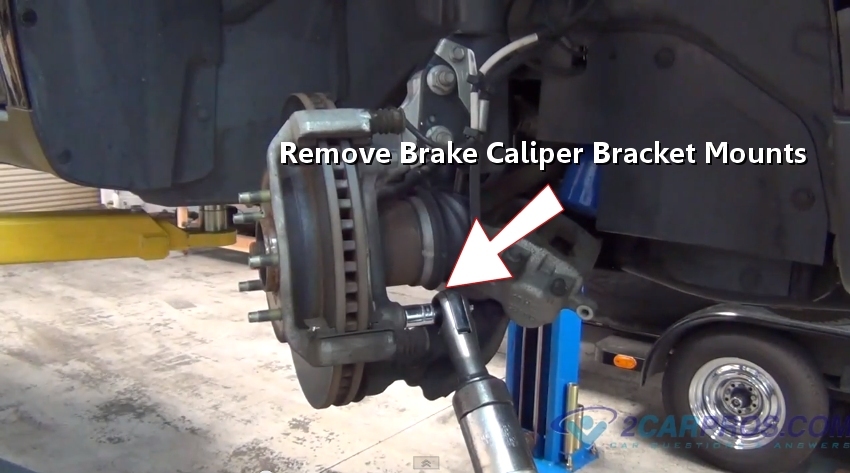
Step 8 - Next, remove caliper bracket mounting bolts to allow the brake rotor to be replaced.

Removing Caliper Bracket Mounting Bolts
Removing Both Caliper Mounting Bolts
Removing Brake Caliper

Removing Brake Pads
Step 7 - Once the brake caliper has been removed, retract the caliper using a large "C" clamp or channel locks until fully depressed, use old brake pad to protect the caliper piston. Remove the master cylinder cap or open the brake caliper bleeder screw to allow excess brake fluid to be released if necessary.
Retracting Brake Caliper
Removing Caliper Bracket Mounting Bolts
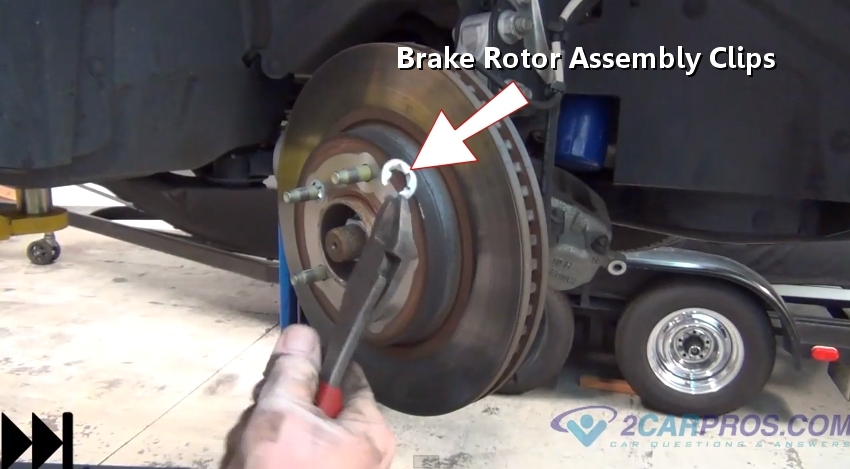
Step 9 - After the caliper mounting bracket has been removed, use side cutters (dikes) to remove assembly clips.

Removing Rotor Assembly Clips
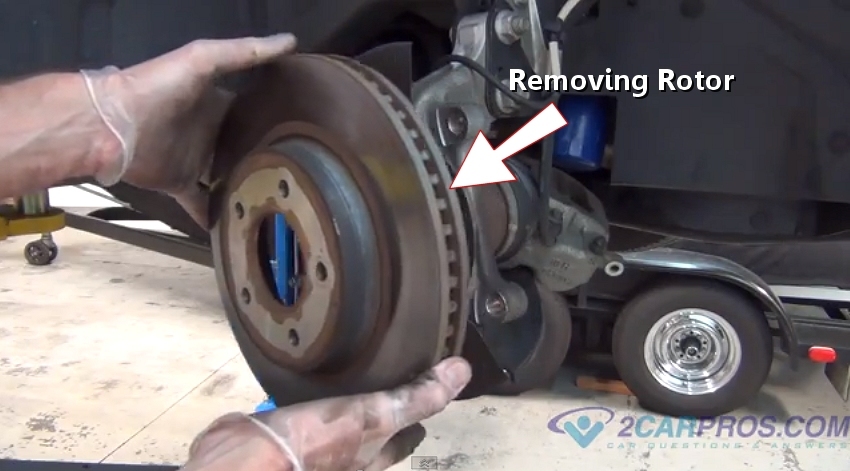
Step 10 - Once the assembly clips have been removed the brake rotor will slide off the axle hub.

Removing Brake Rotor
Step 11 - After the brake rotor has been removed, replace it with a re-machined or new unit. Clean bearing hub rotor mount surface to ensure the proper mounting of the new brake rotor. The new rotor is manufactured with a protective film over the rotor to keep it from rusting, remove protective film with brake cleaner before installing; also after the brake job is complete, a small amount of smoke from the rotor may occur when first used. This is normal and will dissipate after the first couple of uses.

Installing New Brake Rotor
Step 12 - Next, install the caliper mounting bracket onto the spindle.

Installing Caliper Bracket
Step 13 - Un-box and inspect replacement brake pads to insure they will properly replace the old brake pads.

Inspecting New Brake Pads
Removing Rotor Assembly Clips
Removing Brake Rotor
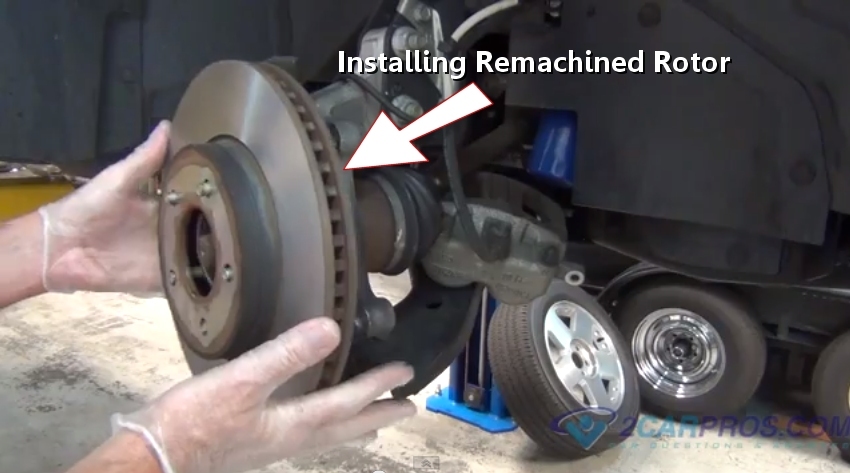
Installing New Brake Rotor
Step 12 - Next, install the caliper mounting bracket onto the spindle.
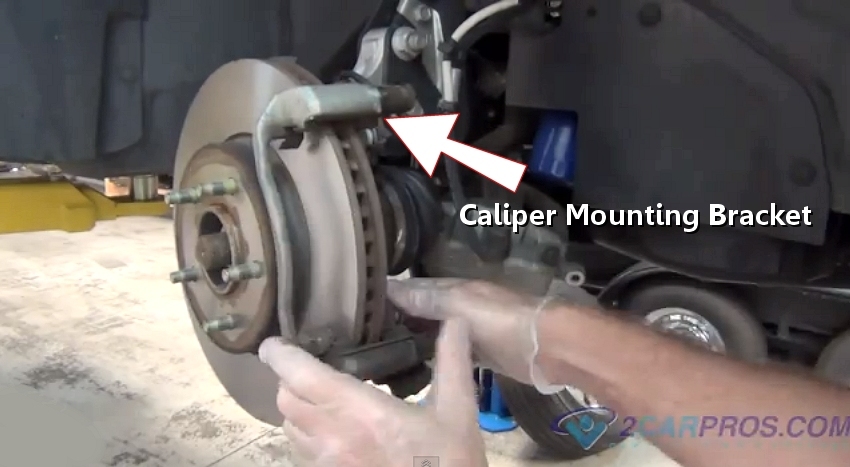
Installing Caliper Bracket

Inspecting New Brake Pads
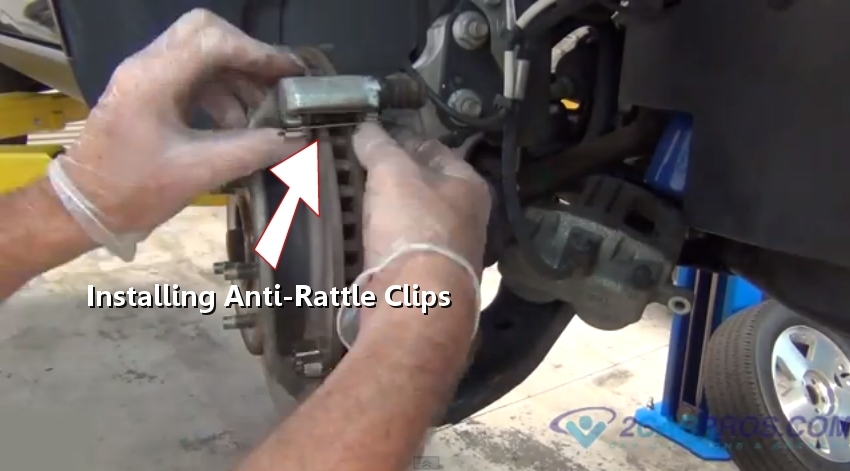
Step 14 - Some brake pad applications involve anti-rattle clips which should be installed when provided.

Anti-Rattle Clips
Step 15 - Remove the old clips to install the new set.

Installing New Anti-Rattle Clips
Step 16 - Now, the new brake pads are ready for installation, be sure to install the pad with the sensor on the inboard side.

Installing Front Brake Pads
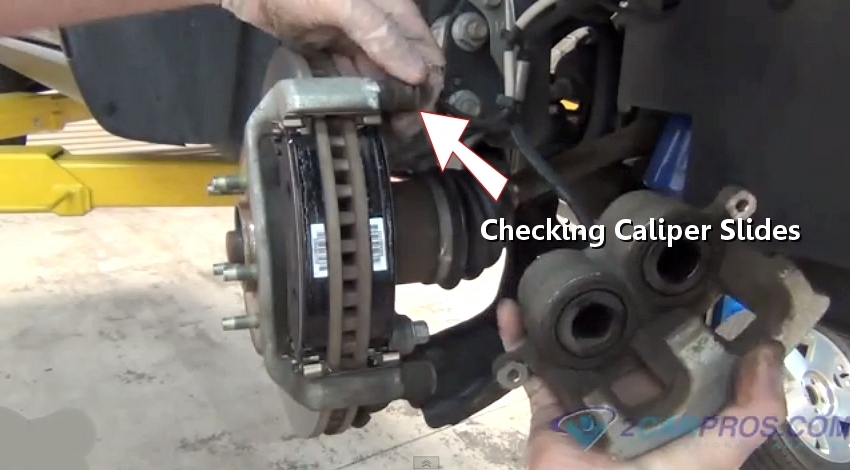
Step 17 - Before installing the brake caliper check the caliper slides by moving them in and out of the caliper mounting bracket. They should move smoothly, if not disassemble by pulling slides out to clean and lubricate.

Inspecting Caliper Slides
Step 18 - Once the brake pads have been installed, the brake caliper can be put back into place. (Note: clean and lube brake caliper slides if needed.)

Installing Brake Caliper
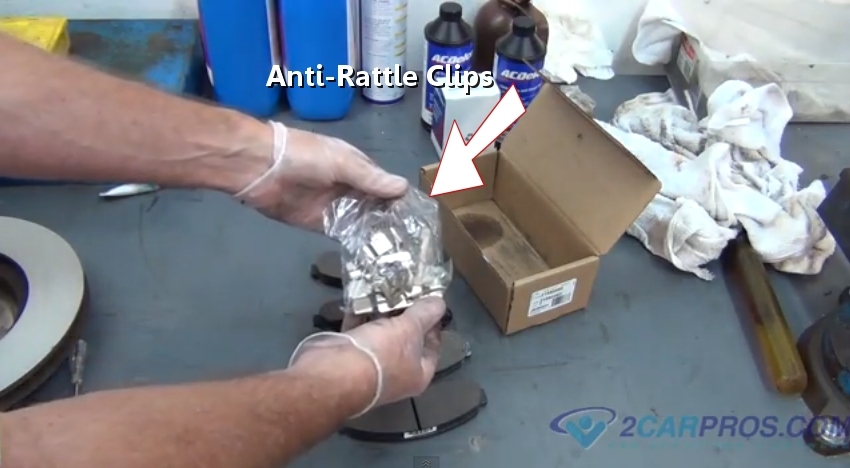
Anti-Rattle Clips
Installing New Anti-Rattle Clips

Installing Front Brake Pads
Step 17 - Before installing the brake caliper check the caliper slides by moving them in and out of the caliper mounting bracket. They should move smoothly, if not disassemble by pulling slides out to clean and lubricate.
Inspecting Caliper Slides

Installing Brake Caliper
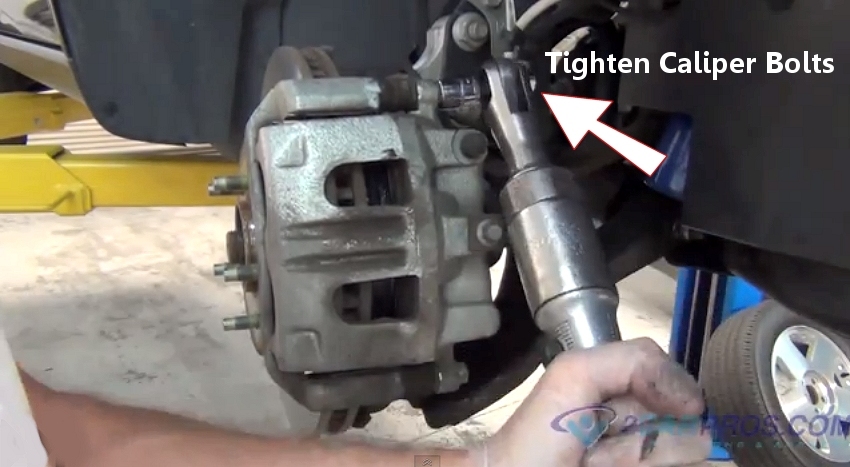
Step 19 - Tighten caliper bolts and double check caliper mounting bracket bolts.

Tightening Caliper Bolts
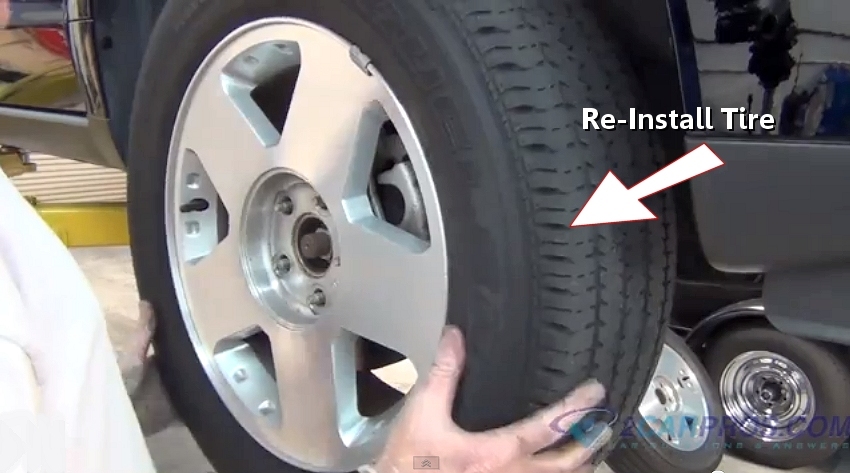
Step 20 - Re-install tire

Re-Installing Tire
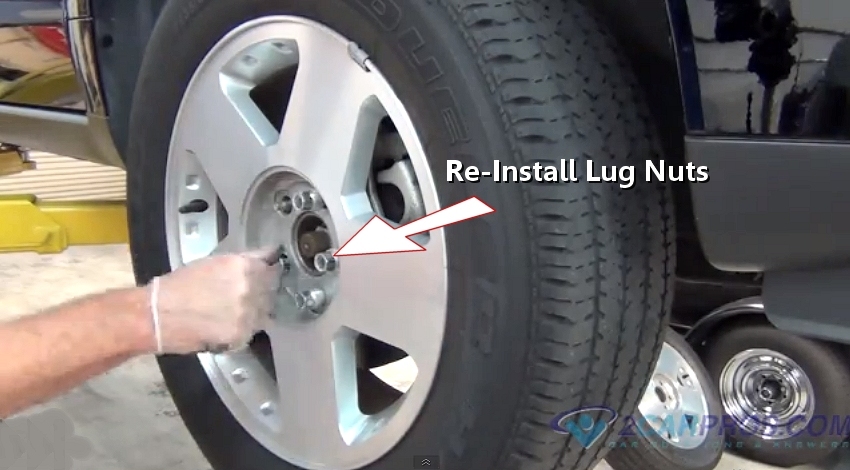
Step 21 - After the tire has been re-installed add the lug nuts to hold the wheel on, and tighten. (Note: Finish tightening lug nuts once the car has been lowered onto the ground.)

Re-installing Lug Nuts
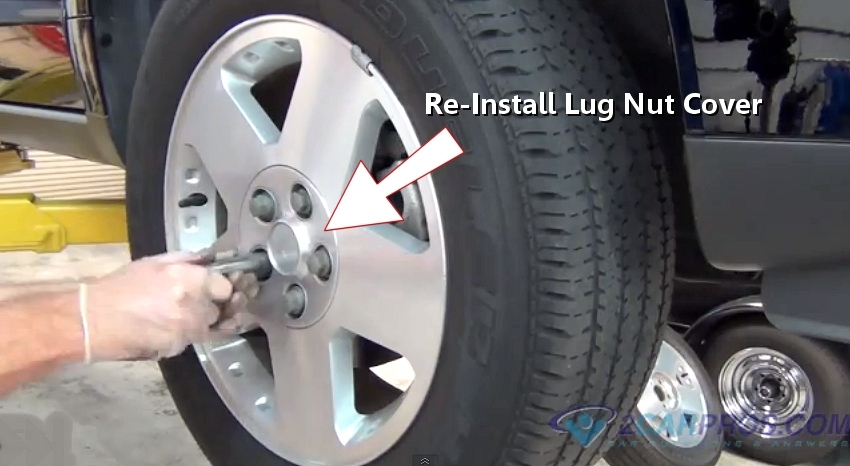
Step 22 - Re-installing hub cap or lug nut cover.

Installing Lug Nut Cover
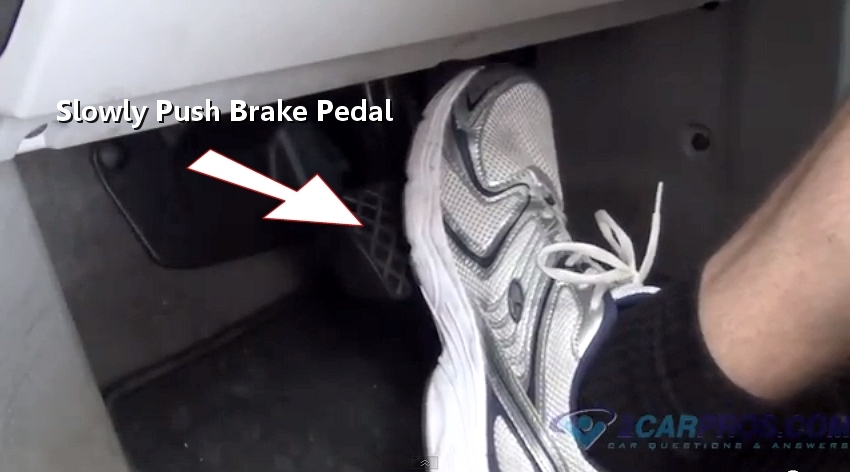
Step 23 - After the car is back on the ground and the tires are tightened, slowly push the brake pedal down, then allow back up slowly. This operation is forcing the brake pads to travel to the brake rotors. Do this until normal brake operation has returned (brake pedal in its normal position), This helps prevent air bubbles in the system which alleviates bleeding.

Slowly Pushing Brake Pedal
Never drive a car without normal brake pedal operation. If bleeding is needed (spongy pedal) follow normal bleeding procedures. When test driving the vehicle listen for any unusual noises during the operation of the brakes, Note: Brake pad operation may be slightly impaired until the surfaces mate together, (about 2 miles). Visit - Brake System Bleed
Tightening Caliper Bolts
Re-Installing Tire
Re-installing Lug Nuts
Installing Lug Nut Cover
Step 23 - After the car is back on the ground and the tires are tightened, slowly push the brake pedal down, then allow back up slowly. This operation is forcing the brake pads to travel to the brake rotors. Do this until normal brake operation has returned (brake pedal in its normal position), This helps prevent air bubbles in the system which alleviates bleeding.
Slowly Pushing Brake Pedal


Hello, I have browsed most of your posts. This post is probably where I got the most useful information for my research. Thanks for posting, maybe we can see more on this. Are you aware of any other websites on this subject.
ReplyDeleteBest Brake Rotors for Trucks Reviews