Rec1

Friday, 3 April 2015

How To Use Voltmeter To Test Car Circuit

How to Use Voltmeter

Helpful Information
A digital voltmeter is ideal for home and shop use for troubleshooting and locating faulty wiring. A digital voltmeter can be used to check for good continuity of an electrical circuit by using the ohms of resistance feature. To check for power at a particular electrical circuit, locate a good clean ground before testing begins.
Digital Voltmeter Function Range
  • DC Voltage 200mV to 1000V
  • AC Voltage 200mV to 750V
  • DC Current 200A to 10A
  • Ohms200 to 2M
  • Diode Check
  • Transistor Check

Easy step by step guide on how to use a voltmeter, this information pertains to all car related applications.
Difficulty Level - 2
A voltmeter is usually used in many ways in the automotive repair field, its most basic function is to check for voltage at a particular component such as a battery, brake light or switch.
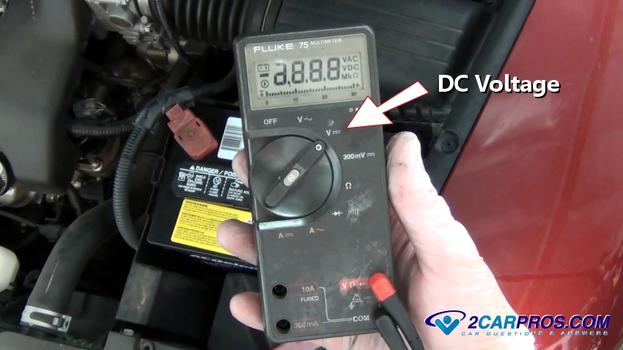
Step 1 - To check for voltage (12 volts) at a particular accessory switch the meter to the DC voltage setting.

Voltmeter Set to DC Voltage
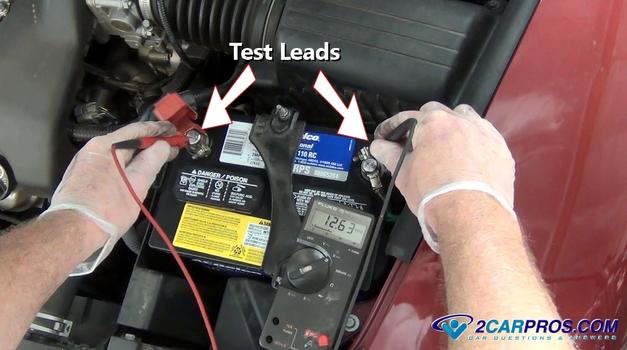
Step 2 - Grasp both negative and positive leads and hold them against the desired test point such as a terminal or wire, the meter will instantly give a reading.

Voltmeter Test Leads

Step 3
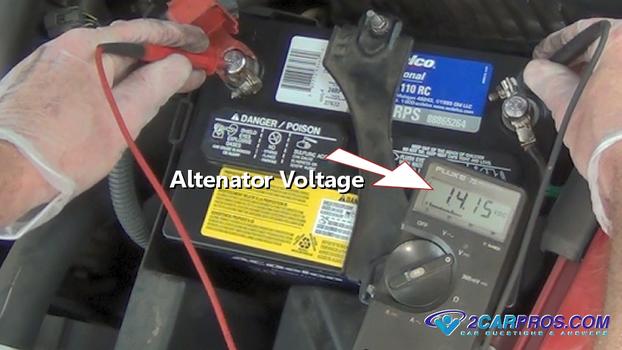
 - Start the engine and watch the meter rise in voltage as the alternator starts producing voltage. Switching the voltmeter to AC voltage will test the alternator diodes for leakage which will destroy a battery over time, voltage should be 0 in this test.
Voltmeter Alternator Test
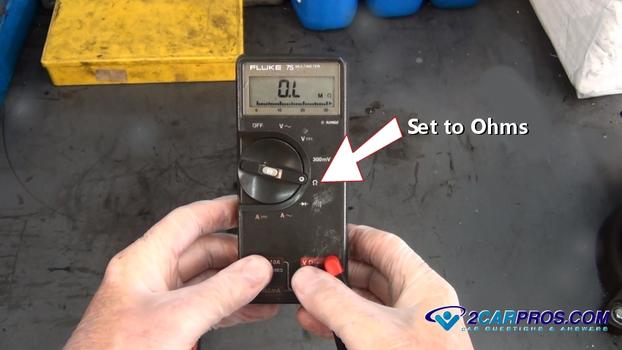
Step 4 - Switching the meter over to ohms will test the internal winding circuit of any electronically controlled device such as a relay, sensor, fuel injector or motor.

Set Meter to Ohms
Step 5 -  If high resistance or an open circuit is present the unit has failed. Switch the meter to mV to test milli volt generation from a sensor, such as a crank angle sensor while the engine is cranking over.

Test Fuel Injector
Step 6 - A voltmeter works great for testing pulse voltage which is needed for fuel injectors and ignition coils.

Testing Ignition Coil Pulse
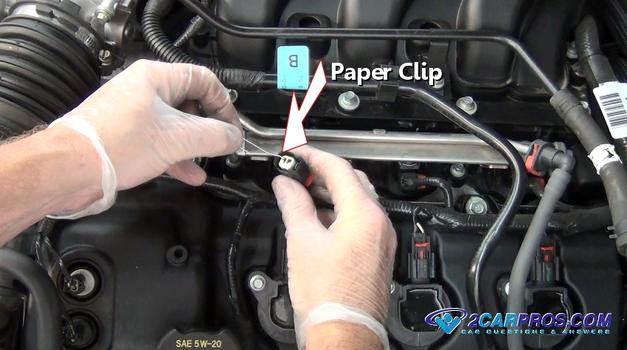
Step 7 - Gently install a paper clip into the connector to aid in testing when needed. If a sharp probe is used to pierce the wire for testing, use electrical tape to reseal the area. (Note: Do not damage terminals.)

Installing Paper Clip

No comments:

Post a Comment