How To Replace CrankShaft Angle Sensor
Crankshaft Angle Sensor CAS CKS Replacement
Car CAS Replacing Procedure
Helpful Information
A crankshaft positing sensor sends feedback data to the engine computer (PCM), when this sensor fails the engine will stall, which could be immediate or intermitted.
Easy steps on how to replace an automotive engine crankshaft angle sensor (CAS or CKS), this information outlines a typical sensor replacement though configurations may vary the process is the same.
Difficulty Scale: 4 of 10
Begin with the vehicle on level ground, safely hoisted and supported by jack stands, engine off (cold) with the emergency brake set.
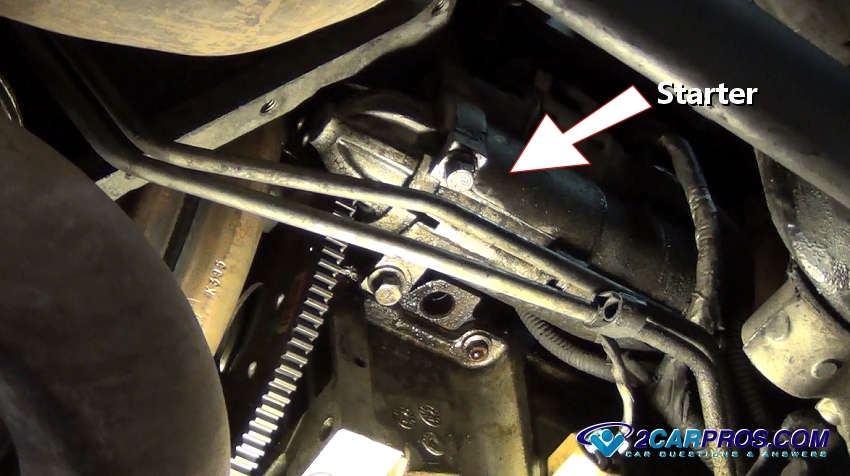
Step 1 - Locate the crankshaft angle sensor, some are positioned behind components such as the starter which will need to be removed to replace the sensor.

Starter
Step 2 - Before removing the starter disconnect the negative battery cable to avoid electrical damage.

Removing Negative Battery Cable
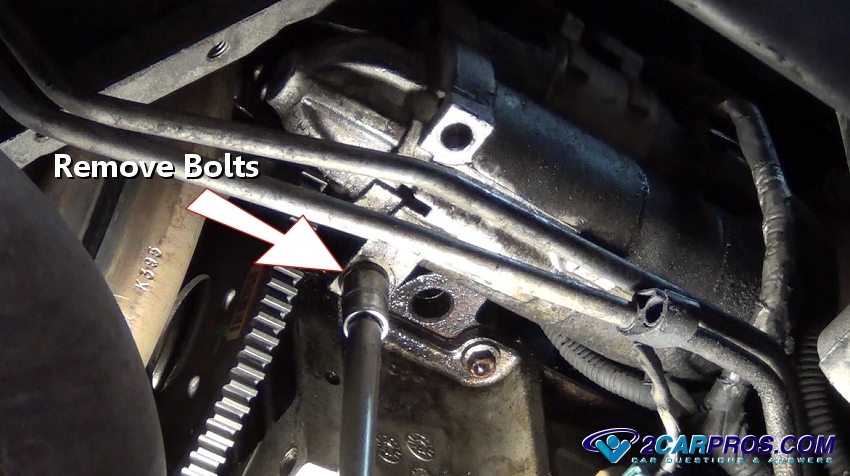
Step 3 - After disconnecting the battery remove the starter mounting bolts, the starter will become loose.

Removing Starter Bolts
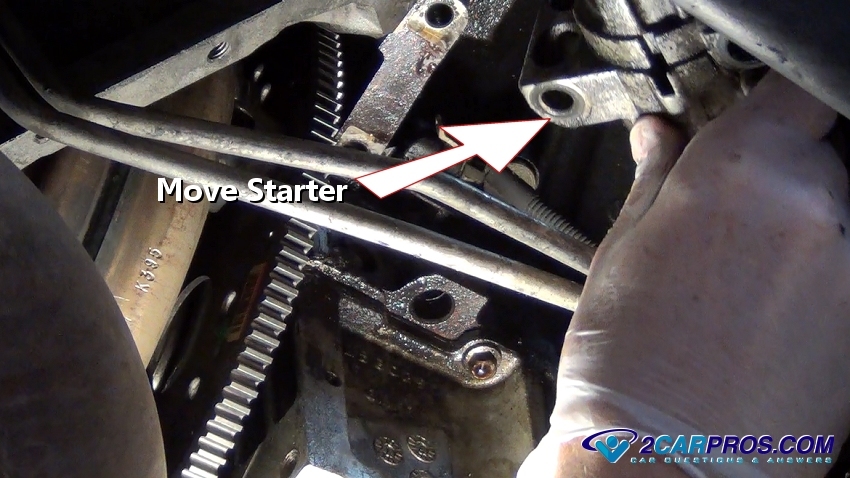
Step 4 - Once the bolts have been removed , support the starter motor while moving it off to the side and out of the way of the crankshaft angle sensor.

Move Starter Motor
Step 5 - By removing the starter motor the sensor can be more easily accessible.

Crankshaft Angle Sensor
Step 6 - Release the connector clip to remove the wiring harness from the sensor.

Release Electrical Connector
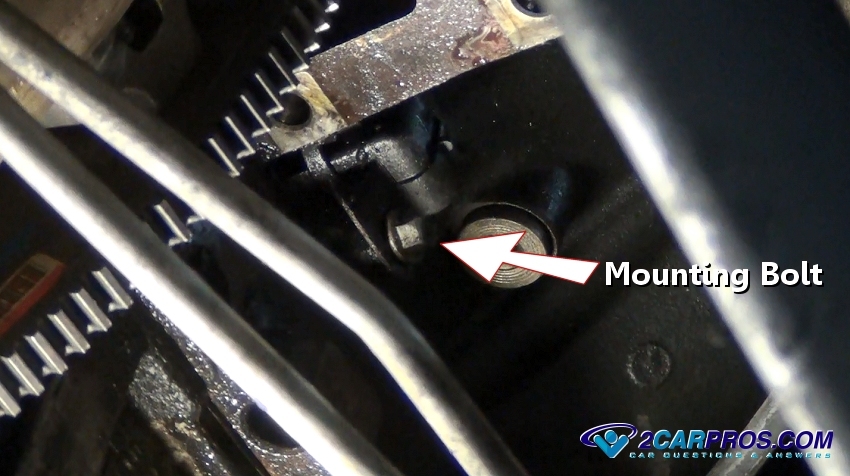
Step 7 - Next, locate the sensor mounting bolt and remove it.

Crankshaft Angle Sensor Mounting Bolt
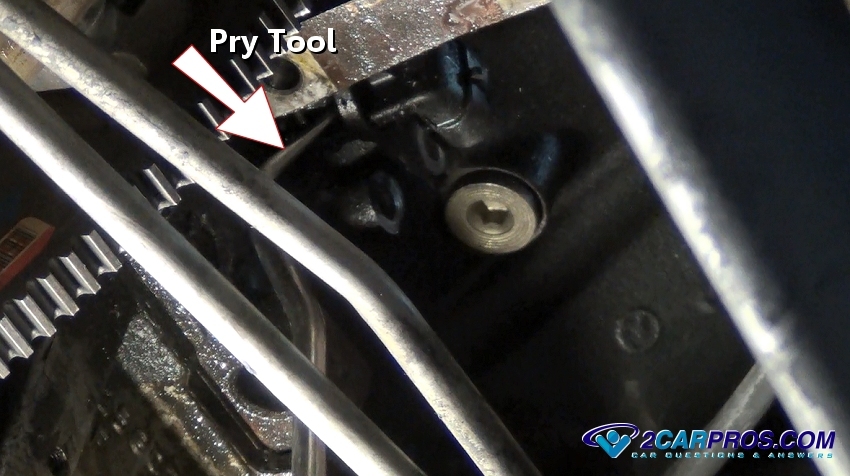
Step 8 - Once the bolt has been removed, use a small pry tool or screw driver to work the sensor loose.

Removing Sensor
Step 9 - After the sensor has been worked loose, firmly grasp the sensor and pull it from the engine block, a small amount of oil may be present.

Failed Crankshaft Position Sensor
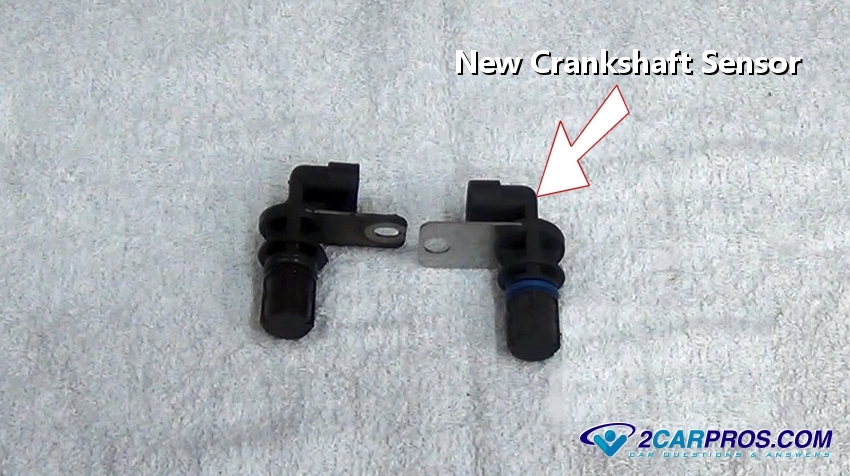
Step 10 - Compare the new sensor to the failed sensor to ensure a proper installation.

New Crankshaft Position Sensor
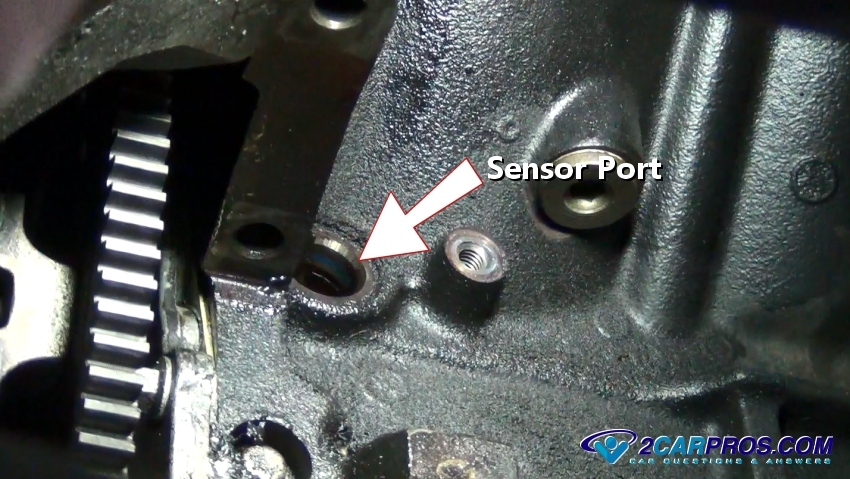
Step 11 - Before installing the new sensor, clean the sensor port to ensure a proper seal to the new sensor.

Sensor Port
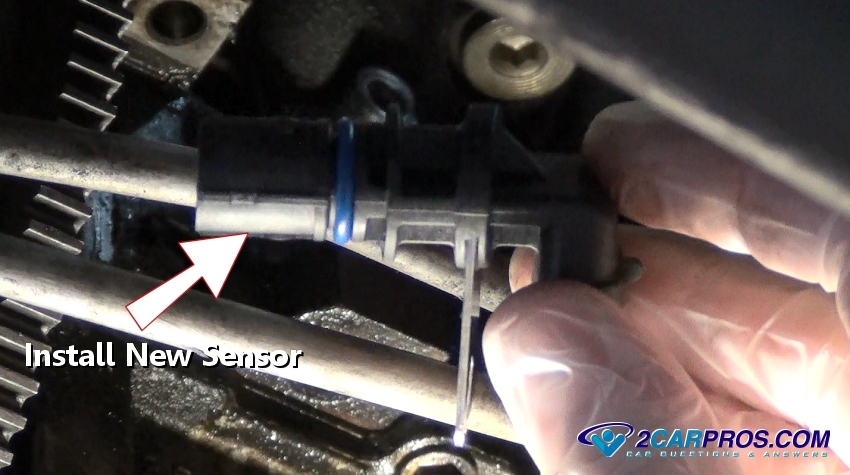
Step 12 - Once the port has been cleaned, install the new sensor with a small amount of oil to lubricate the "O" ring seal.

Install New Crankshaft Angle Sensor
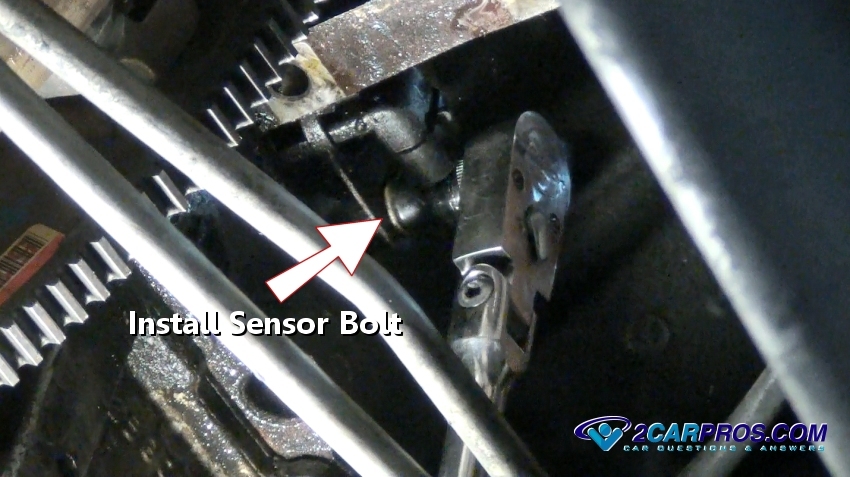
Step 13 - After the sensor has been installed, thread the mounting bolt into place and tighten (do not over tighten.)

Install Sensor Bolt
Step 14 - Next, reconnected the electrical connector to the sensor. (Note: Ensure the connector is clean prior to insertion.)

Reinstall Electrical Connector
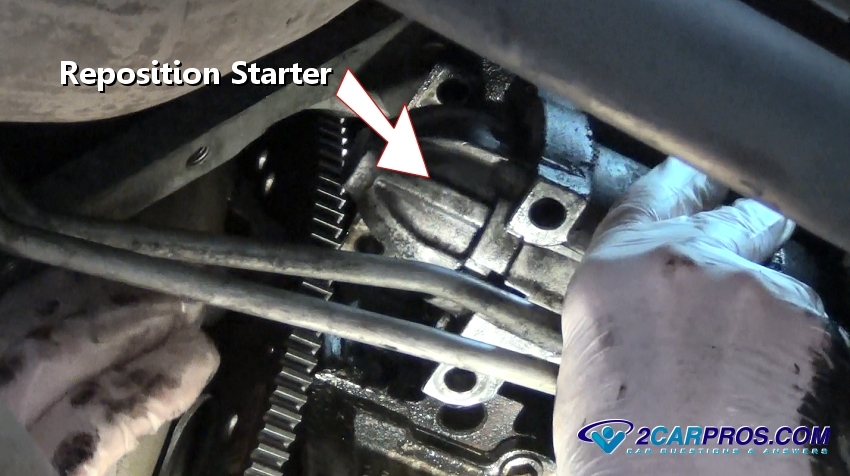
Step 15 - Once the sensor installation is complete reposition the starter and insert the mounting bolts.

Reposition Starter
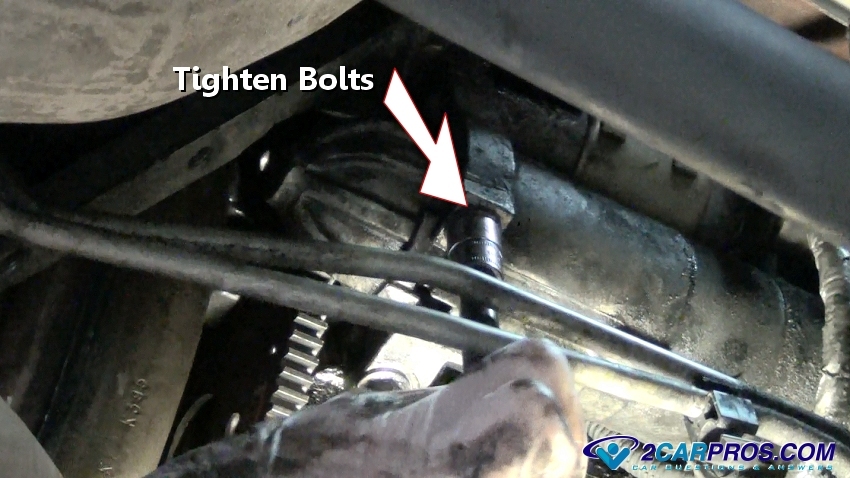
Step 16 - Tighten starter bolts evenly and recheck previous work to ensure the job was performed correctly.

Tighten Starter Bolts
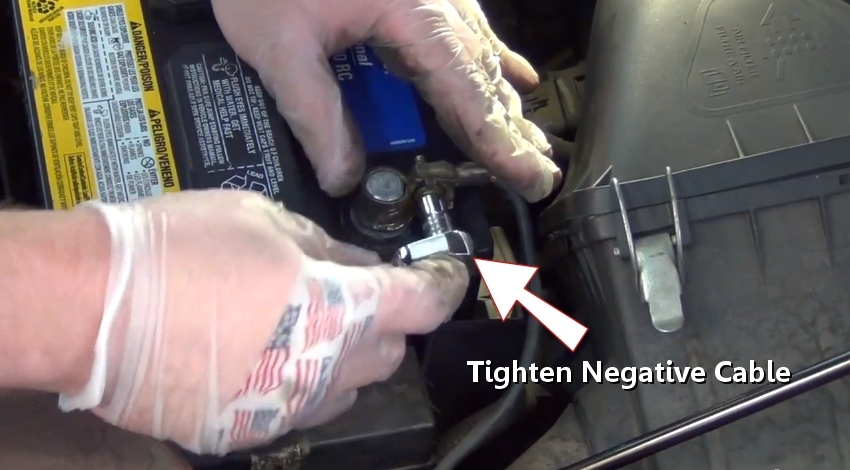
Step 17 - Reconnect negative battery cable at the completion of the job, if hard sparking is occurring, remove the starter and check for wiring problems.

Reconnect Battery
Step 18 - If a check engine light has been triggered it will need to be cleared to reset the computer system. Learn more

Check Engine Light
Starter

Removing Negative Battery Cable
Step 3 - After disconnecting the battery remove the starter mounting bolts, the starter will become loose.
Removing Starter Bolts
Move Starter Motor

Crankshaft Angle Sensor

Release Electrical Connector
Crankshaft Angle Sensor Mounting Bolt
Removing Sensor

Failed Crankshaft Position Sensor
New Crankshaft Position Sensor
Sensor Port
Install New Crankshaft Angle Sensor
Install Sensor Bolt

Reinstall Electrical Connector
Reposition Starter
Tighten Starter Bolts
Reconnect Battery

Check Engine Light
Car
Repair World
Troubleshoot
All types Of Car Problem With proper Solutions
Know
Exactly How Each And Every Part In Your Car Works
Troubleshoot
Car OBD Codes.Know Exactly What Each Code Means?
http://carrepairworld.blogspot.com/2015/04/vehicle-obd-ii-codes.html


Comments
Post a Comment