How to replace front brake pads and rotors on rear wheel drive vehicles
RWD Brake Pad And Rotor Replacement
FOR PART 1 CHECK HERE
FOR PART 2 CHECK HERE
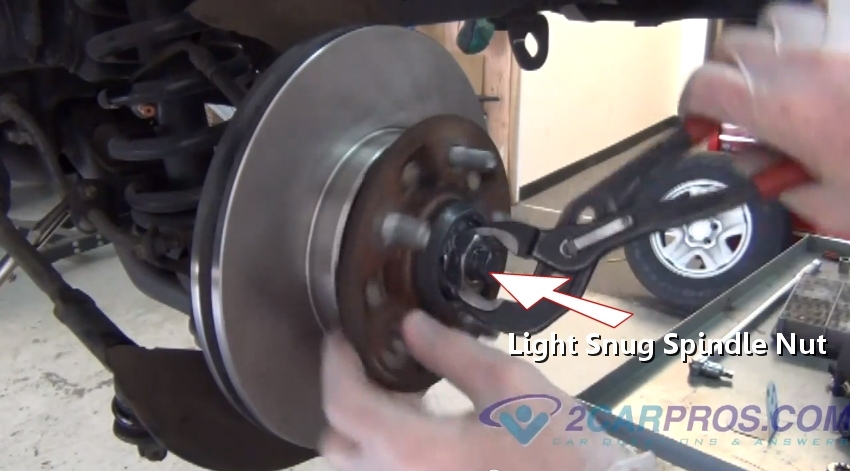
This action sets the bearing into there races and allows the correct bearing play, axle nut should end up almost loose, allowing the bearing lash or play to be at the minimum. (Note: Do not over tighten.)

Light Snug Spindle Nut
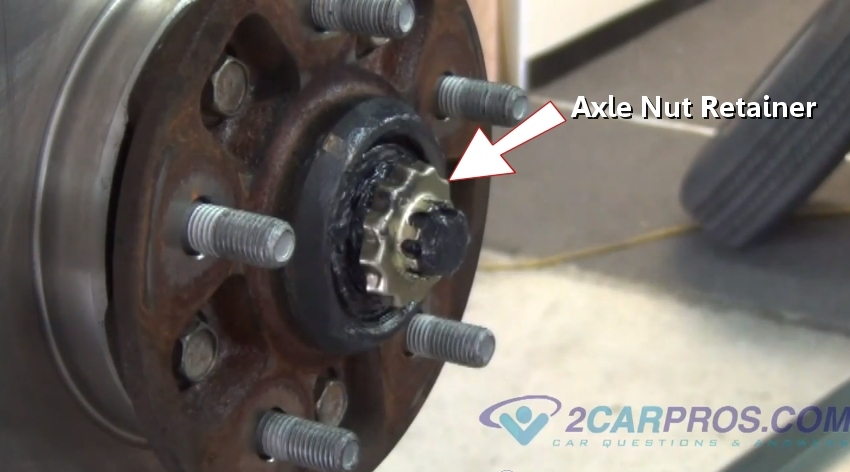
Step 52 - Next, install the axle nut retainer onto the axle nut, align the retainer with the cotter pin hole in the spindle.

Axle Nut Retainer
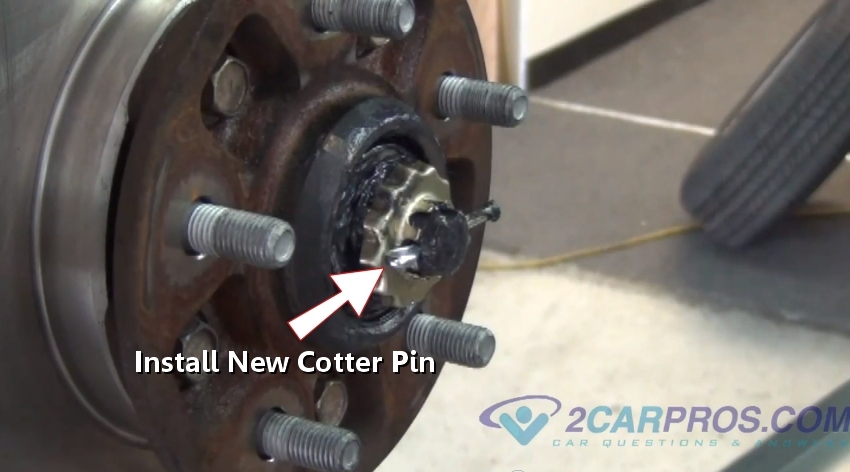
Step 53 - Using a new cotter pin, locate the through hole and push the cotter pin into place.

Install New Cotter Pin
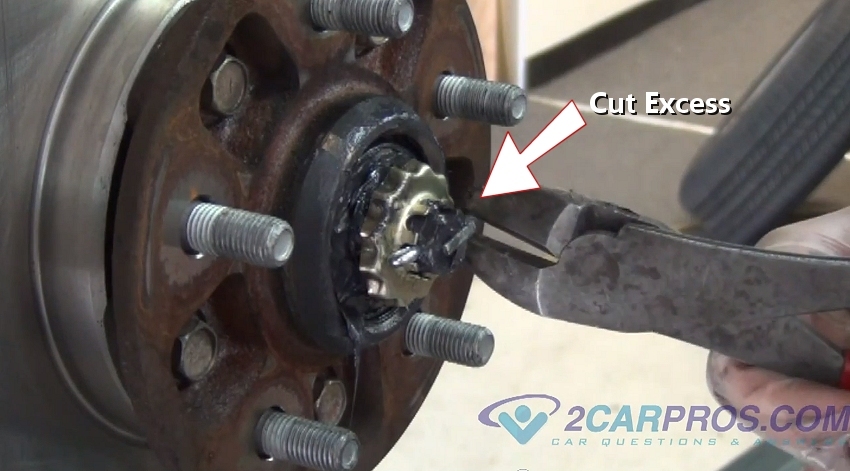
Step 54 - Once the cotter pin is installed, use a pair of dikes to bend the long end of the cotter pin over the spindle end and cut off the excess cotter pin material.

Cut Excess Cotter Pin
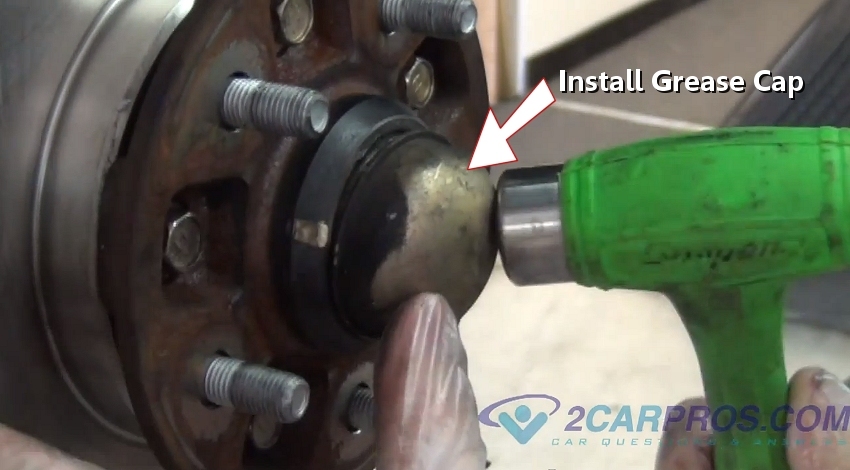
Step 55 - After the cotter pin has been installed, set the grease cap with the gap at the top.

Set Grease Cap
Step 56 - Using a hammer, install the grease cap evenly onto the bearing hub, wipe when finished with a shop towel.

Installing Grease Cap
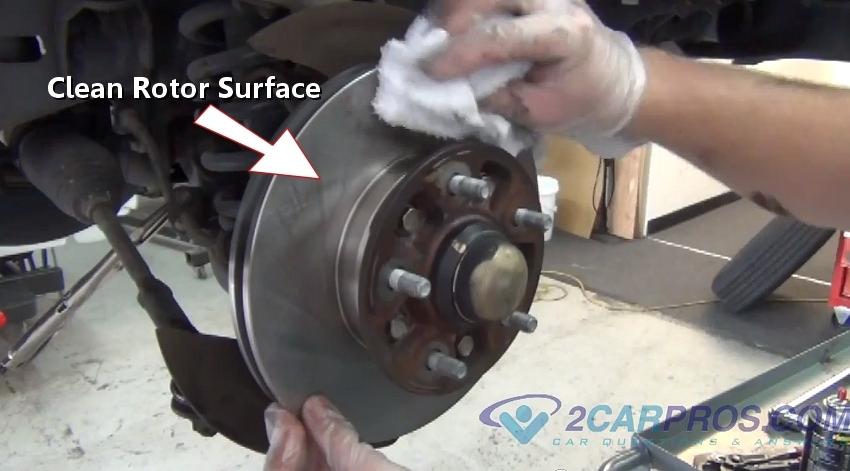
Step 57 - After the cap is installed, use a clean towel and clean the rotor pad surface on both sides.

Clean Rotor Surface
Step 58 - Then install the caliper mount, thread the mounting bolts and tighten.

Install Caliper Mount
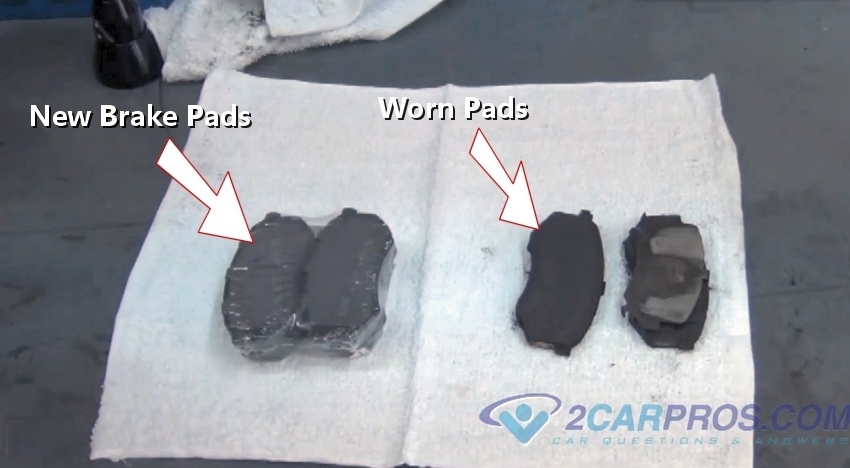
Step 59 - Compare the new brake pads to the worn pads, they should match up except for the worn brake material.

New Brake Pads
Step 60 - A brake pad may be unique as far as which side of the caliper its installed on, observe wear sensors etc.

Compare Brake Pad Size
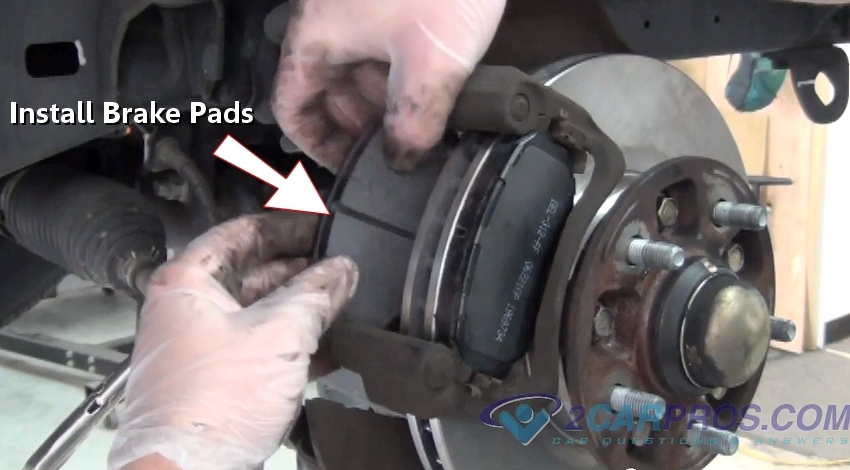
Step 61 - After confirming the brake pads, install both pads while checking anti rattle clips and shims.

Install Brake Pads
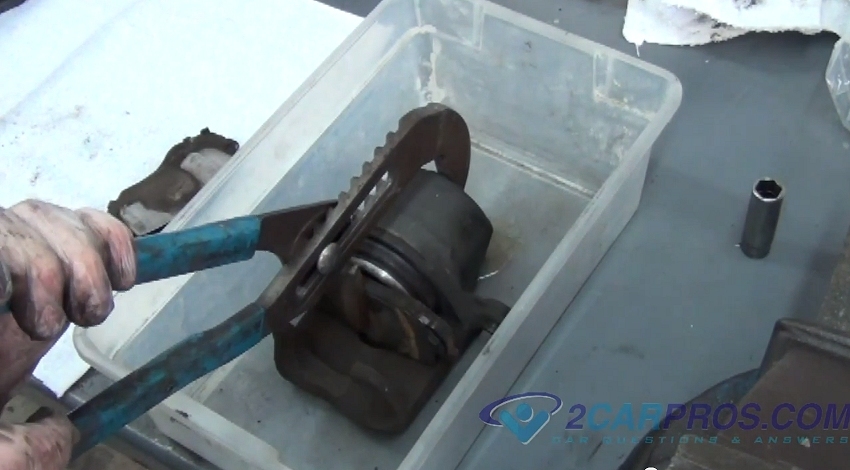
Step 62 - Using a large pair of channel locks or C clamp, use an old brake pad as a buffer and squeeze the brake caliper to retract the piston, (brake fluid will leak out). (Note: For most vehicles, this operation is done while the caliper is still connected to the brake hose.)

Retract Brake Caliper
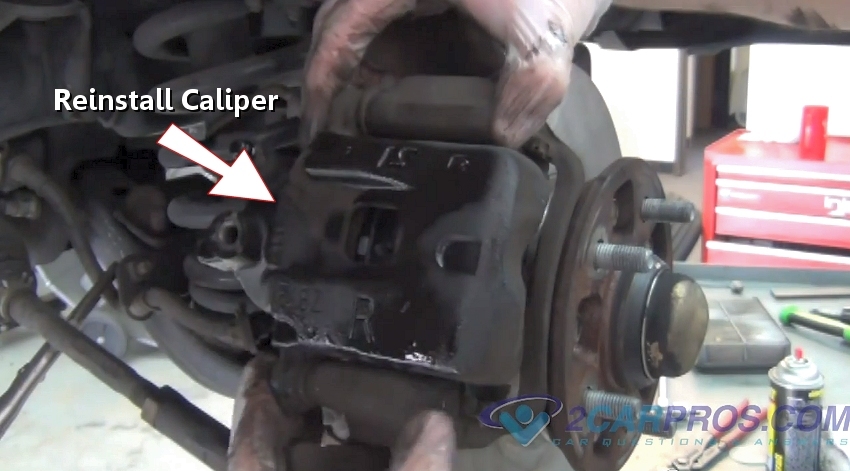
Step 63 - Reinstall brake caliper over the brake pads and wipe clean.

Reinstall Caliper
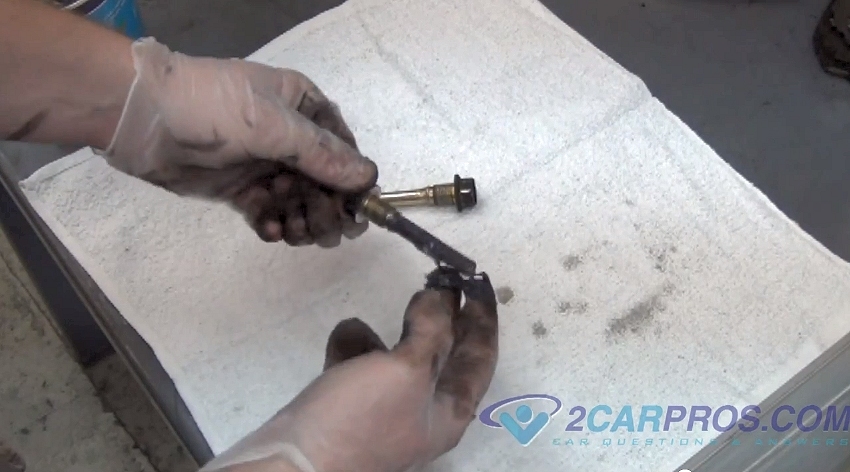
Step 64 - Using a shop towel, wipe the caliper slides clean and apply a thin layer of brake grease to the bolt slide area.

Service Caliper Slides
Light Snug Spindle Nut
Axle Nut Retainer
Install New Cotter Pin
Cut Excess Cotter Pin

Set Grease Cap
Installing Grease Cap
Clean Rotor Surface

Install Caliper Mount
New Brake Pads

Compare Brake Pad Size
Install Brake Pads
Retract Brake Caliper
Reinstall Caliper
Service Caliper Slides
Step 65 - After servicing the caliper slide bolts, install and tighten bolts onto the caliper.

Tighten Caliper Mounting Bolts
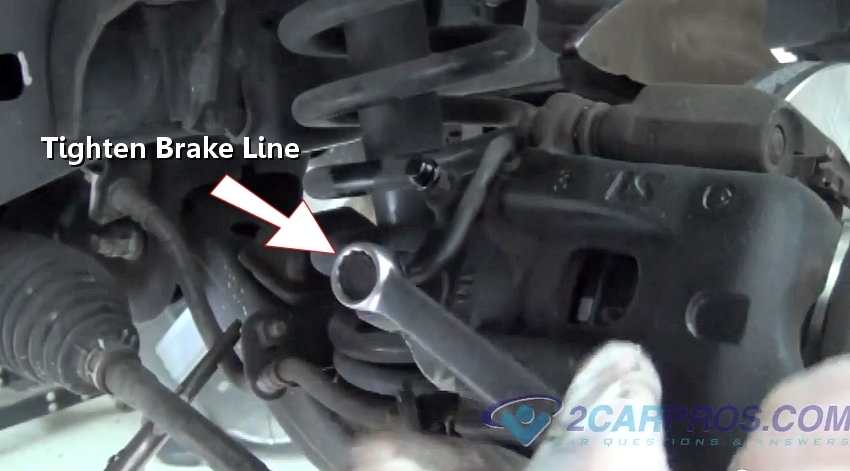
Step 66 - Once the caliper is installed, mount the brake line onto the caliper and tighten securely. (Note: Copper sealing washers needed for this step.)

Securely Tighten Brake Line
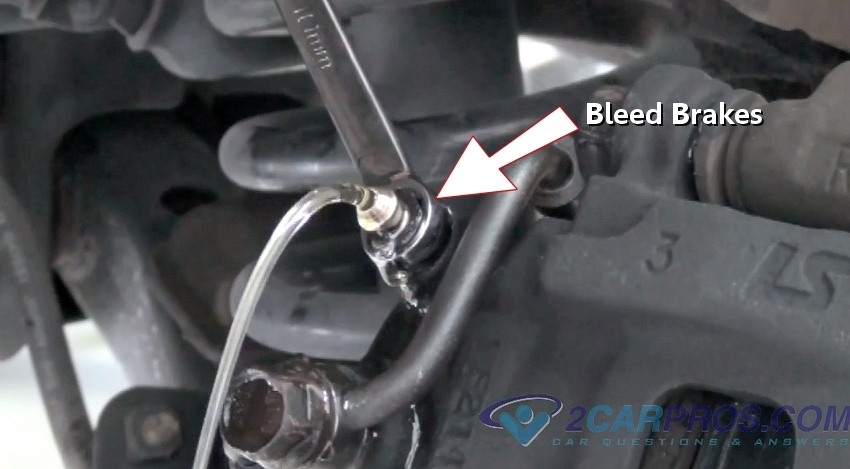
Step 67 - Next, remove the dust cap that covers the bleeder valve. With a helper holding down on the brake pedal, slowly open the bleeder to allow brake fluid and air to escape. Once the brake fluid flow stops close the bleeder completely. Then have the helper slowly allow the pedal to return to its normal position. (Note: Check brake fluid levels, before and after this operation.) Reinstall dust cap and wipe clean using a shop towel. Repeat these steps for the opposite side, always perform this repair on one side at a time to avoid confusion. Reinstall tires and lug nuts to tighten.
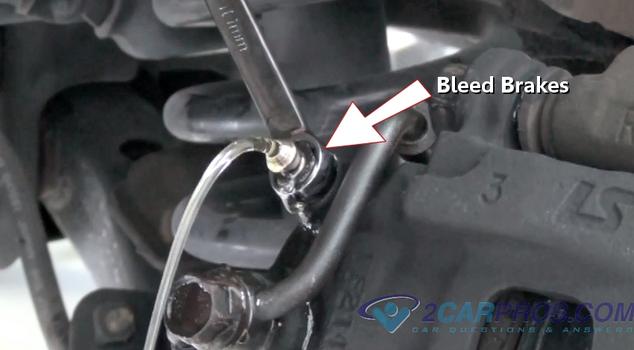
Bleed Brakes
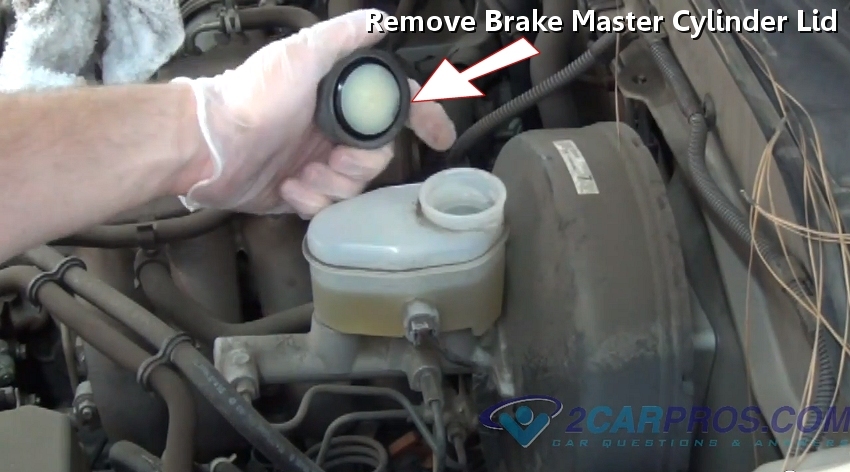
Step 69 - Using a shop towel, clean the brake master cylinder reservoir, remove the lid so fluid can be added.

Remove Brake Master Cylinder Lid
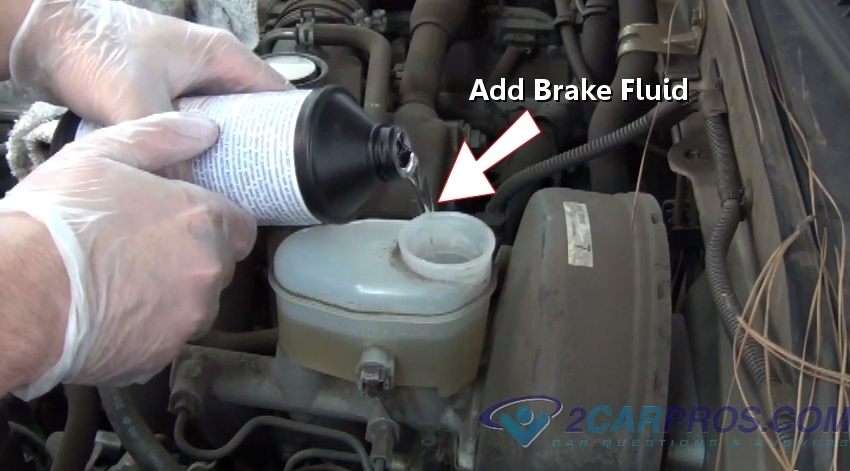
Step 70 - From a sealed container add brake fluid until the level meets the "FULL" line on the reservoir.
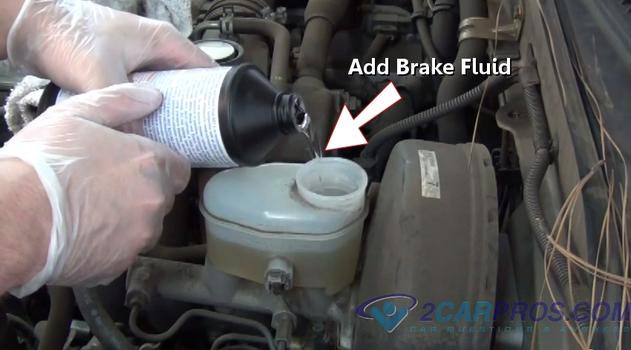
Adding Brake Fluid
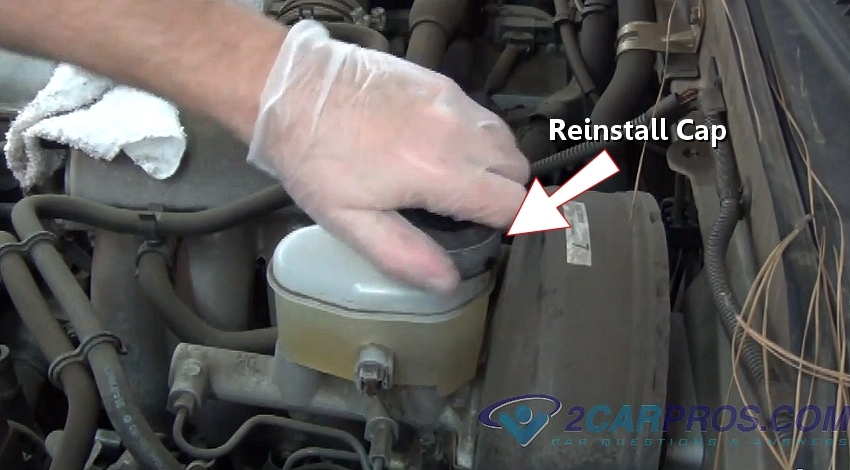
Step 71 - Once the fluid has been installed to its proper level, reinstall the lid and wipe an excess brake fluid with a shop towel.
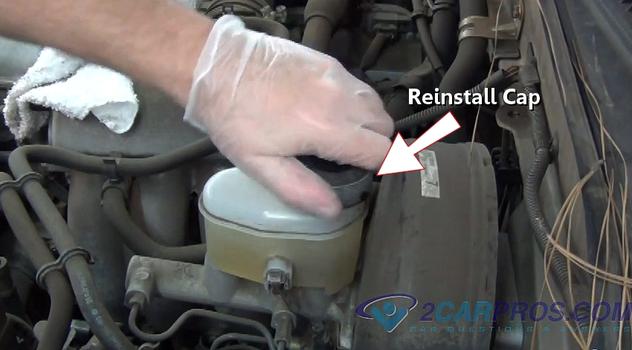
Reinstall Brake Master Cap
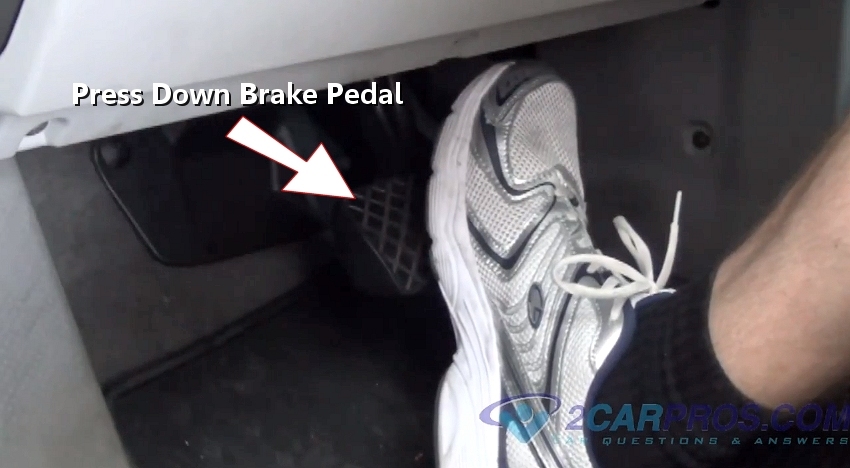
Step 72 - Next, slowly push the brake pedal down, then slowly allow it to return to normal position, repeat this action until normal brake pedal operation returns. (Note: Never operate a vehicle without normal brake pedal operation.)

Push Brake Pedal Down
Once the repair job is complete, drive the vehicle gently as the brake pads wear in. Once a few blocks of stop and start driving occurs the brake pads in be properly set to the brake rotor. When first driving the car after any brake service listen for "out of the ordinary" noises. If irregular noises are observed stop operating the vehicle and repair as necessary.
Each serviceable wheel bearing front brake design has minor differences but all share the same principal.
Helpful Information
Brake pads and rotors are normal service items on every vehicle. If the brake master cylinder is low on fluid or a squeaking noise is observed the brake pads should be inspected. This condition can be accompanied by a brake warning light on the dash. There are major differences between front wheel drive brake jobs, and rear wheel drive front brake jobs because of the location of the drive wheels.
Most replacement brake rotors with bearing hubs built together will have new axle bearing races already installed. Some safety precautions include never using compressed air to clean brake parts because of hazardous materials.
Best Practices

Tighten Caliper Mounting Bolts
Securely Tighten Brake Line
Bleed Brakes
Step 69 - Using a shop towel, clean the brake master cylinder reservoir, remove the lid so fluid can be added.
Remove Brake Master Cylinder Lid
Adding Brake Fluid
Reinstall Brake Master Cap
Push Brake Pedal Down
- Bleed the system after brake job is complete.
- Slide the tires under the vehicle for added safety while carefully avoiding jack stands.
- Always perform brake replacements on one wheel at a time to avoid confusion.
- It is a good practice to bleed the brake system when replacing brake components.


The difference between those used brake pads and the new ones is really something. I've replaced a lot of brake pads in my day (for which I can thank my father), and I'm always amazed to see that difference. Auto repair like this is really important to make sure your vehicle remains safe. Can you imagine the potential consequences of brakes that aren't taken care of? If you can't do it yourself, you should take it somewhere where they can.
ReplyDeleteService Pro Auto and Truck Repair
Thanks a lot for providing these instructions. My brake pads need to be replaced, and I see this as a great opportunity to learn how to do this myself. I thought I should do some research first, and this article was very helpful. I'll be sure to take your advice, and compare the sizes of the new and old brake pad sizes.
ReplyDeleteWalter Kowalski | http://www.alaskanautocenter.com/services
This is just what I have been looking for! I have been needing to replace my RWD brake pads and rotors. You even list all the steps and provide pictures as well so it makes it even easier to follow. Plus, you even have two other parts so we can see every step. Now I can do this on my own as soon as I buy the wholesale brakes to do it. Man, you made things a lot easier on me and now I will know how to do this on my own.
ReplyDeletehttp://www.stopmasterbrakes.com.au/
Thanks for sharing a great instructions. My car brake pads also need to be replaced, and I see your post it's really helpful for me.
ReplyDeletehttp://www.toughla.com/brakelinings/