How To Replace Parking Brake Shoe
Parking Brake Shoe Replacement
Helpful Information
The emergency/parking brake or "E" brake is used to securely hold the vehicle when in a stopped position. The brake is also designed to stop the vehicle in case of the primary system fails. On many vehicles with four wheel disc brakes, the parking brake has been integrated within the brake rotor disc.
This system is similar to the traditional drum brake systems with the exception of awheel cylinder. Most parking brakes are self adjusting, if the parking brake pedal seems low, or the brake doesn’t hold the vehicle there could be a problem and inspection is required.
Best Practices
- Lift vehicle to manufacturers recommended instructions and secure with jack stands.
- Brake material can contain asbestos. Avoid using pressurized air or other devices that can cause brake dust to become airborne.
- Do not use a hydraulic jack to hold the vehicle while performing work.
Tools and Supplies Needed
- Wrench set
- Socket set
- Lug wrench
- Hydraulic jack
- Jack stands
- Replacement parking brake shoes
- Shop towels
- Protective eyewear and gloves.
- Hammer
Step by step guide on how to replace an automotive parking brake shoe. This article pertains to all vehicles equipped with a parking brake shoe.
Difficulty Scale: 4 of 10
Begin with the vehicle on level ground, in park, safely lifted in the air and supported with jack stands for service.
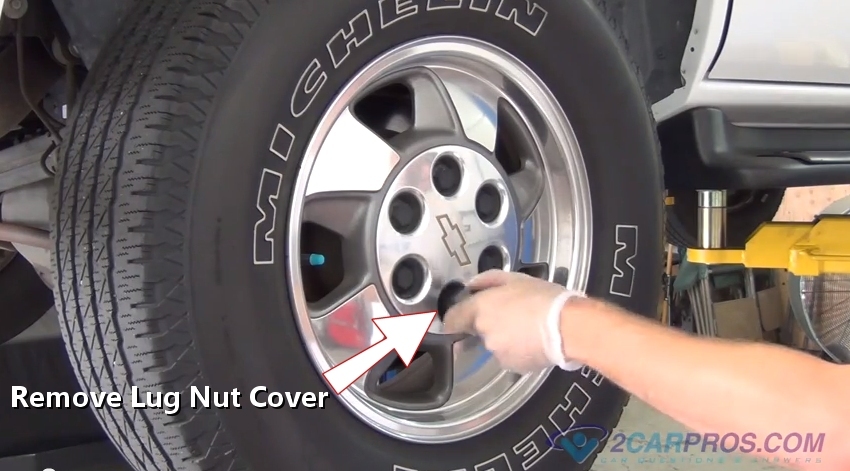
Step 1 - After the vehicle is safely lifted for service, remove the lug nut cover or hubcap if equipped.

Removing Lug Nut Cover
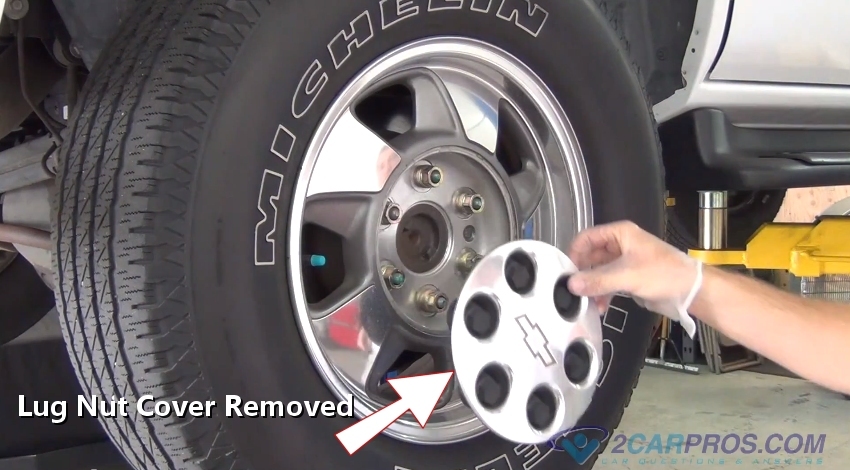
Step 2 - With the lug nut cover loose, remove it from the wheel.

Lug Nut Cover Removed
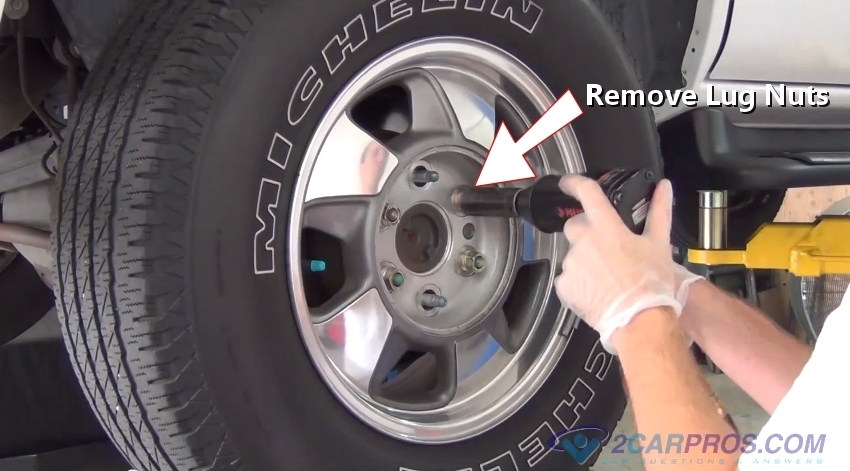
Step 3 - Using a air impact loosen the wheel lug nuts. If a lug wrench is used, loosen the lugs one turn while the vehicle is still on the ground.

Remove Lug Nuts
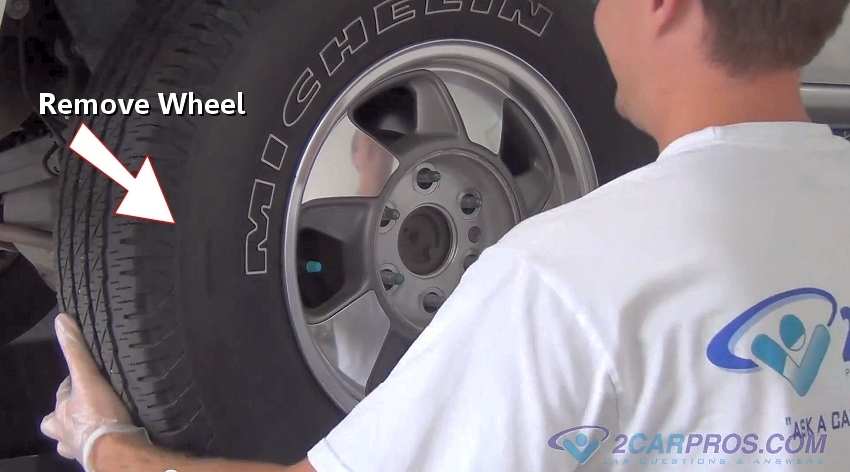
Step 4 - Next, grasp the wheel and lift to remove the wheel off of the wheel studs and away from the vehicle. Slide the tire under the vehicle for added safety.

Remove Wheel
Step 5 - After the wheel has been removed, use a pair of dikes to remove the rotor retainer clip. (Note: This clip will not be reinstalled, its used during the assembly process at the manufacturer, not featured on all vehicles.)

Remove Retainer Clip
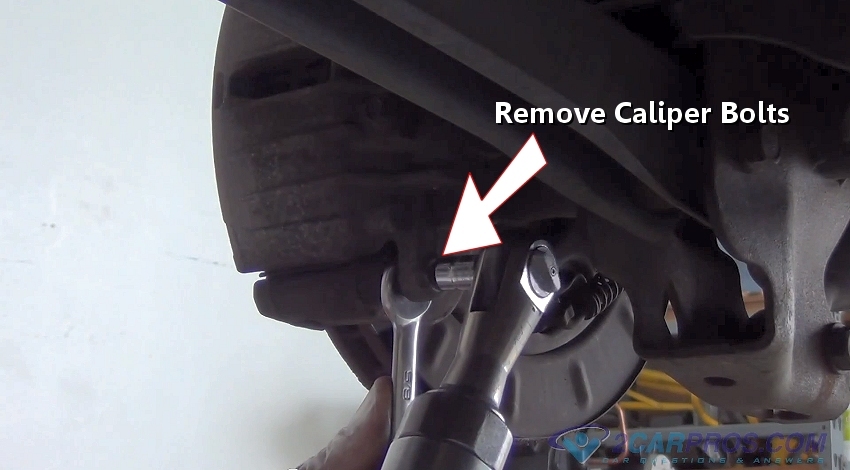
Step 6 - Using a socket or a wrench remove both caliper mounting bolts, upper and lower. (Note: A wrench may be needed to hold the caliper slide securely.)

Remove Caliper Mounting Bolts
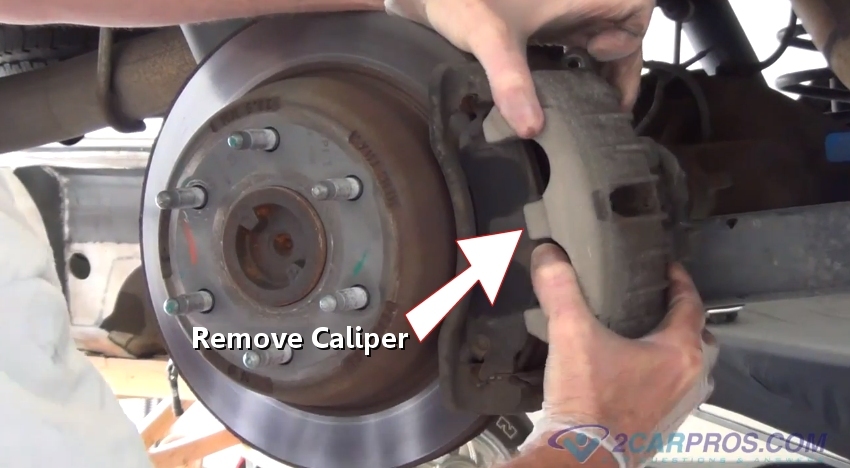
Step 7 - Once the rear caliper bolts have been removed, lift the brake caliper from the rear brake pads, the caliper will be snug against the pads. Secure the caliper while not allowing it to hang by the brake hose.

Remove Rear Caliper
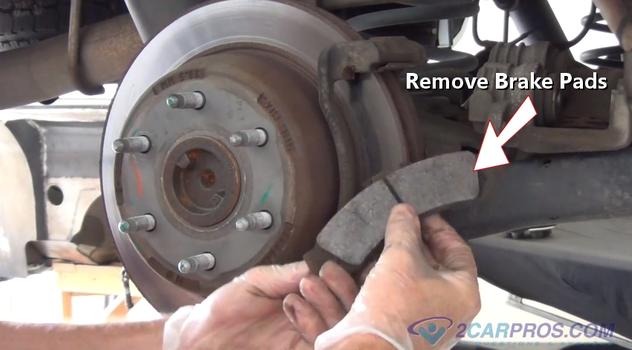
Step 8 - After the brake caliper has been removed and securely stowed, remove both rear brake pads from the caliper bracket.
 Step 9 - Next, loosen and remove both upper and lower caliper bracket mounting bolts.

Remove Caliper Bracket Mounting Bolts
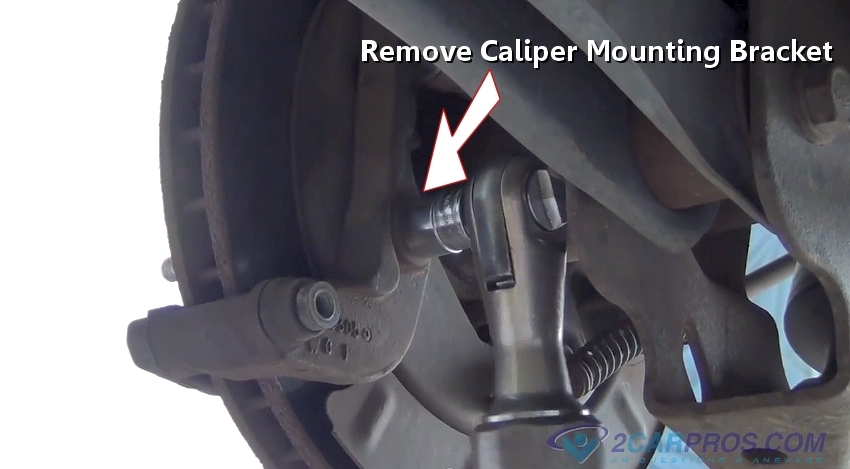
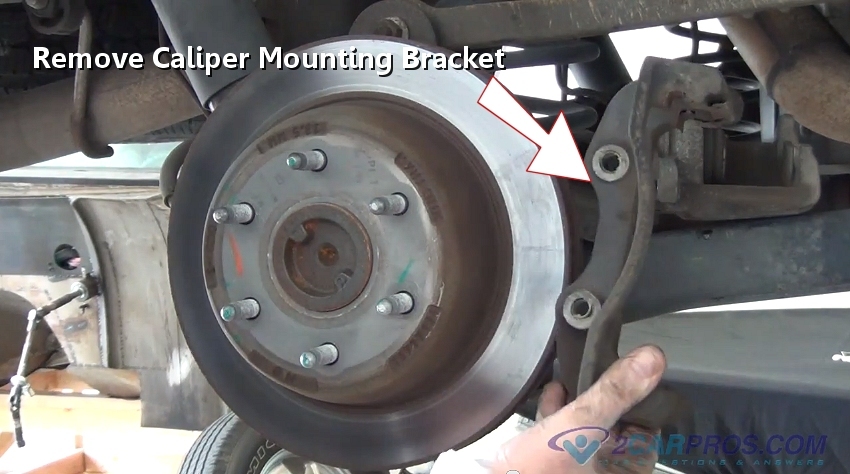
Step 10 - Once the bracket mounting bolt has been removed, lift the mount from the axle housing.

Remove Caliper Mounting Bracket
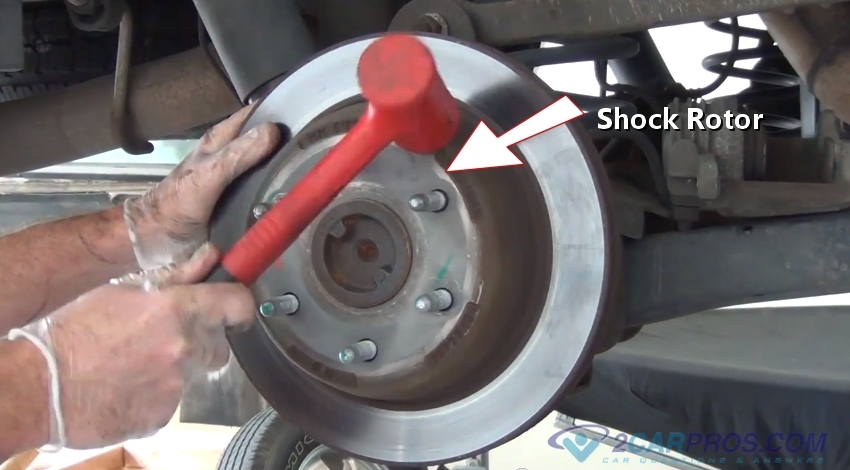
Step 11 - After the caliper mounting bracket has been removed, use a hammer and strike the rotor sharply, this action will loosen the rotor from the axle flange.

Shocking Rotor
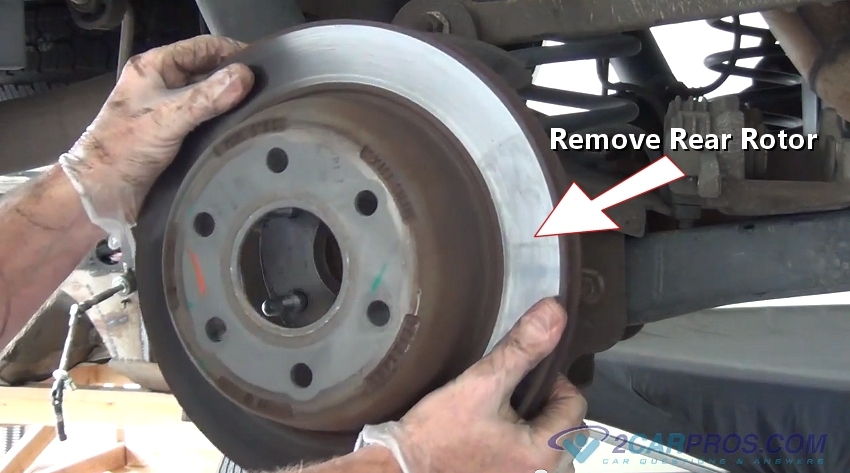
Step 12 - Grasp the brake rotor firmly and lift it off of the axle flange and wheel studs.

Remove Rear Brake Rotor
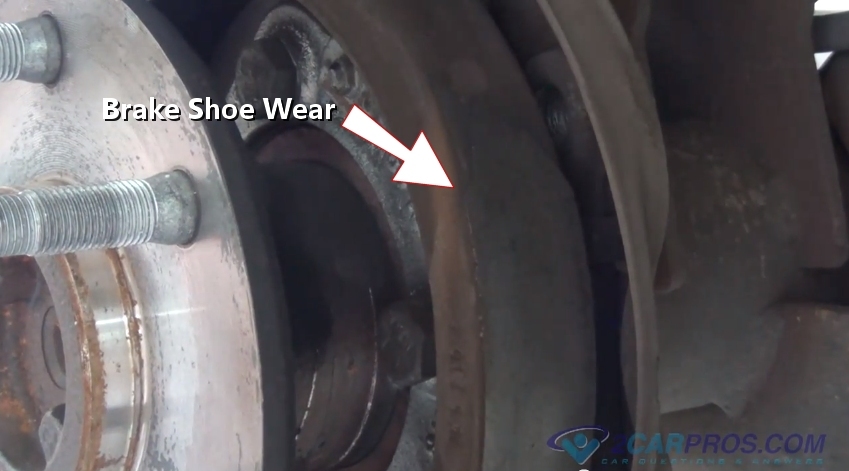
Step 13 - Once the brake rotor has been removed, inspect the parking brake shoe for wear.

Parking Brake Shoe Wear
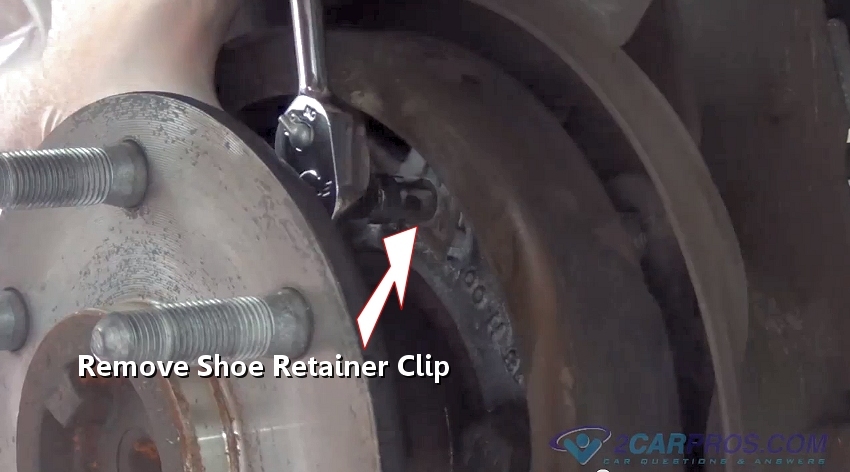
Step 14 - After inspection of the shoe lining, remove the anchor bolt which holds the parking brake shoe trainer clip in place.

Removing Parking Brake Shoe Retainer Clip
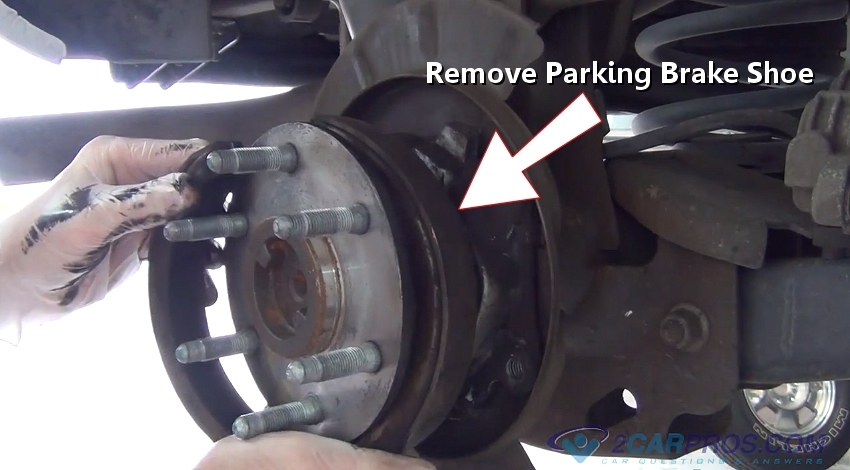
Step 15 - The parking brake shoe will become loose which will allow the removal of the shoe, this can be a little cumbersome in some vehicles.

Removing Parking Brake Shoe
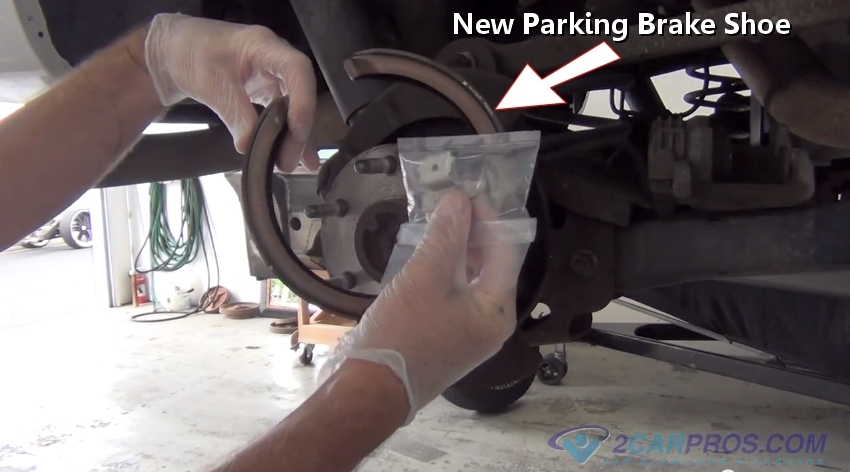
Step 16 - Compare the worn brake shoe to the replacement shoe. Also, install any new hardware that is included with the replacement shoe set.

New parking Brake Shoe W/Retainer Clip
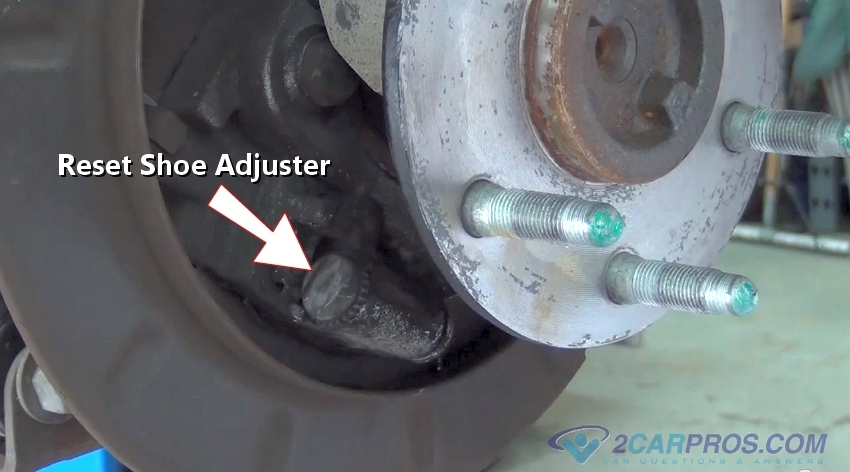
Step 17 - Before installing the new brake shoe, reset the self adjusters by turning the plunger inward.

Reset Parking Brake Shoe Adjuster
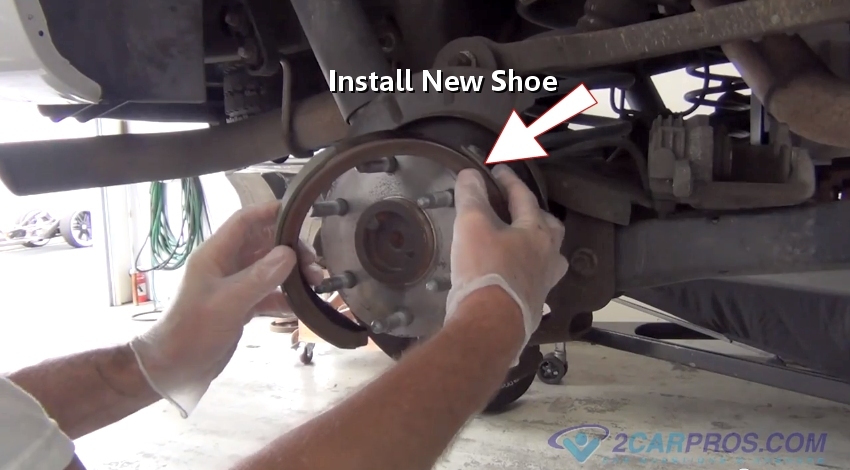
Step 18 - Gently place the new shoe over the axle flange and rotate into position.

Install Parking Brake Shoe
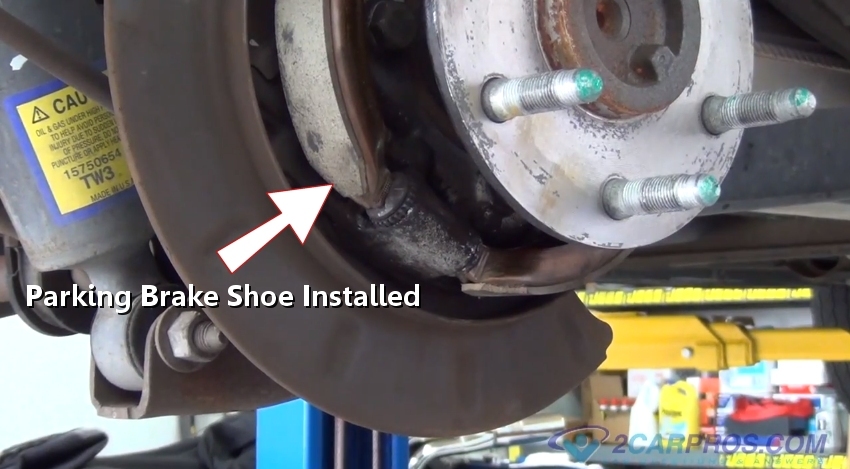
Step 19 - Once in position guide the shoe into the self adjuster plungers and reinstall the retainer clip. Then, reassemble the rear brake assembly by reversing the steps already completed.

Parking Brake Shoe Installed
After the job is complete, push the parking brake lever downward several times to adjust the shoe to the brake surface. Adjustments maybe required, if so, this is performed by tightening the star adjuster wheel, don't over tighten. While driving the vehicle, listen for weird noises as this indicates there is a problem, and further inspection is required.
Removing Lug Nut Cover
Lug Nut Cover Removed
Step 3 - Using a air impact loosen the wheel lug nuts. If a lug wrench is used, loosen the lugs one turn while the vehicle is still on the ground.
Remove Lug Nuts
Remove Wheel

Remove Retainer Clip
Remove Caliper Mounting Bolts
Remove Rear Caliper

Remove Caliper Bracket Mounting Bolts
Remove Caliper Mounting Bracket
Shocking Rotor
Remove Rear Brake Rotor
Parking Brake Shoe Wear
Removing Parking Brake Shoe Retainer Clip
Removing Parking Brake Shoe
New parking Brake Shoe W/Retainer Clip
Reset Parking Brake Shoe Adjuster
Install Parking Brake Shoe
Parking Brake Shoe Installed


Comments
Post a Comment