Rear Axle Seal Replacement
Axle Seal Replacement
Helpful Information
A differential requires three shaft seals (2 axle - 1 pinion gear) to maintain gear oil which is used to lubricate the gears while in operation. When these seals fail disassembly is required to replace them. When replacing an axle bearing a special puller is needed to extract the bearing from the housing. It can be reinstalled by using a hammer and a punch, or bearing driver.
Best Practices
- Use high quality silicon rubber to ensure a proper seal.
- Always refill the differential with factory recommended fluids.
- Differentials that are limited slip require special fluid.
- Use jack stands when working under a vehicle.
Step by step guide on how to replace a rear axle seal. This guide pertains to inner axle retainer vehicles only.
Difficulty Scale: 5 of 10
Tools and Supplies Needed
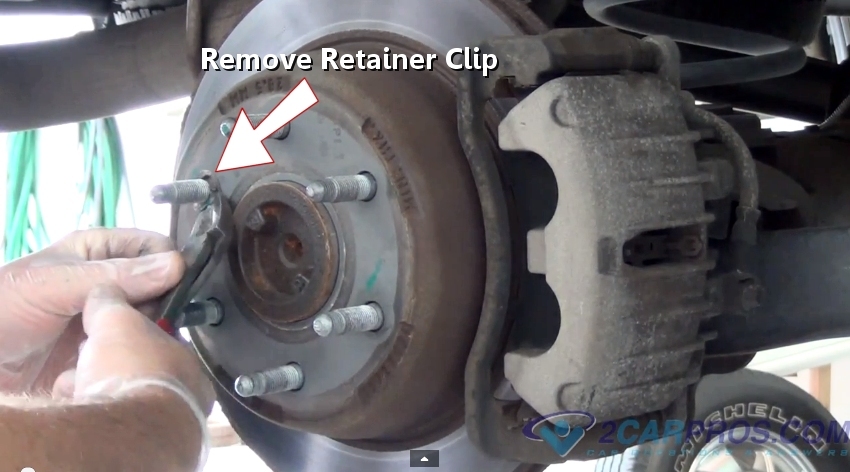
Step 1 - Once the vehicle is safely in the air, remove the tire on the side where the repair is needed and remove the retainer clip.

Removing Retainer Clip
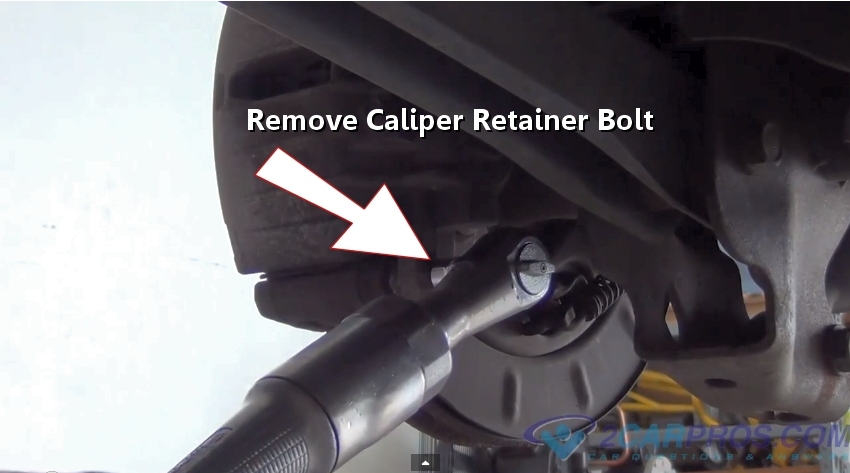
Step 2 - After removing retainer clips (installed for manufacturing, not needed on reassembly) remove the caliper mounting bolts.

Removing Caliper Mounting Bolts
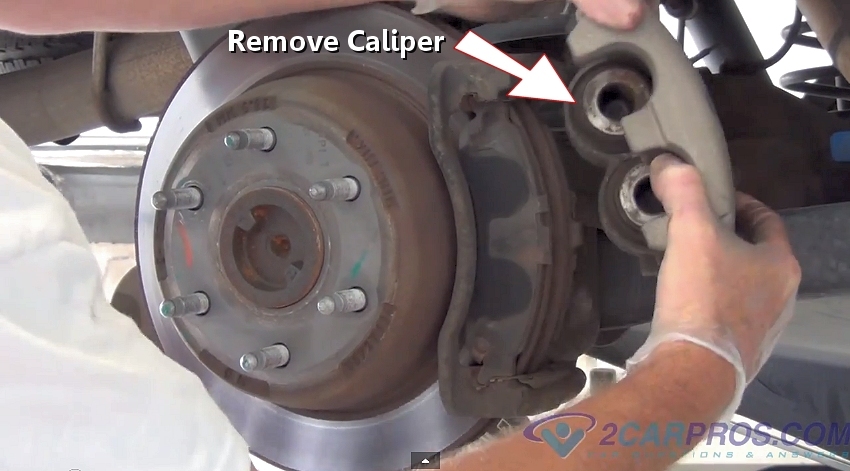
Step 3 - Next, lift the caliper off the brake pads and secure it out of the way.

Removing Brake Caliper
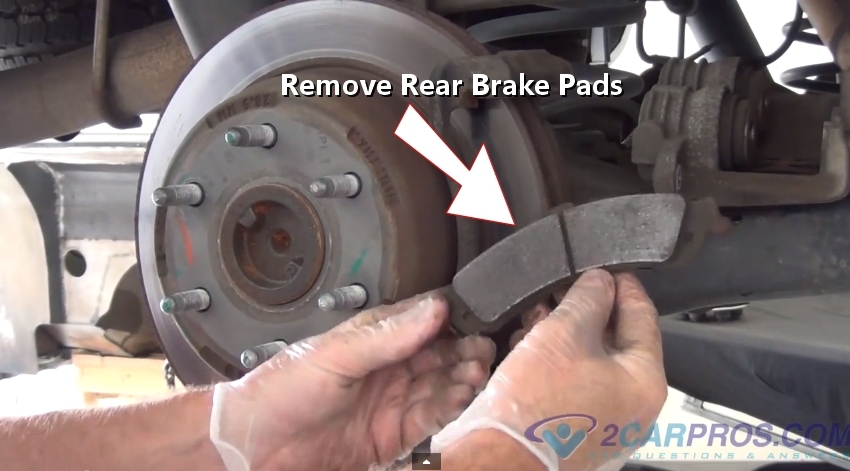
Step 4 - After the caliper has been removed, lift the brake pads out of the caliper mounting bracket. (Note: If gear oil has leaked onto the rear shoes or pads they must be replaced. Visit - Rear brake shoe replacement, Rear brake pad replacement.)

Removing Brake Pads
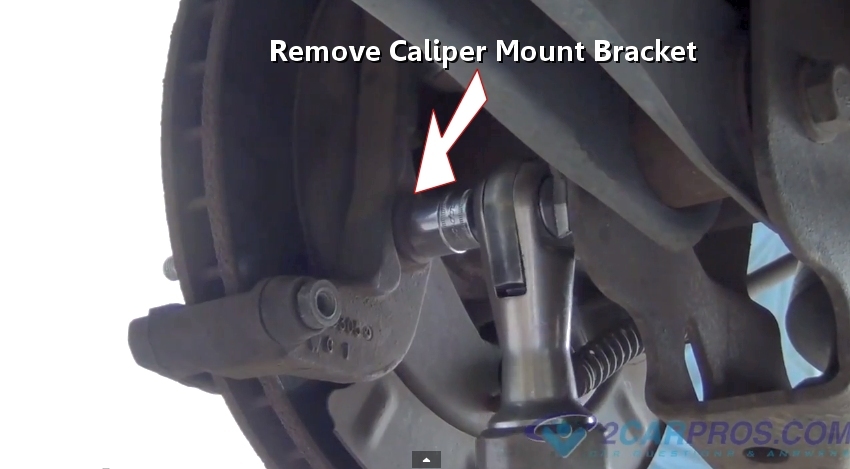
Step 5 - Once the brake pads have been removed, loosen and undo the caliper bracket mounting bolts to remove the bracket.

Removing Caliper Mounting Bolts
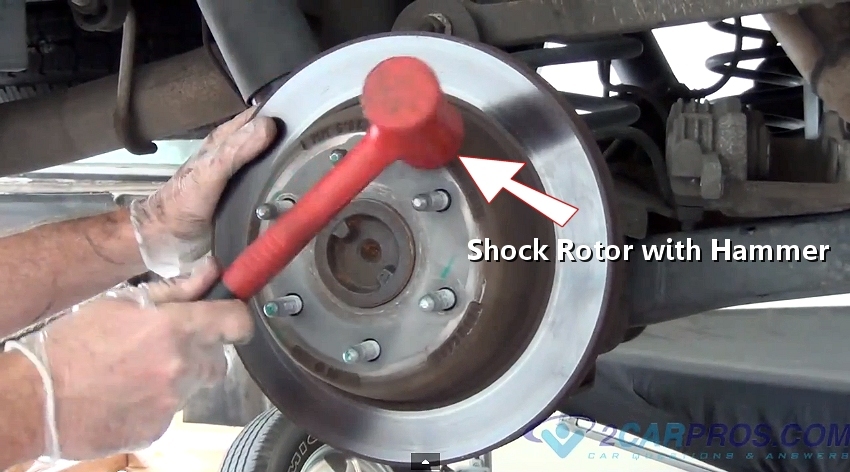
Step 6 - Sometimes rust can hold the rotor to the axle, in this case use a plastic or rubber hammer to "shock" the brake rotor to loosen.

Brake Rotor Shock
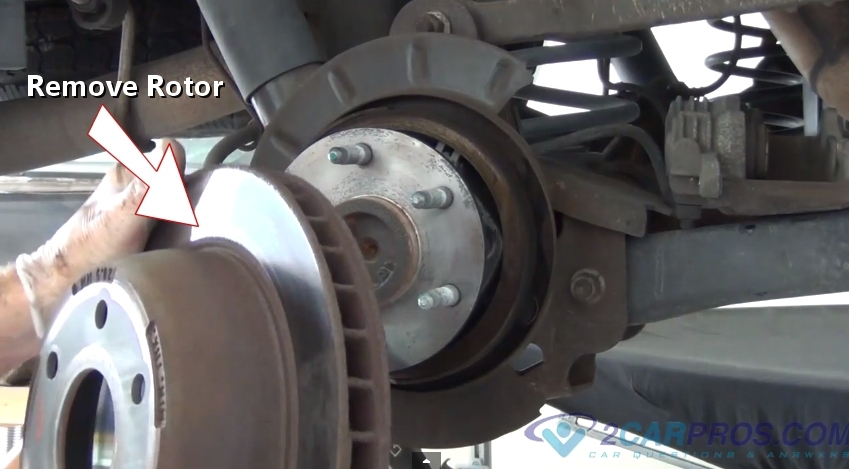
Step 7 - After the hammer shock loosens the rotor, simply grasp the rotor to remove it.

Removing Brake Rotor
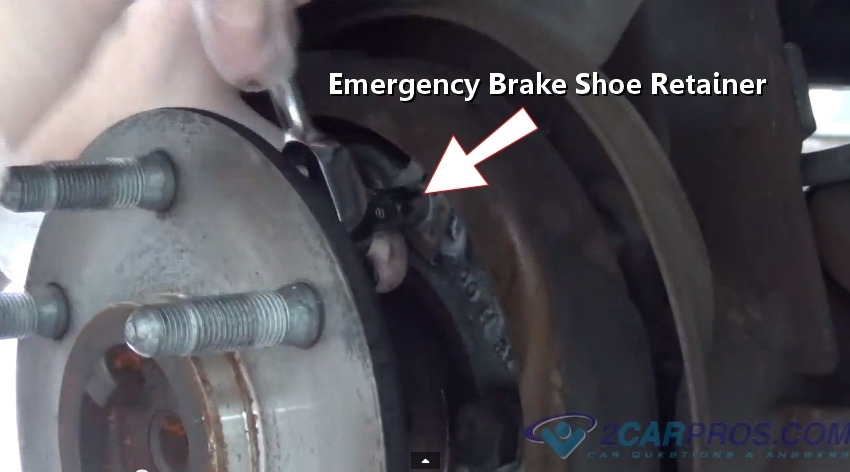
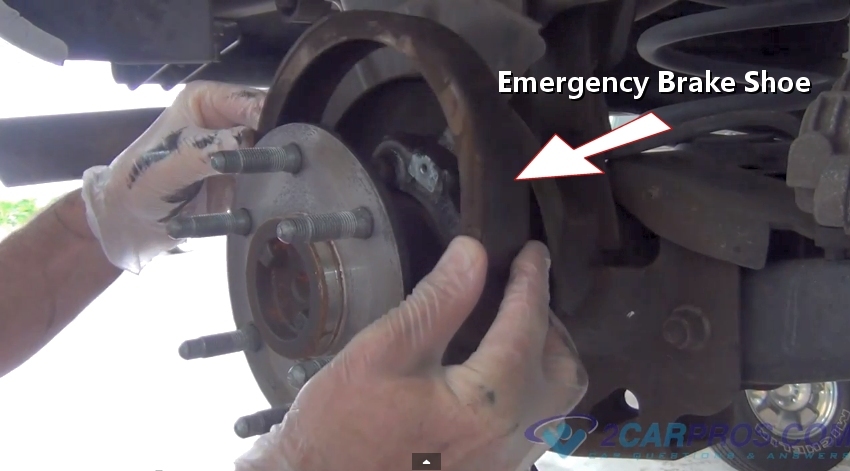
Step 8 - Next, remove the parking brake shoe retainer bolt.

Removing parking Brake Shoe Retainer
- Replacement axle seal
- Socket set
- Screw drivers set
- Wrench Set
- Protective gloves and eyewear
- Breaker bar
- Large pry bar
- Gear oil
- Differential cover gasket
- Gasket sealer
- Fluid catch basin
- Dikes (side cutters)
- Shop towels
- Hydraulic jack
- Jack stands
Removing Retainer Clip
Removing Caliper Mounting Bolts
Removing Brake Caliper
Removing Brake Pads
Removing Caliper Mounting Bolts
Brake Rotor Shock
Removing Brake Rotor
Removing parking Brake Shoe Retainer
Step 9 - Once the retainer has been removed, lift the brake shoe from the axle assembly.

Removing Emergency Brake Shoe
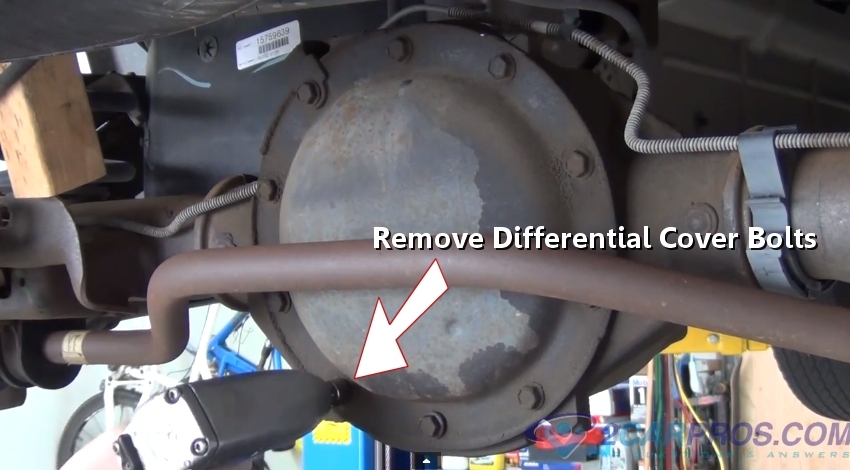
Step 10 - Only loosen and don't remove the bottom three cover bolts, fully remove the remaining bolts. Have a fluid catch basin ready to catch gear oil which will start to flow from the cover.

Removing Cover Bolts
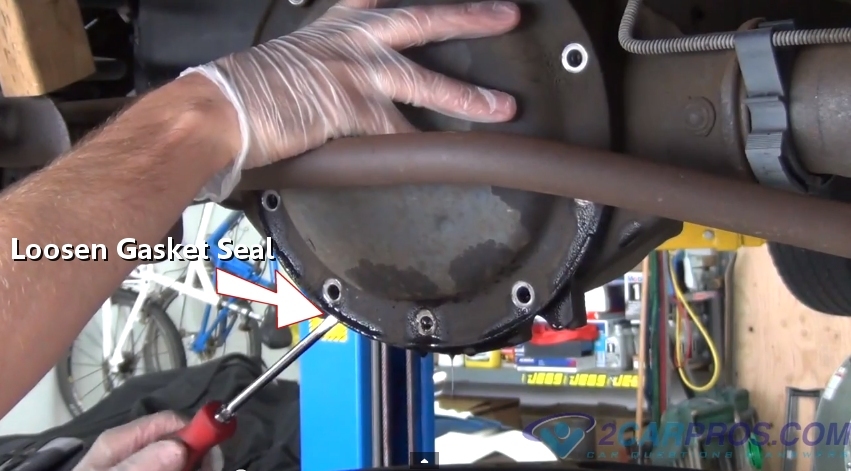
Step 11 - Once most of the gear oil has drained into the catch basin, remove the remaining three bolts to remove the cover, use a large screw driver to release the seal.

Loosening Differential Cover Gasket Seal
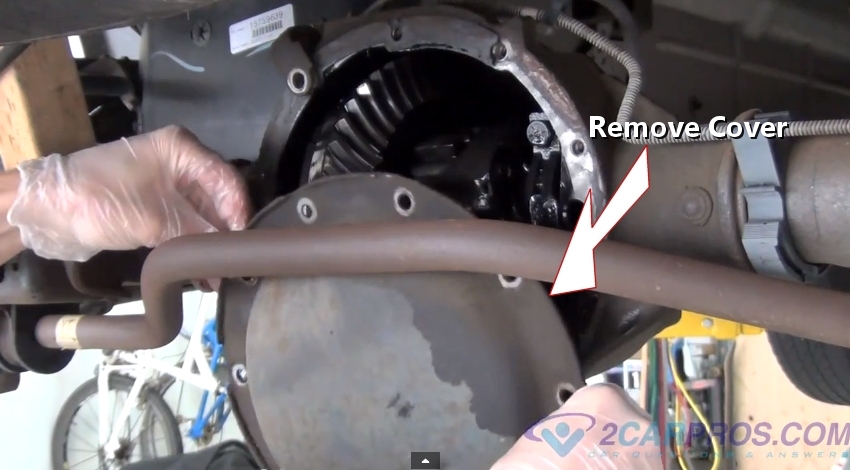
Step 12 - Next, remove the cover while exposing the inner workings of the differential.

Removing Differential Cover
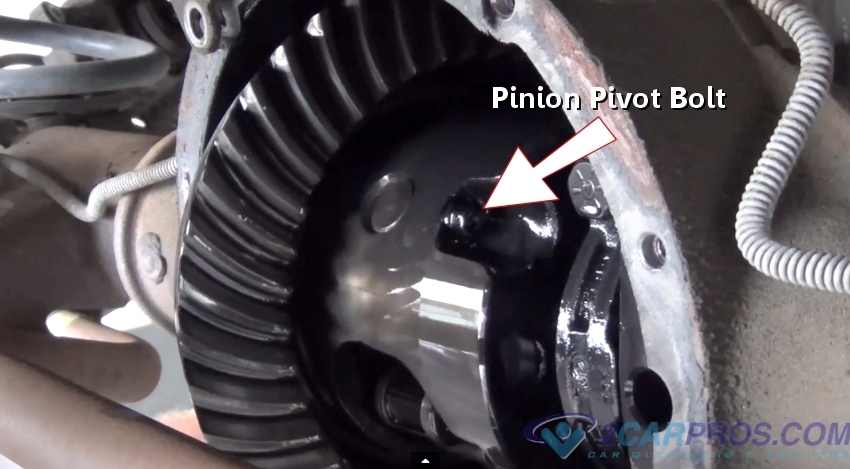
Step 13 - Then, rotate the driveshaft until the pinion pivot shaft bolt is exposed. (Note: keep fingers clear while rotating the gear set.

Locating Pinion Pivot Bolt
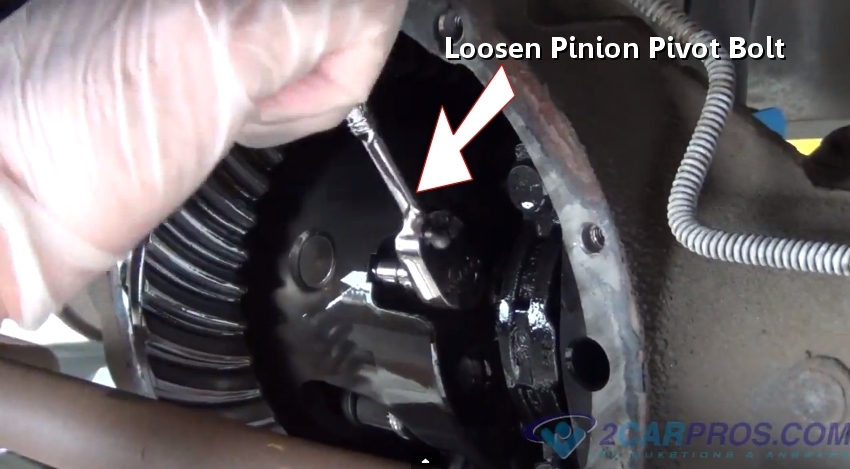
Step 14 - After the pinion pivot bolt has been located, use a small ratchet or wrench to loosen and remove the bolt.

Removing Pinion Pivot Bolt
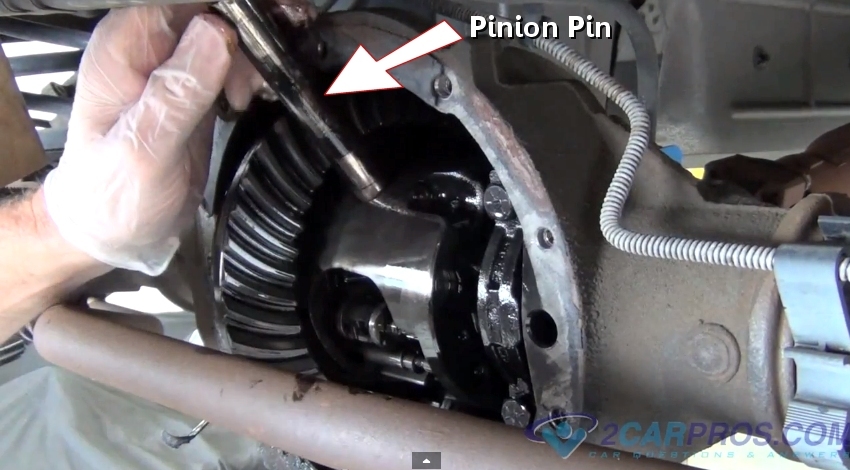
Step 15 - Once the pinion pivot bolt has been removed, rotate the driveshaft to maneuver enough clearance to allow the pinion pivot to slide completely out. Use a finger to push up from the bottom, grasp to remove.

Removing Pinion Pin
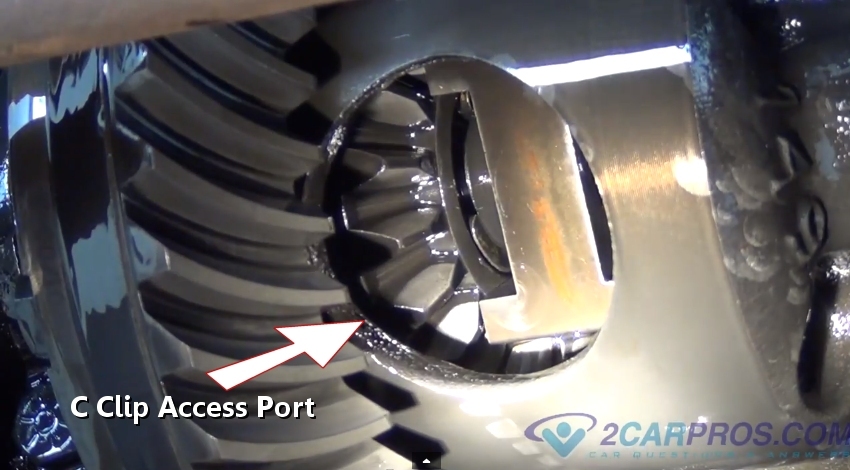
Step 16 - After the pinion pin has been removed, again rotate the drive shaft until the "C" clip access port appears.

C Clip Access Port
Step 17 - Next, at the axle flange (wheel side) move the axle inward, it will move slightly, to allow enough clearance for the "C" clip to be removed.

Removal Clearance
Removing Emergency Brake Shoe
Removing Cover Bolts
Loosening Differential Cover Gasket Seal
Step 12 - Next, remove the cover while exposing the inner workings of the differential.
Removing Differential Cover
Locating Pinion Pivot Bolt
Removing Pinion Pivot Bolt
Removing Pinion Pin
C Clip Access Port
Removal Clearance
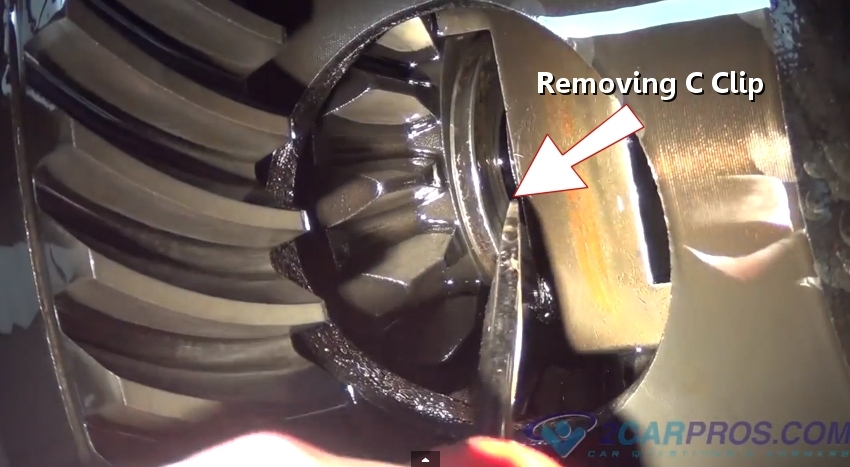
Step 18 - Use a small screwdriver or magnet to work the "C" clip out of the assembly which will release the axle.

Removing C Clip
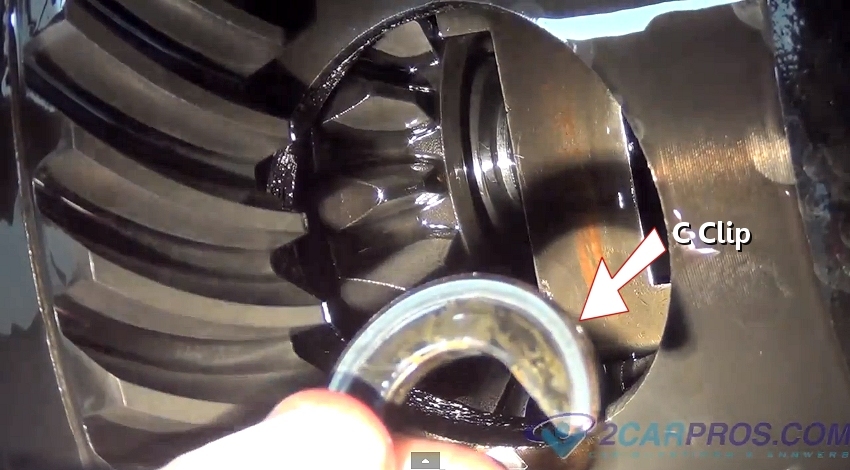
Step 19 - Once the C Clip has been worked out of the gear set check the clip for wear and replace if needed.

C Clip Removed
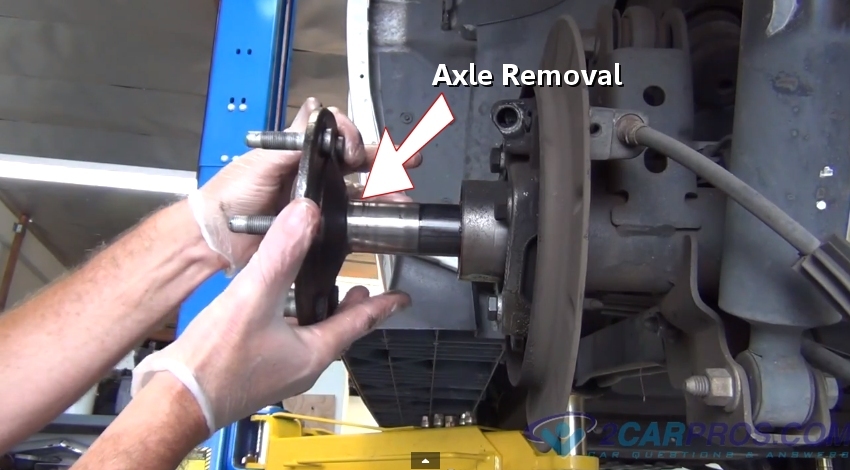
Step 20 - Next, grasp the axle at the flange and pull outward. The axle should slide completely out of the differential housing.

Removing Axle
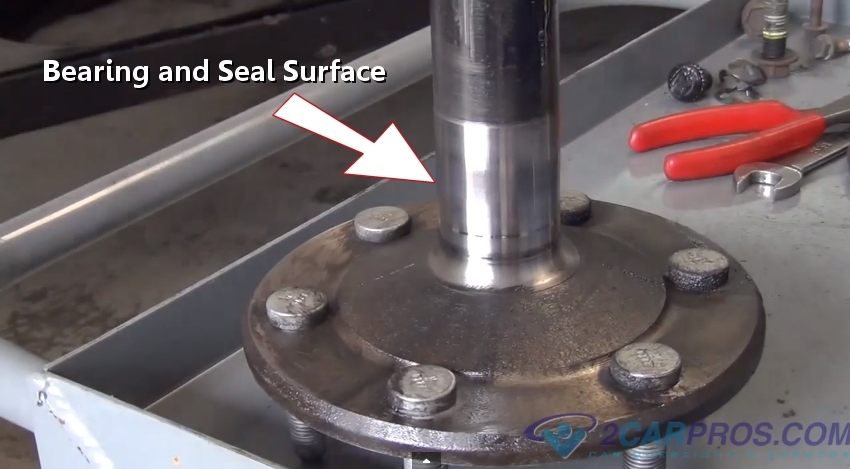
Step 21 - Once the axle has been removed inspect the bearing and seal surface of the axle and replace if worn. If this axle was worn you would see an obvious groove in this area.

Bearing and Seal Surface
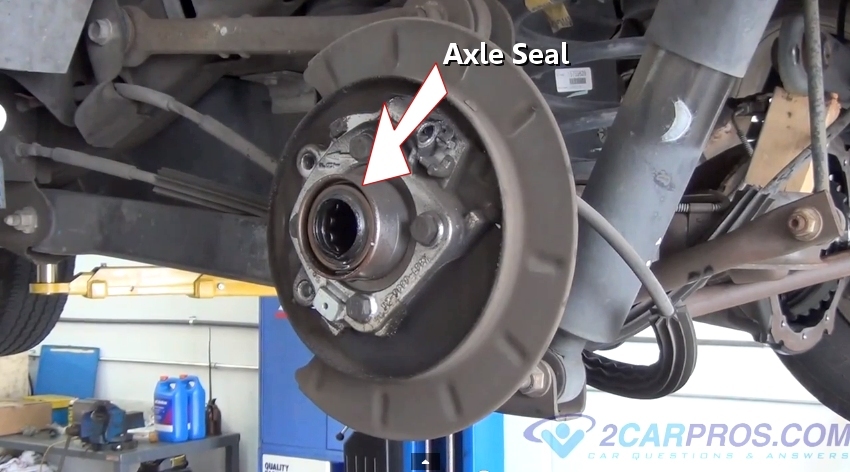
Step 22 - After the axle has been removed the axle seal is ready for replacement.

Axle Seal
Step 23 - Next, use a large pry bar to leverage the seal out of the differential housing.

Removing Axle Seal.
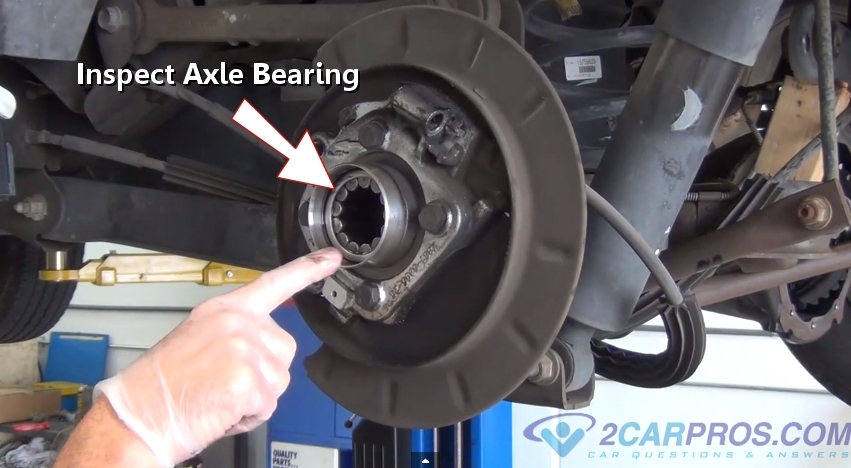
Step 24 - Once the axle seal has been removed, inspect the axle bearing for wear and replace if needed.

Inspecting Axle Bearing
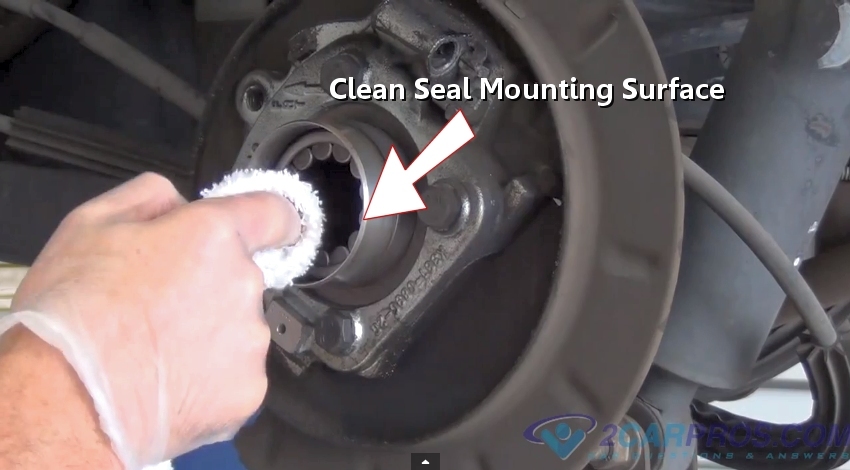
Step 25 - Using a shop towel, clean the seal mounting surface which will ensure proper installation.

Clean Seal Mounting Surface
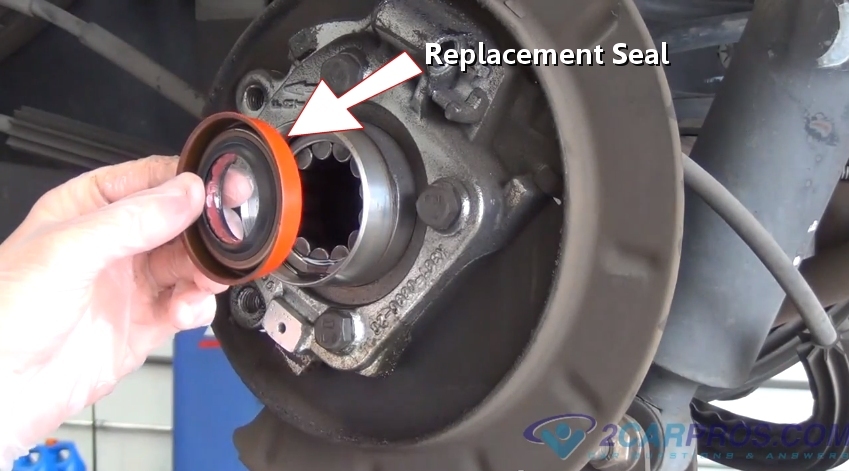
Step 26 - Once the surface has been cleaned, match the new axle seal to the differential housing.

New Axle Seal
Removing C Clip
C Clip Removed
Removing Axle
Step 21 - Once the axle has been removed inspect the bearing and seal surface of the axle and replace if worn. If this axle was worn you would see an obvious groove in this area.
Bearing and Seal Surface
Axle Seal

Removing Axle Seal.
Inspecting Axle Bearing
Clean Seal Mounting Surface
New Axle Seal
FOR FURTHER STEP CHECK PART 2


Comments
Post a Comment