How To replace Valve Cover Gasket
Valve Cover Gasket Replacement
Procedure To Replace Valve Cover Gasket In Your Car
Helpful Information
Oil is present inside the engine, this oil must be contained through the use of gaskets and seals, these units can wear and fail allowing oil to leak externally. A valve cover gaskets is located between the engine block and cylinder head, when it fails it can leak oil onto the exhaust manifold were it's burned with a noticeable odor.
Parts and Supplies Needed
Best Practices
- New valve cover gasket set
- Shop towels
- Carburetor Cleaner
Best Practices
- Recheck valve cover bolt tightness after a short time
- Avoid gasket material and dirt from getting into the engine
- Do not over tighten valve cover
- Clean engine before the valve cover is removed to avoid dirt contamination
Easy step by step guide on how to replace an automotive engine valve cover gasket, though configurations will vary, the process is similar, this information pertains to most vehicles.
Difficulty Level - 4
Begin with the vehicle on level ground, engine "OFF", in park with the emergency brake set, wear protective eyewear and gloves using a basic set of tools.
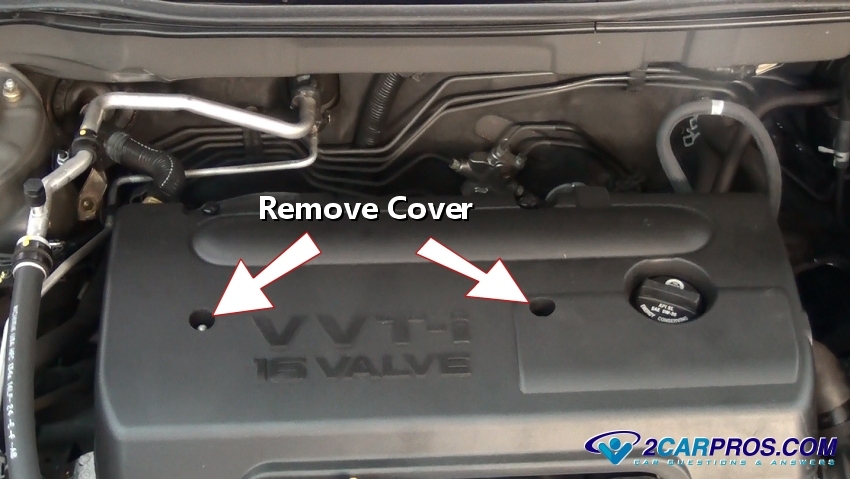
Step 1 - Some engine's have a plastic cover over the valve cover that must be removed by loosening and removing the mounting nuts or bolts.
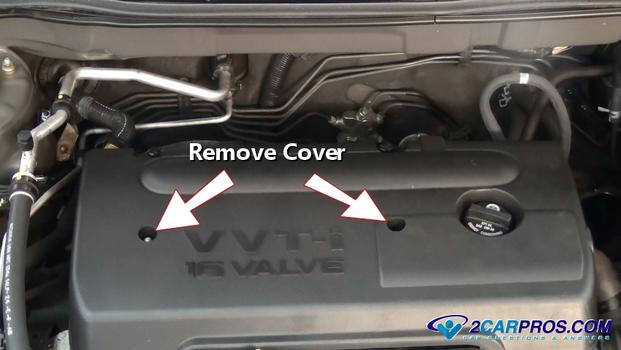
Remove Plastic Cover
Step 2 - Some engine's are designed with ignition coils mounted to the valve cover which will need to be removed, start by removing the electrical connectors.
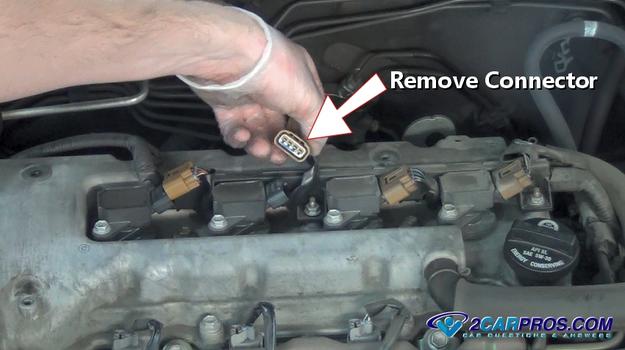
Remove Ignition Coil Electrical Connector
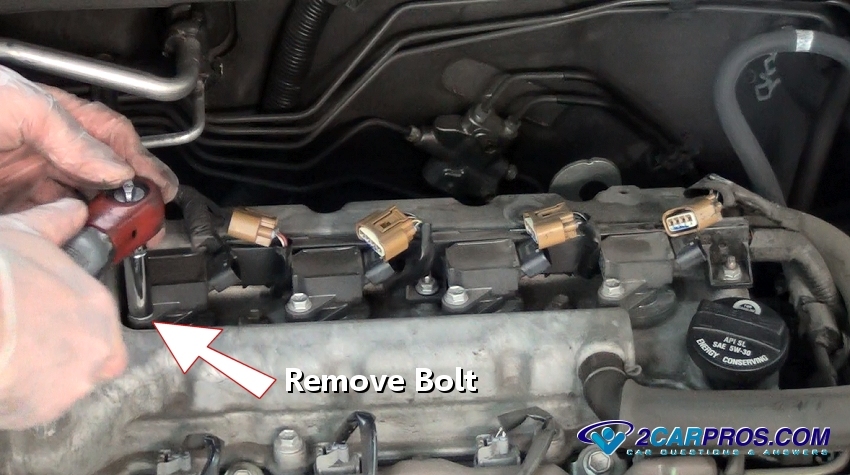
Step 3 - Loosen and remove the mounting bolts that secure the ignition coils.
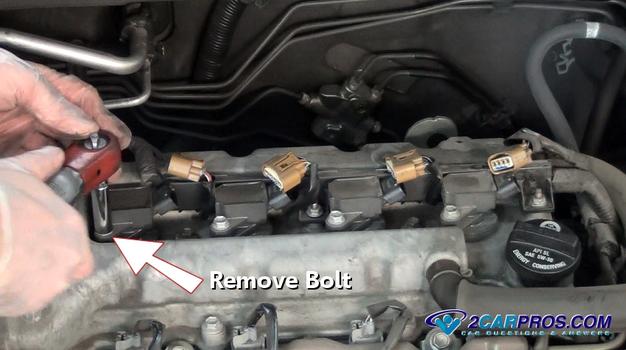
Remove Coil Mounting Bolts
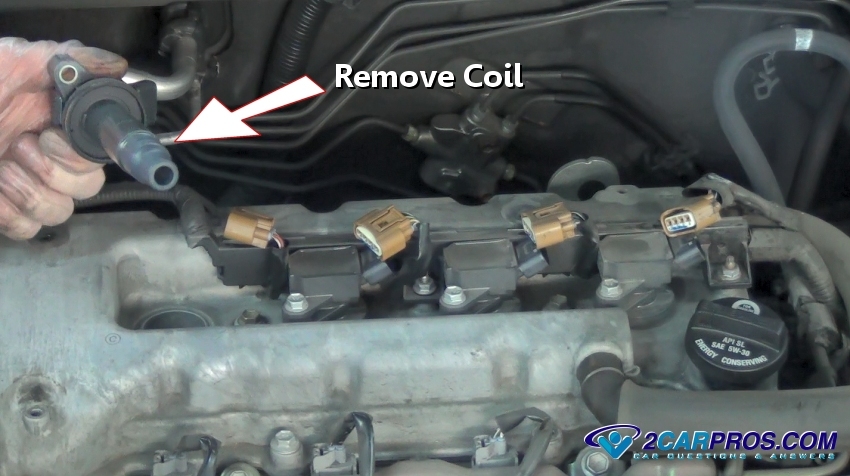
Step 4 - Remove the ignition coils from the valve cover and inspect.

Remove Ignition Coil
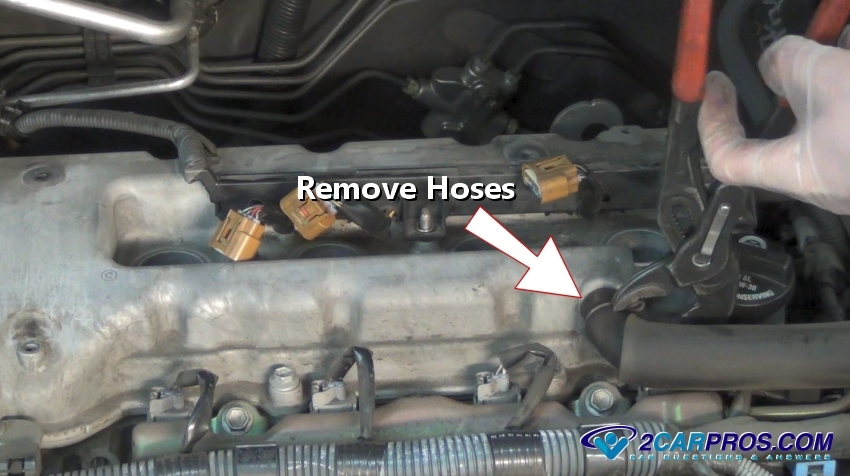
Step 5 - Inspect the valve cover to remove any breather hoses or plastic clips that are attached by releasing the clamp using pliers.

Remove Hoses
Step 6 - Remove wiring harness mounting bolts to remove the harness from the valve cover.

Remove Wiring Harness
Step 7 - Loosen and remove all valve cover mounting bolts.
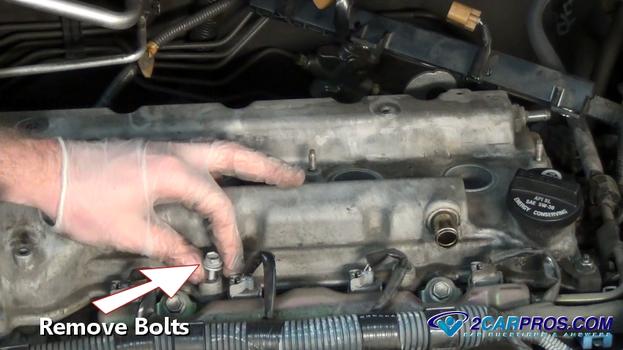
Remove Valve Cover Bolts
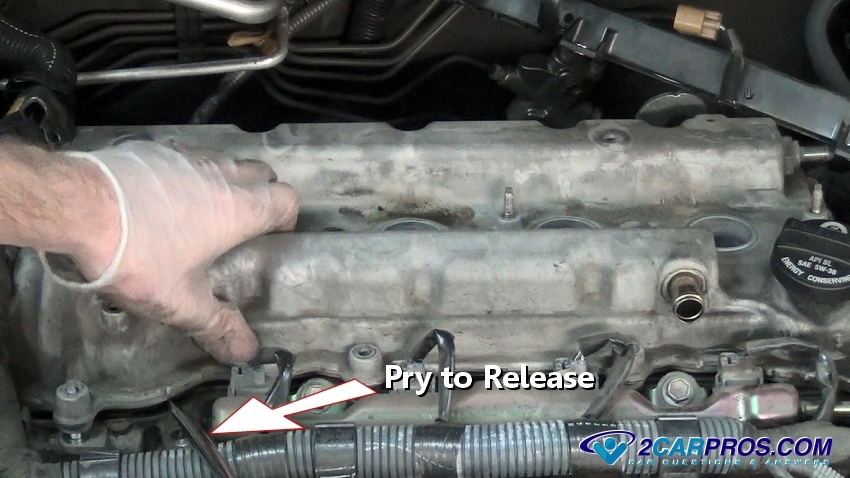
Step 8 - Be sure all valve cover mounting bolts have been removed before trying to remove the cover to avoid damage, use a screw driver or small pry bar to wedge in-between the cover and cylinder head to pry the cover seal loose.

Pry Loose Valve Cover
Step 9 - Grasp the valve cover firmly and lift it from the engine bay, a small amount of oil will be present.

Removing Valve Cover
Step 10 - Once the valve cover has been removed, the valve train will be exposed, be sure to keep dirt and debris from this area, check the area for excessive sludge build up and clean if needed.
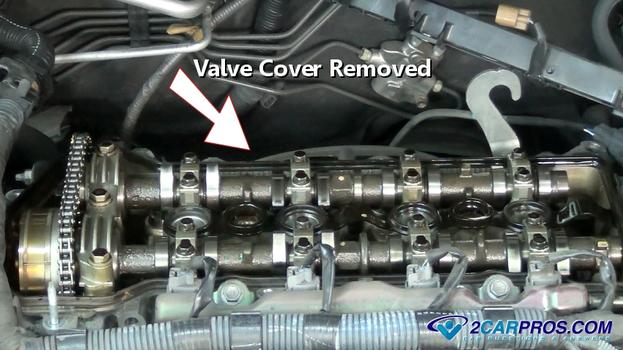
Valve Cover Removed
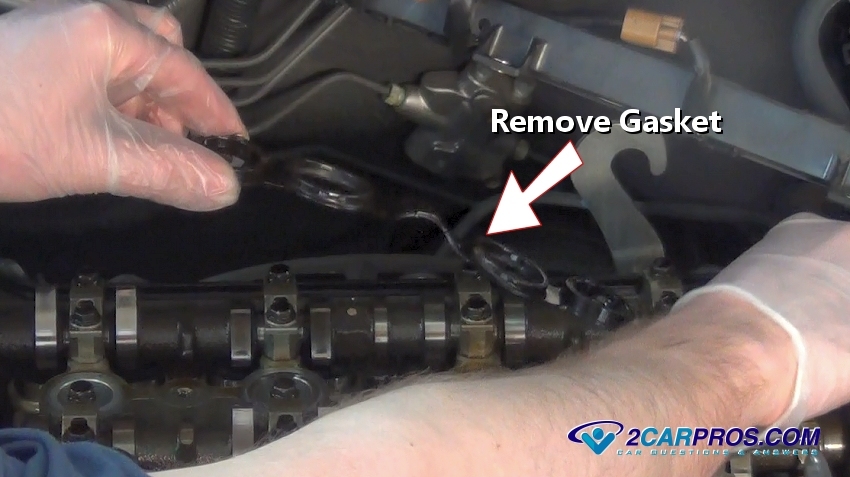
Step 11 - The cover gasket will either be stuck on the cylinder head, or the valve cover itself, remove the old gasket.

Remove Valve Cover Gasket
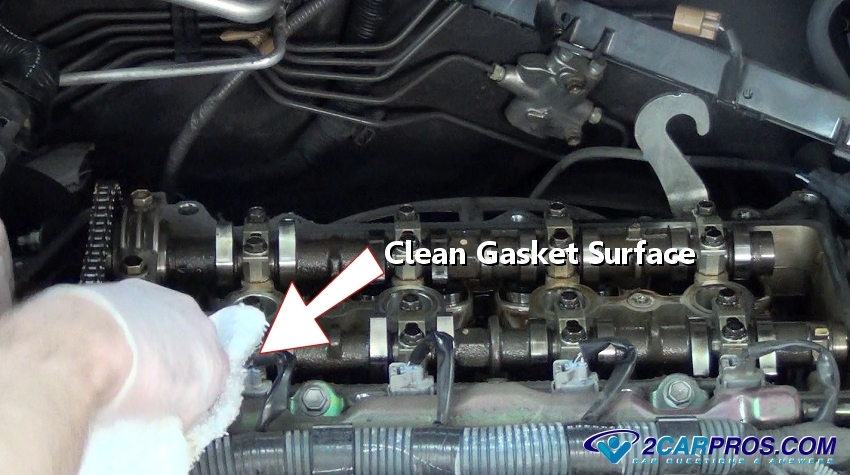
Step 12 - Using a shop towel and some carburetor cleaner, wipe the gasket surface clean to ensure a proper reseal of the new gasket. (Note: A gasket scraper may be needed.)
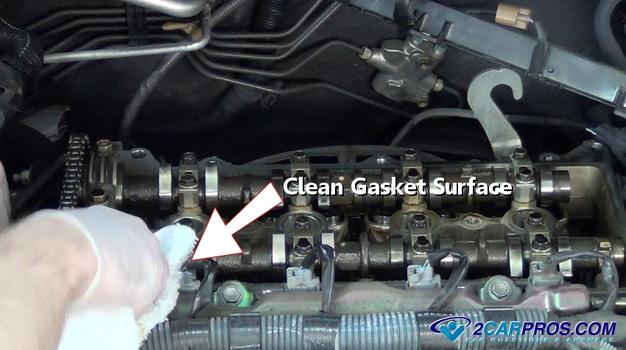
Clean Gasket Surface
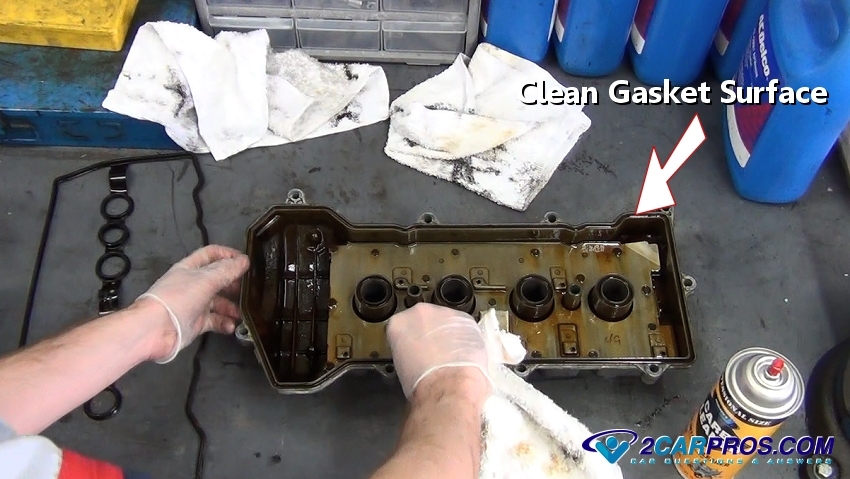
Step 13 - Use carburetor cleaner and a shop towel to clean the gasket surface of the valve cover.

Clean Gasket Surface
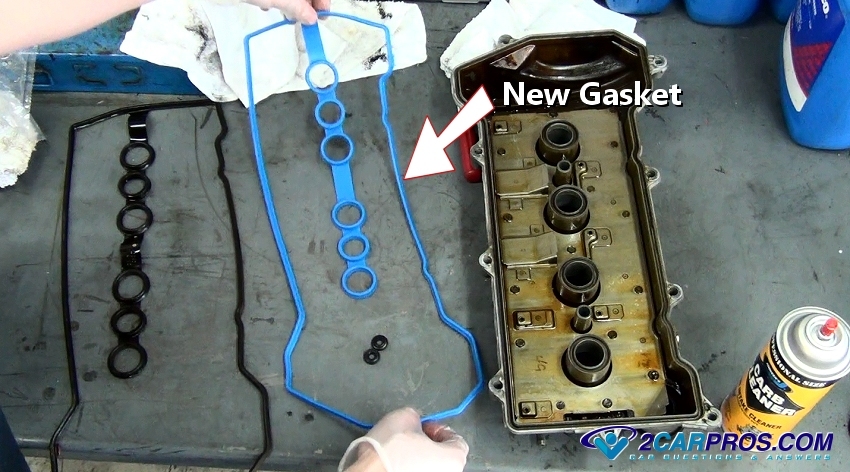
Step 14 - Match the old gasket to the new unit to ensure a proper installation.

New Valve Cover Gasket
Step 15 - Gently install the new gasket avoiding bends or folds to the new gasket to preserve the integrity of the gasket, push into place. (Note: Some applications require spray contact cement to hold the gasket while installing.)
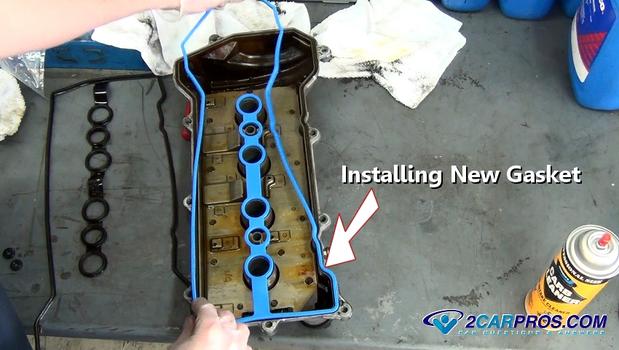
Installing New Valve Cover Gasket
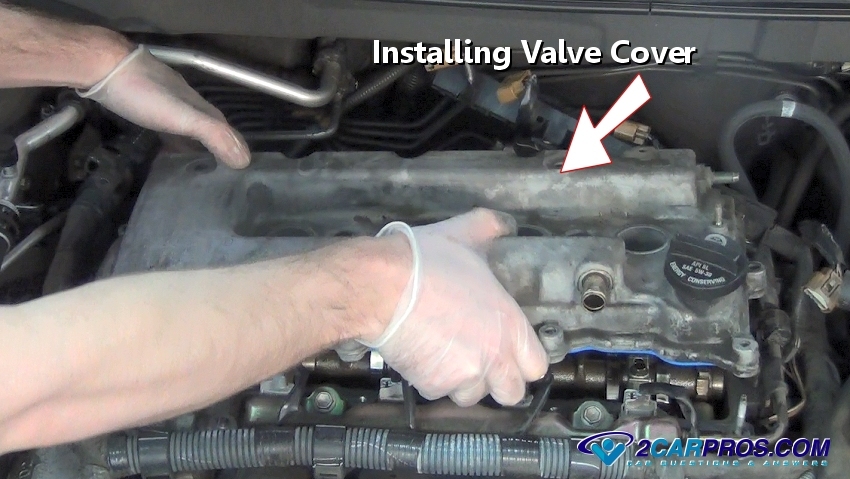
Step 16 - Gently lower the valve cover into place while ensuring nothing is caught under the gasket during installation.
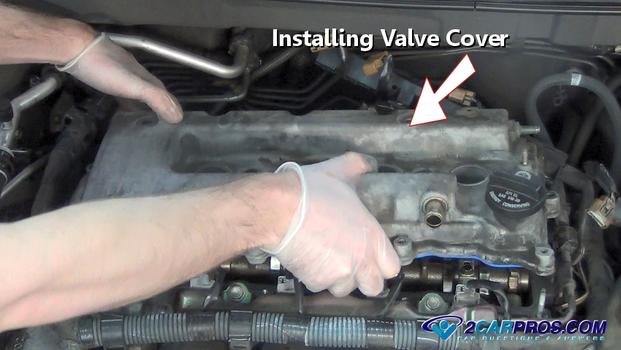
Installing Valve Cover
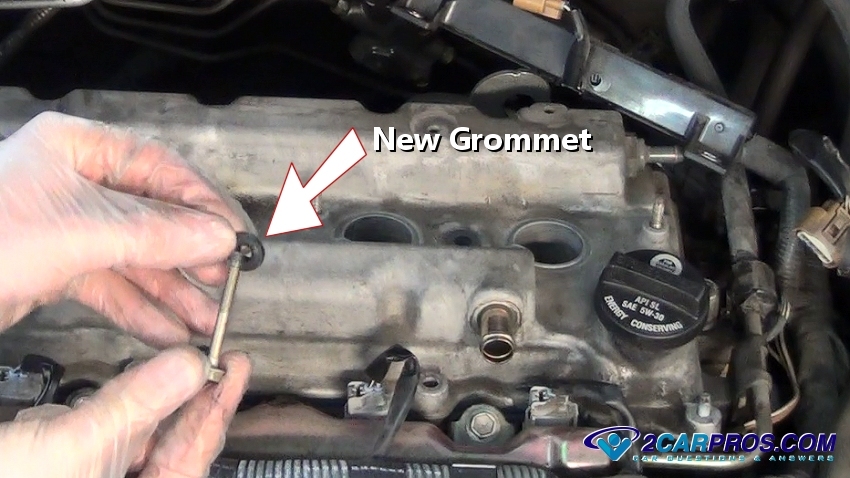
Step 17 - Some valve cover bolts require a new grommet or gasket which should be included in the new gasket kit.

New Grommet
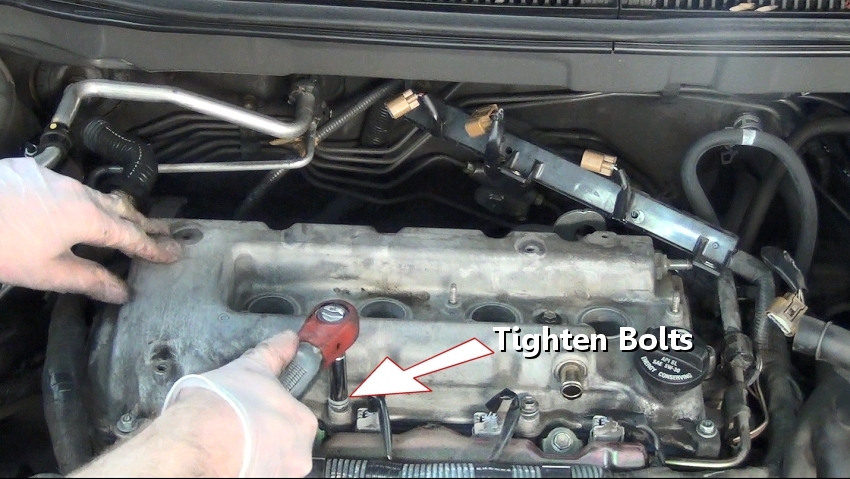
Step 18 - Once all valve cover bolts have been installed by hand, gently tighten the bolts down evenly, in small increments, using a star pattern, bolts should be snug, not super tight.
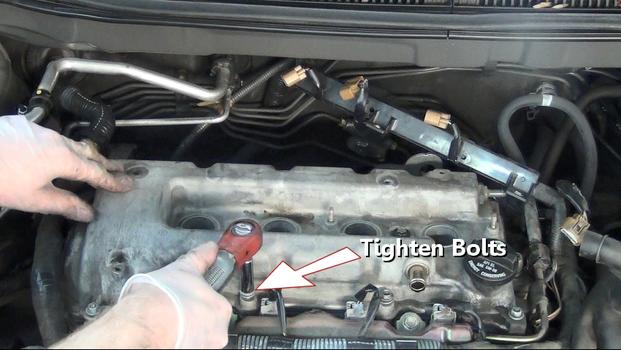
Tighten Valve Cover Bolts
Step 19 - Reattach all hoses and plastic clips which were removed earlier.
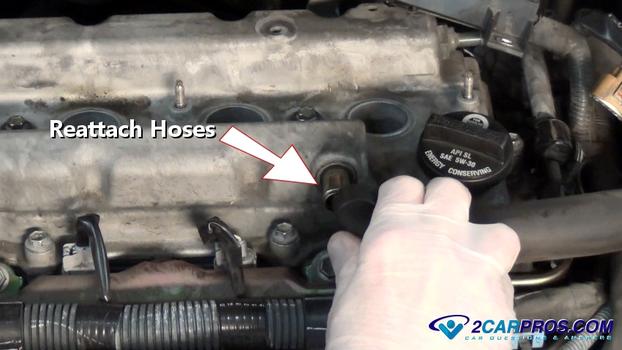
Reattach All Hoses
Step 20 - Reinstall ignition coil wiring harness mounting nuts and tighten.
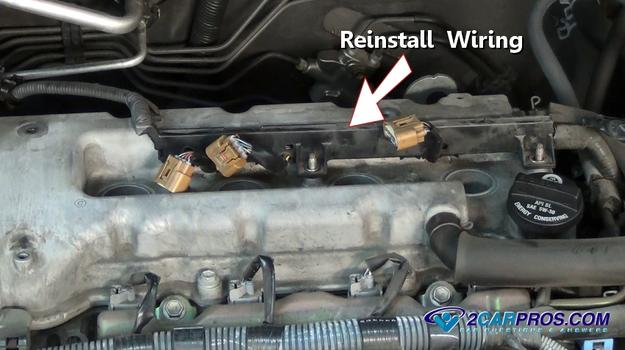
Reinstall Coil Wiring Harness
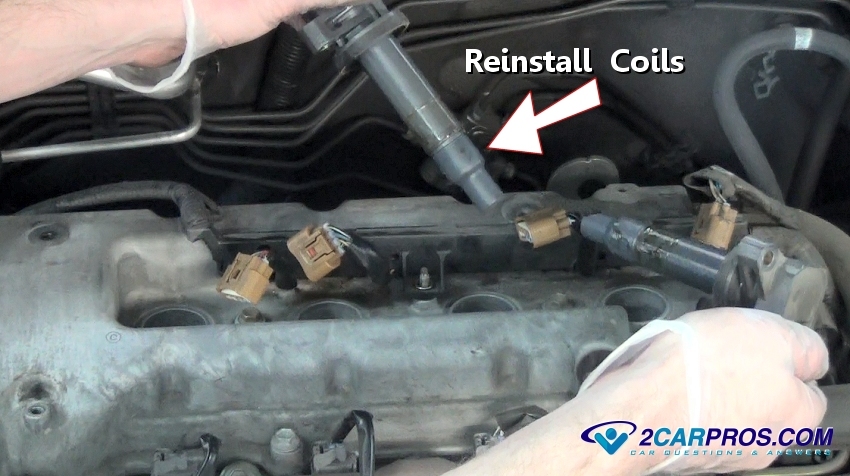
Step 21 - Reinstall ignition coils and mounting bolts, tighten and reattach wiring harness connectors. Position the plastic cover back into place and install the hold down nuts and tighten.
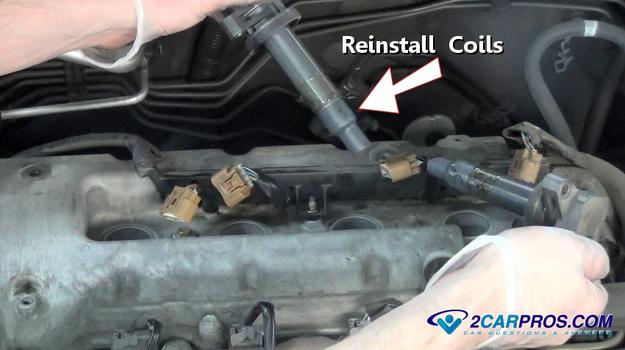
Reinstall Ignition Coils
Remove Plastic Cover

Remove Ignition Coil Electrical Connector
Remove Coil Mounting Bolts
Remove Ignition Coil
Step 5 - Inspect the valve cover to remove any breather hoses or plastic clips that are attached by releasing the clamp using pliers.
Remove Hoses

Remove Wiring Harness

Remove Valve Cover Bolts
Pry Loose Valve Cover

Removing Valve Cover

Valve Cover Removed
Remove Valve Cover Gasket
Clean Gasket Surface
Clean Gasket Surface
New Valve Cover Gasket

Installing New Valve Cover Gasket
Installing Valve Cover
New Grommet
Tighten Valve Cover Bolts

Reattach All Hoses

Reinstall Coil Wiring Harness
Reinstall Ignition Coils
Car
Repair World
Troubleshoot
All types Of Car Problem With proper Solutions
Know
Exactly How Each And Every Part In Your Car Works
Troubleshoot
Car OBD Codes.Know Exactly What Each Code Means?
http://carrepairworld.blogspot.com/2015/04/vehicle-obd-ii-codes.html

Comments
Post a Comment