How To use A Test light To Check Car Circuit
Test Light Instructions
Test light circuit Tester
Helpful Information
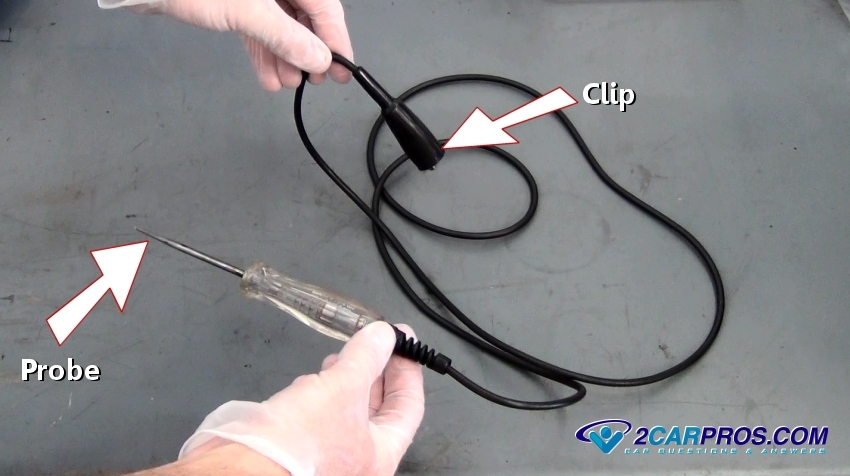
A test light utilizes a bulb held in a probe attached to a sharply pointed rod with a connection lead. This design is optimal for piercing a wire, testing a fuse or checking the surface charge of a battery. If power is present, the bulb will illuminate confirming the circuit has power and is operating properly. Also, reversing the test light lead to the positive battery to be able to check for system ground continuity. A voltmeter is used to check resistance and to give a voltage reading which can be used for more in-depth troubleshooting.

Easy step by step guide on how to use an automotive test light, information pertains to all 12 volt vehicles.
Difficulty Scale: 2 of 10
Step 1 - A test light is needed to perform electrical power and ground testing to facilitate automotive repairs, this tool is easy to use and is reasonable priced.
Test Light
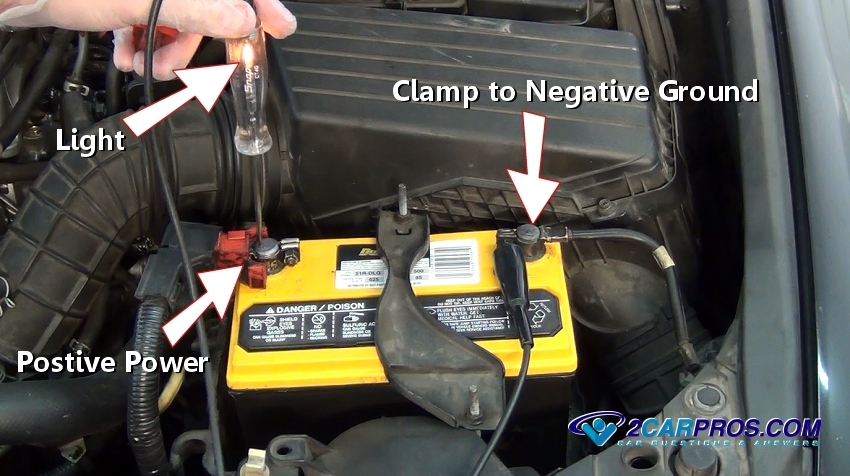
Step 2 - Before staring any testing the test light itself must be tested, connect the clip or clamp to a known ground source, in this case the battery negative terminal is being used but almost any metal surface on the vehicle will work. Gently, touch the test light probe to a known power source, we use the battery positive is this example but any known power source such as a fuse or positive battery cable will work.

Testing the Test Light
Step 3 - Once the test light is properly grounded, it can be used to test not only fuse condition by touching each side of the fuse, it also confirms power at the fuse. If an accessory has failed such as brake lights and the fuse tests okay, testing can then proceed further down the circuit such as the brake light switch and so on, a wiring schematic is useful when performing these tests.

Test Fuse Power
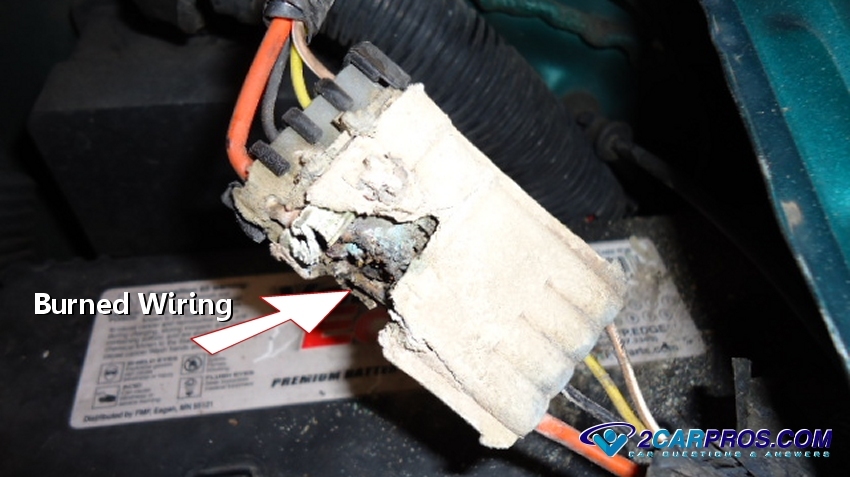
Step 4 - When power tests okay for power at the source such as a relay or fuse, yet power is not present at a particular accessory such as the cooling fan a test light can trace the problem down through a process of elimination.

Burned Wiring
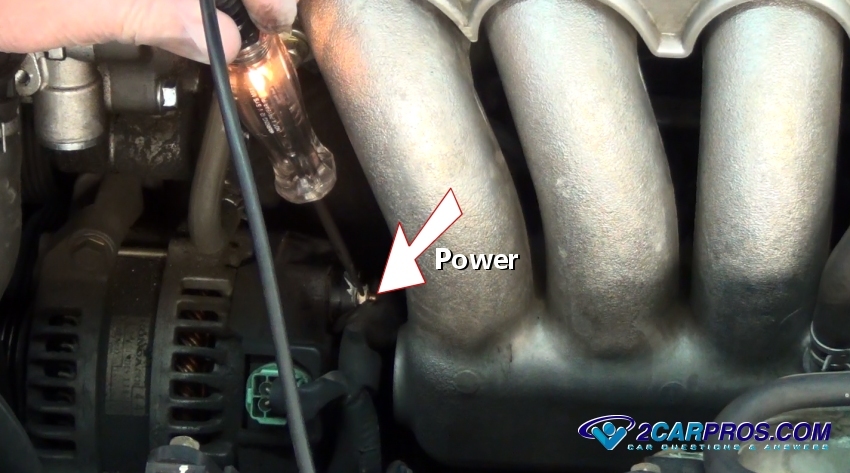
Step 5 - Power must be present at the large terminal of the alternator to charge, a test light performs this task easily.

Alternator Power
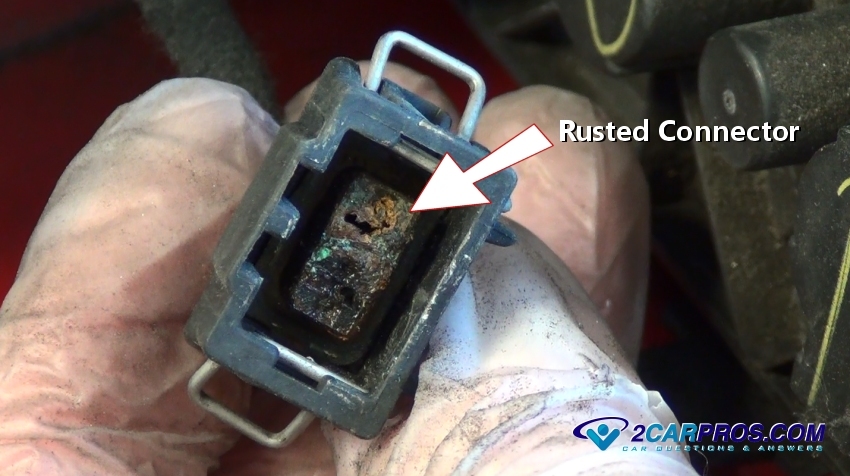
Step 6 - This electrical connector tested good while probing the wires before the connector, it wasn't until the technician removed the connector was the problem discovered.

Rusted Electrical Connector
Step 7 - A test light can be used to test for power at the fuel injector, reversing the clamp to the negative side of the battery will check the trigger side of the injector circuit.

Testing Fuel Injector Pulse
Test Light
Testing the Test Light
Step 3 - Once the test light is properly grounded, it can be used to test not only fuse condition by touching each side of the fuse, it also confirms power at the fuse. If an accessory has failed such as brake lights and the fuse tests okay, testing can then proceed further down the circuit such as the brake light switch and so on, a wiring schematic is useful when performing these tests.

Test Fuse Power
Burned Wiring
Alternator Power
Rusted Electrical Connector

Testing Fuel Injector Pulse


ReplyDeleteA test light is a simple but extrememly useful tool. If you are trying to diagnose and troubleshoot an electrical problem, sometimes a test light can help you rule out possible causes much more quickly and easily than a DMM (Digital Multi Meter). It's quick, easy and very versatile, so the test light style of best auto circuit tester can be a lifesaver. You can use it to check any positive circuit. Headlights not coming on? if the fuse is good, you can use a circuit tester to trace the wiring path and find out what's gone wrong. If the positive path is intact, you can also use the test light to check the grounding points of the circuit.
The test light is easy to use. First, let's look at how to test a positive circuit for voltage. The basic principle is illustrated in the photo above. You have a positive power source (in the case of the photo it's the battery) and you have a ground (any exposed metal that's bolted to the chassis). The test light is the go-between. If you connect one end to the positive power source and the other end to a good ground, it lights up. To test for positive voltage, attach one end to a known ground, and touch the other end to the wire you want to test. If it lights up, you're good.